My DIY Amps

saikatbiswas82

Well-Known Member
Joined
Jun 24, 2012
Messages
1,252
Points
113
Location
Kolkata
Project #1 : Nelson Pass AmpCamp Amp or ACA
----------------------------------------------------------------------------

For quite some time, I have been planning to build an amplifier by myself. After reading a lot of articles online, I finally decided to start my journey with AmpCamp amp or ACA. This amplifier is designed by the legend - Nelson Pass. Here is the link about the introduction of the amp written by Nelson Pass himself:

Amp Camp Amp #1 - diyAudio

A picture is worth a thousand words. So without further ado, I would like to post some photos of my build:

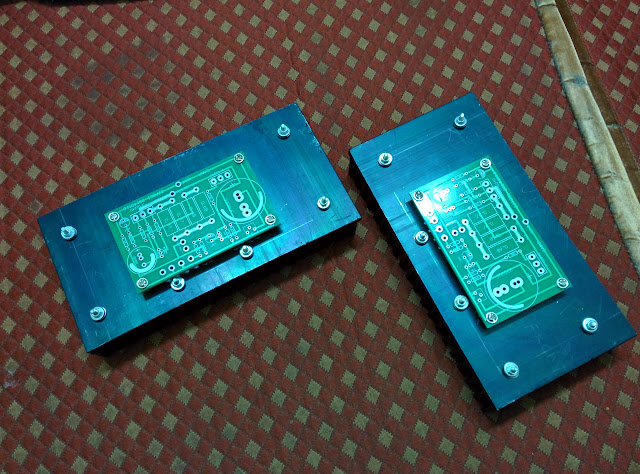
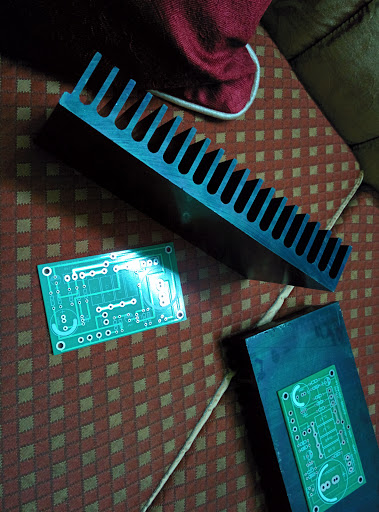
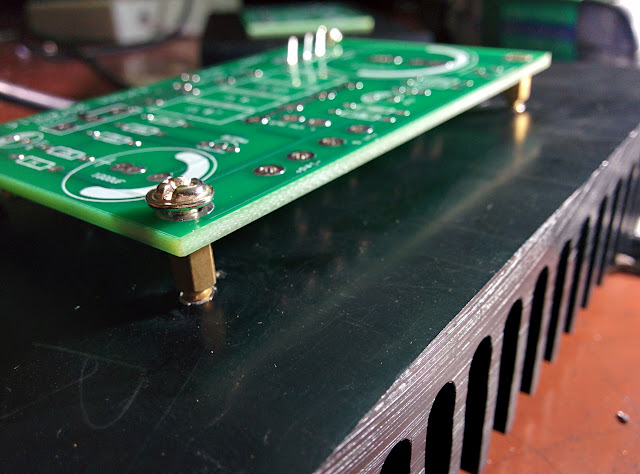
PCBs with the heatsinks:

IMG_20160402_073032.jpg


IMG_20160401_031021.jpg


IMG_20160402_043128.jpg


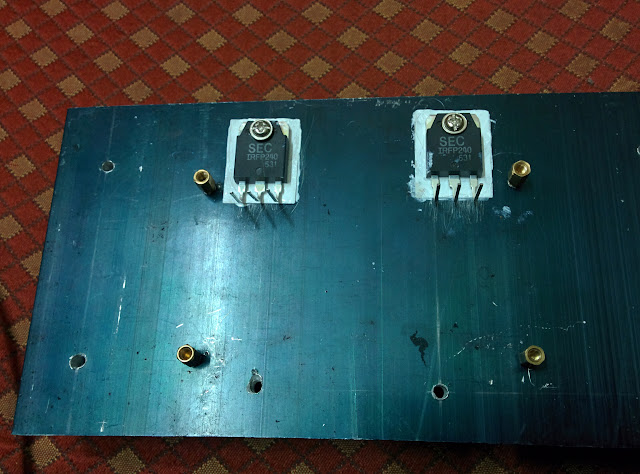
Mosfets have been mounted on heatsinks:
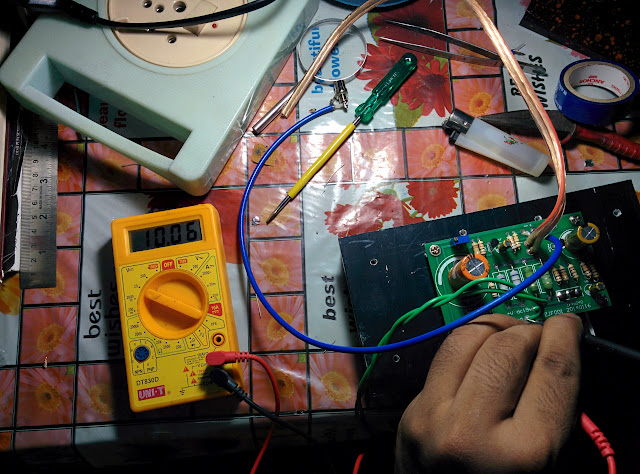
IMG_20160412_023552.jpg


Biasing at 10v:

IMG_20160412_033247.jpg


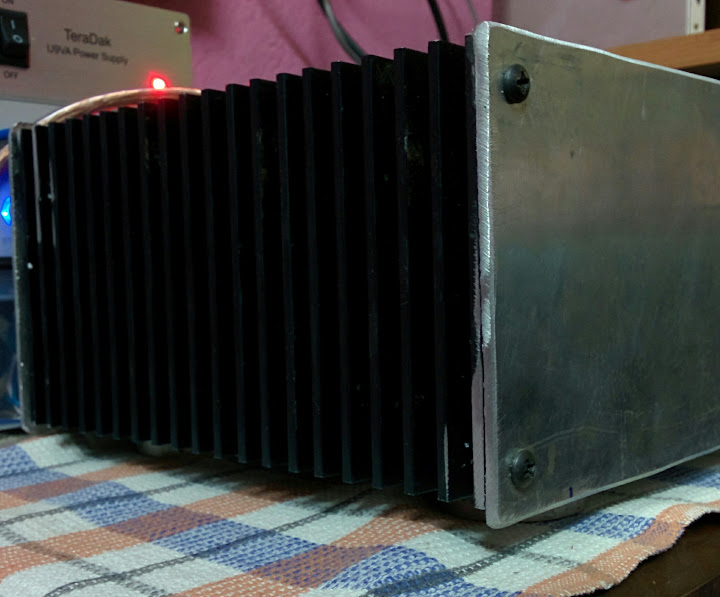
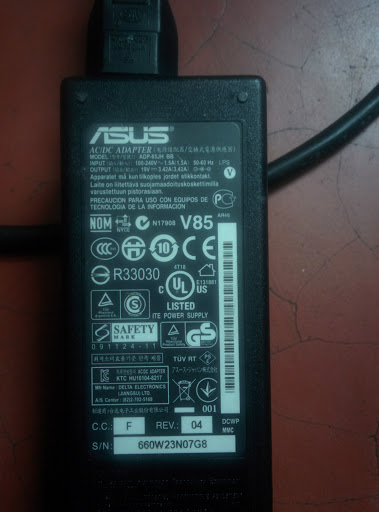
The Power supply (my laptop charger):

IMG_20160417_201202.jpg


Testing one channel:

IMG_20160412_232744.jpg


Testing both the channels in my setup:

IMG_20160414_170552%257E2.jpg


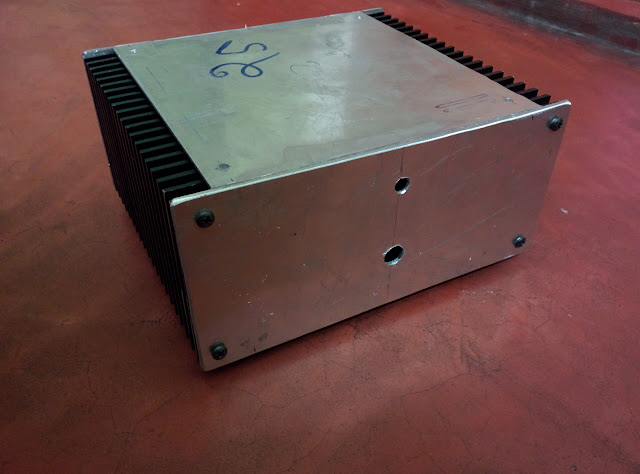
Cabinet is being built:

IMG_20160418_160817.jpg


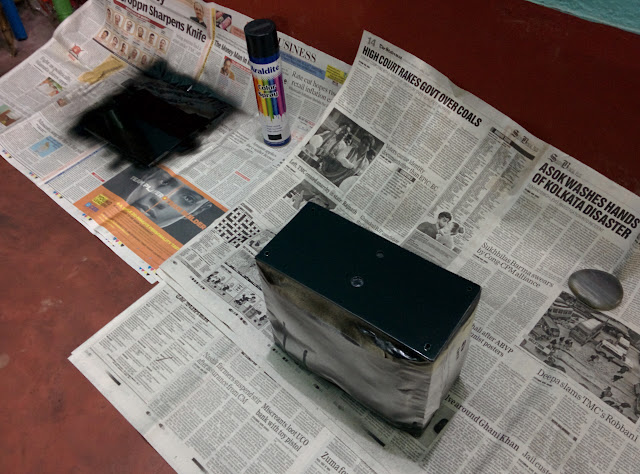
Paint job in progress:
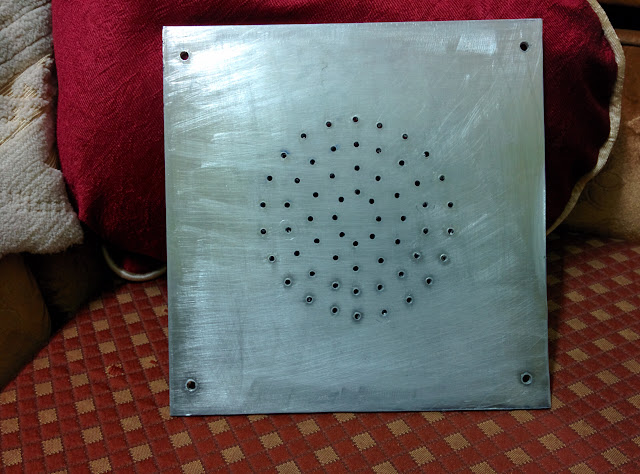
IMG_20160420_223532.jpg


The top plate:

IMG_20160420_215415.jpg


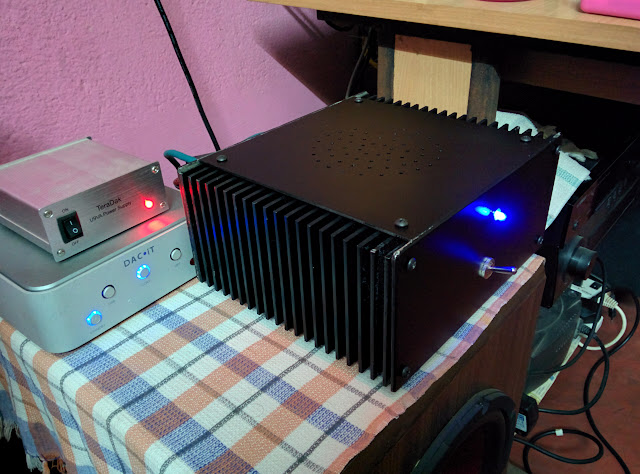
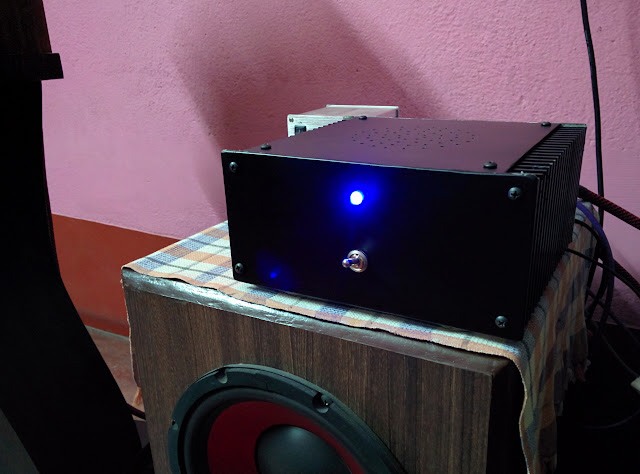
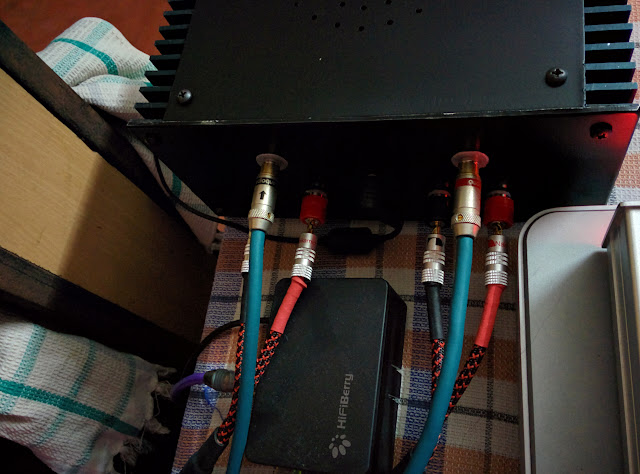
And the final outcome:

IMG_20160422_020945.jpg


IMG_20160422_021015.jpg


IMG_20160422_021046.jpg


Impressions:
I am extremely happy building it. SQ wise its very good indeed. Earlier, I was a bit skeptical about the 5 watt per channel output power. But it did justice to my 90db bookshelf speakers. In short - its worth every penny (paisa).

I am loving every bit of it.
 
Nice bro. Impressive.

Did you source the components locally? Any links to them?
Thanks bro.

Few components are from diyaudiocart. Rest have been procured locally in Kolkata.


superb Saikat!! a complete DIY Amp.
what are the voltage requirements of the amp board? is it gonna be difficult to build a toroidal based PSU?
Thanks bro.

The power requirements are - single rail 0-19v. I am powering both the channels with my laptop charger. However, it won't be much difficult to build a toroidal trafo based linear regulated psu.

I have the trafo already. I will build lpsu for this amp during coming month.
 
Last edited by a moderator:
Congratulations!
If I remember correctly, you were thinking of building an f5 (I am not good with amplifier names as such), what happened to that?
 
Congratulations!
If I remember correctly, you were thinking of building an f5 (I am not good with amplifier names as such), what happened to that?
Thanks Sumanta da.
I had plans for F6. Some of the components have already been procured. The biggest problem would be the overall volume of the cabinet including heatsinks. I am guessing that the volume of F6 would be at least 4 times of my ampcamp. Due to space constraints, I was not able to start that project. I think, I'll be able to start working on that from this year end.

One more update - I will start working on my next class a amp project from next week. That would be my project #2. Will update accordingly. [emoji3]

Sent from my Nexus 5 using Tapatalk
 
Last edited:
Carry on like this and soon I will hire you for a F5 (about the remunerations, will Aliah Biriyani suffice? :D).
I guess that will be more than enough. But I'll be needing 4 plates. 2 plates at a time [emoji3]

Btw, what I've heard so far is - F5 is an exceptional amp and one of the most popular amps among DIYers.

Sent from my Nexus 5 using Tapatalk
 
Last edited:
hi Saikat,

can you please post few more pics of amp cabinet build. i want to see how have you bolted the heat sinks and chassis together.
 
hi Saikat,

can you please post few more pics of amp cabinet build. i want to see how have you bolted the heat sinks and chassis together.

Hi Som,

If you look at this picture, you'll be able to find 4 driiled holes on the top edge of the heatsinks (2 holes on each heatsink)

IMG_20160418_101904.jpg


I've drilled aligned holes on the top plate as well:

IMG_20160420_215415.jpg


After the paint job is over, I simply put screws to attach the top plate with heatsinks.

IMG_20160422_020945.jpg


The same technique has been applied to attach the bottom plate as well.

One more point I almost forgot - the front and back panel height is 6mm more than that of the heatsinks so that it can cover top and bottom plate thickness of 3mm each. Heatsink height is 100mm, back/front panel height is 106mm.

I would like to thank FM omishra for his pointers towards 3mm aluminium sheet for DIY cabinets. Here is the original post: http://www.hifivision.com/diy/62772-my-first-diy-amplifier-jlh-1969-a-3.html#post693135
 
Last edited:
Saikat,
Get good footers for the cab if it is not done already(not able to make it from the pics). it will look better:)
 
Saikat,
Get good footers for the cab if it is not done already(not able to make it from the pics). it will look better:)

Hi Ajesh,

The footers are already in place indeed. I am sorry that I did not take good photos of them. They are hardly visible.

IMG_20160416_131043%257E2.jpg


The footers are about 7-8mm high, made of aluminium and looks like carrom coins. This photo was taken before the paint job.
 
With so little sources you have done a Nice DIY Enclosure @ Saikat... Congrats for your Built. For your next Project i can advise you to keep your Front panel 5 mm bigger from top and bottom sides & second suggestion is use Legs of minimum 12 mm height to max 15 mm. It will look good.

Sadik
 
With so little sources you have done a Nice DIY Enclosure @ Saikat... Congrats for your Built. For your next Project i can advise you to keep your Front panel 5 mm bigger from top and bottom sides & second suggestion is use Legs of minimum 12 mm height to max 15 mm. It will look good.

Sadik
Thanks a lot sadik. I will keep that in mind for my upcoming build.

Sent from my Nexus 5 using Tapatalk
 
Adding longer legs not only helps aesthetics but also helps good ventilation for the heat sinks as higher placed sinks allows undercurrent air flow else hot air is trapped below heatsinks. Also it is best kept open rather than in cabinet due to obvious reasons :)

Great job on build BTW. Congrats!
 
Join WhatsApp group to get HiFiMART.com Offers & Deals delivered to your smartphone!
Back
Top