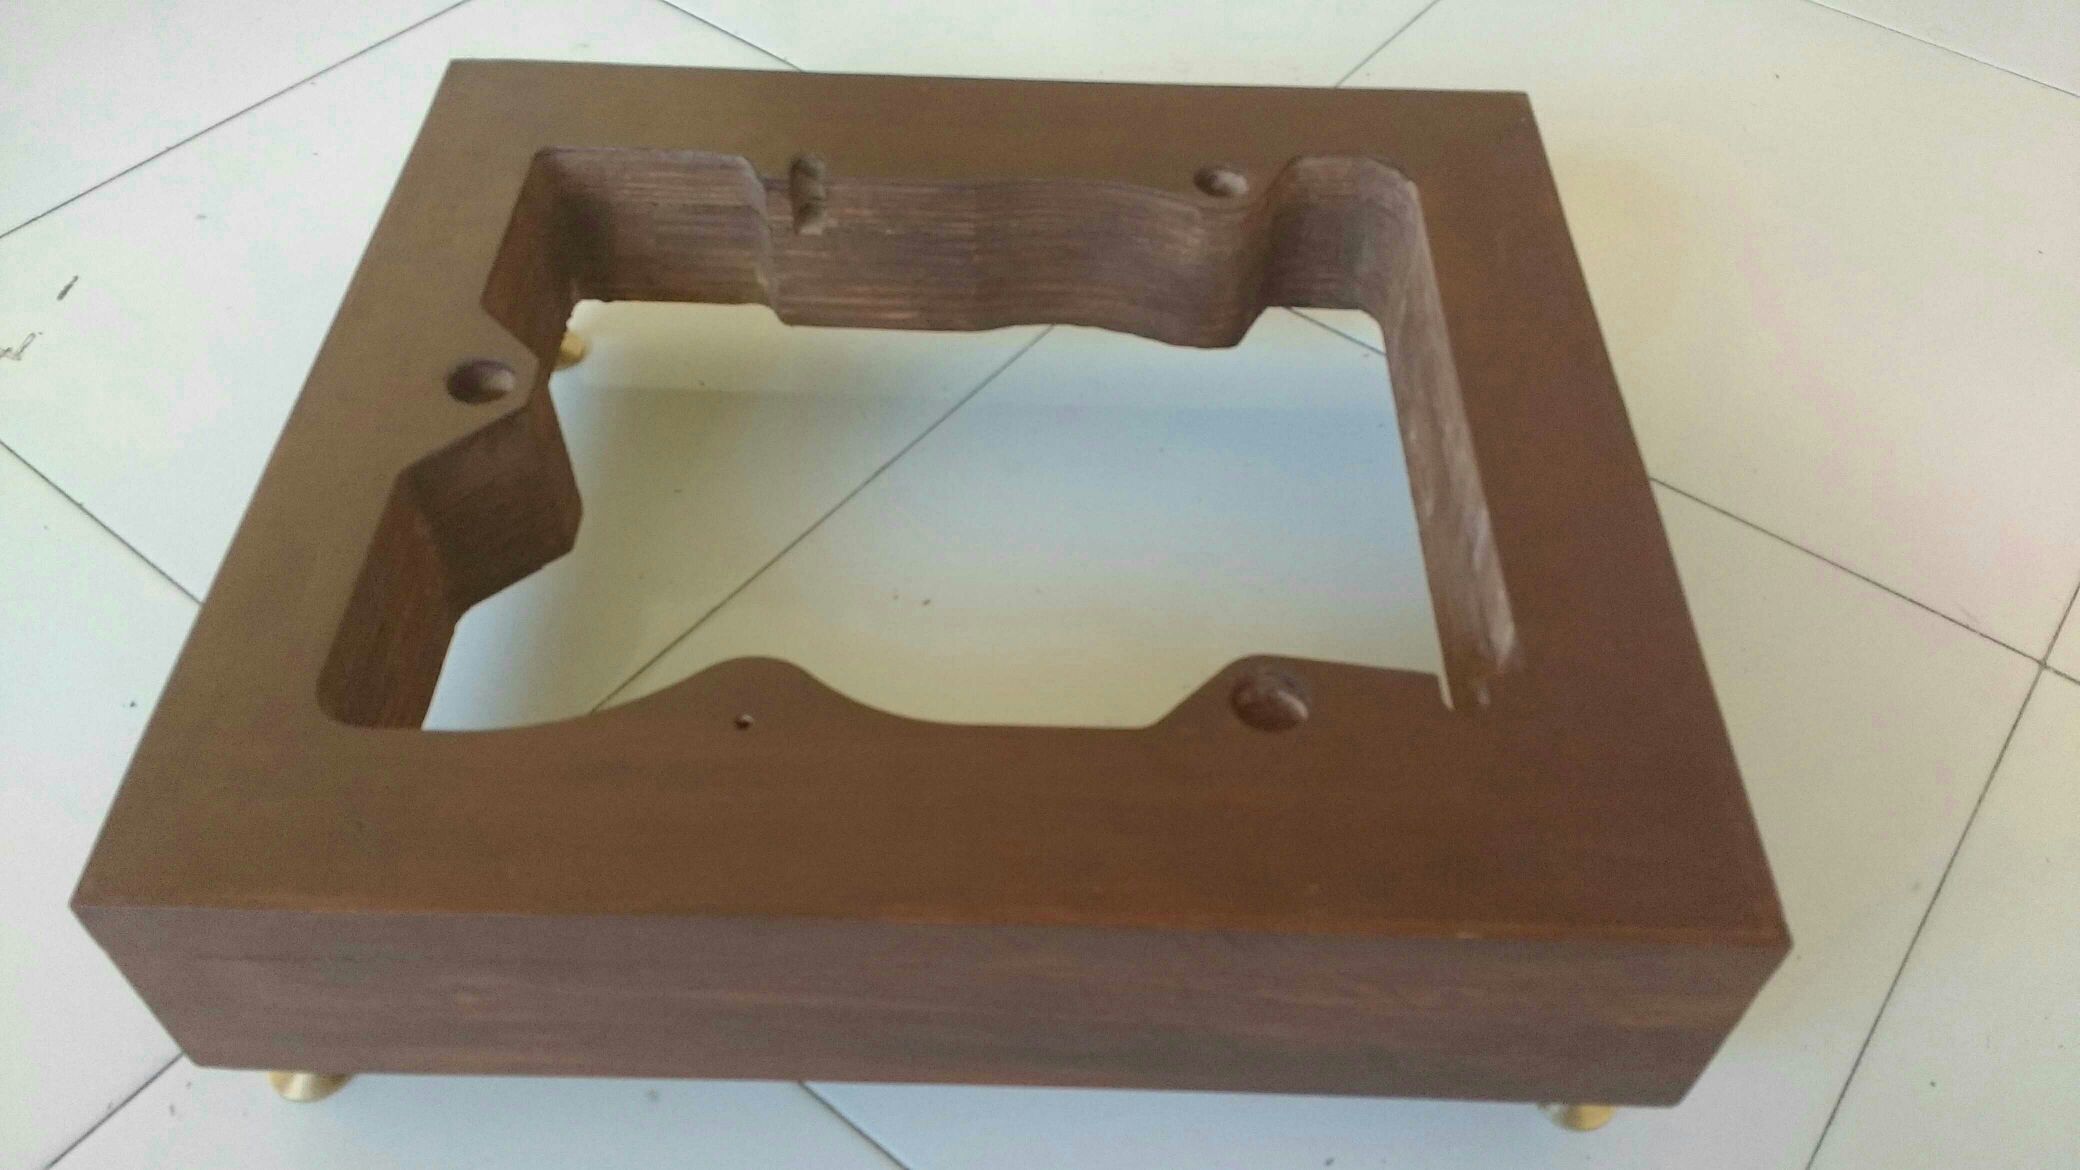
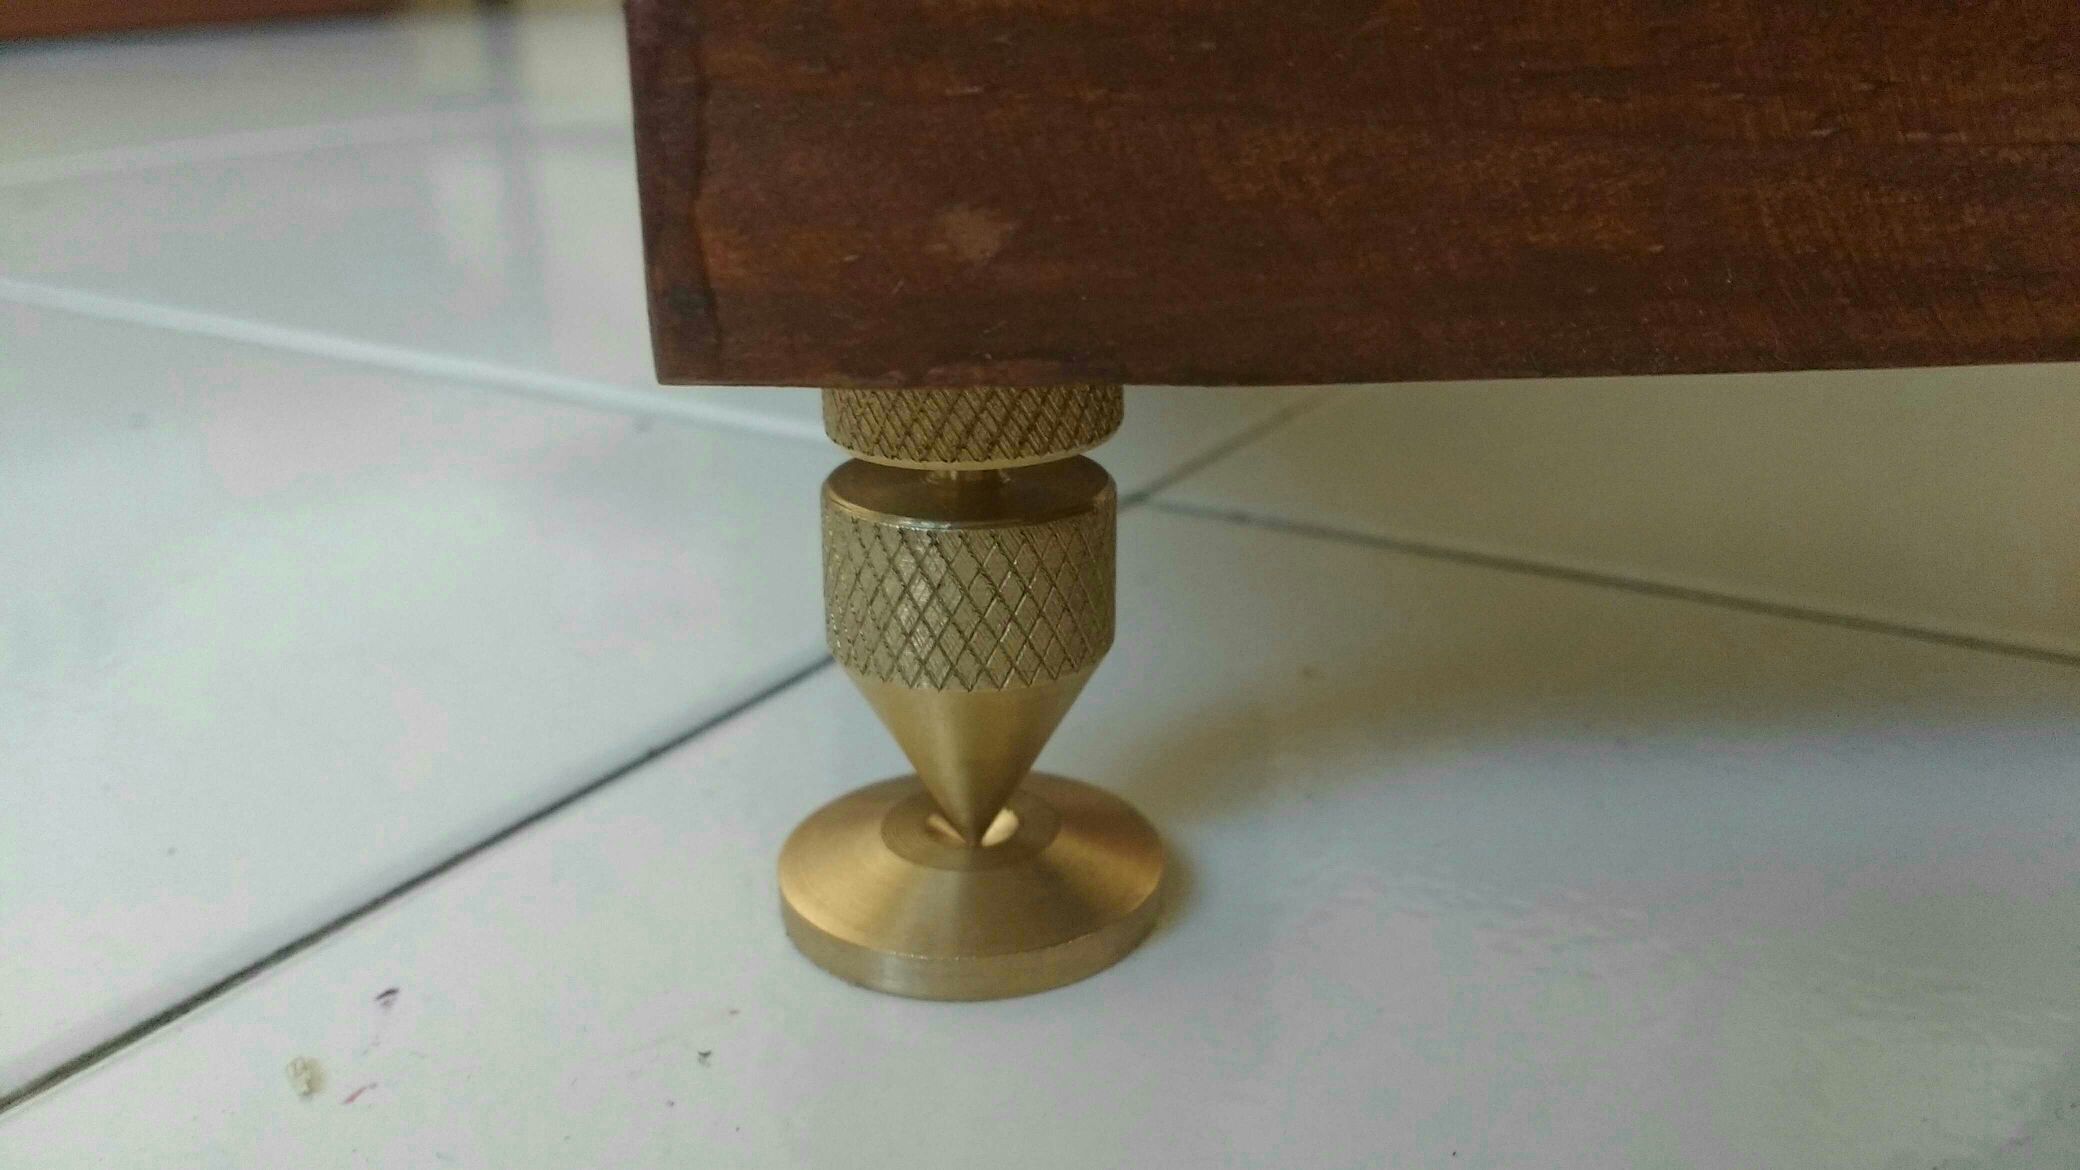
As I mentioned external body is of wood, and then filled it with 5 layers of plywood inside. Top sheet is veneer. Made a 3D model of it so that I can get it cut on CNC machine. Designed spike feet on own, it's quite simple as machine design is my bread and butter.
Once all done did planning of all four sides. Used 120 and 150 sanding paper. Applied polishing powder let it dry, once dry use 180 or 220 paper. Swipe it with dry cloth. Start applying polish, tip try to have one stroke along length. Use stainer of your choice. Be careful stainer it can spoil polish if not used properly. I used 3 coats. Don't forget to sand between each coat. Use as 220 or higher grade paper for intermediate sanding.
Feet I have made design anyone wants I can share it. I have used M6 Dnuts in wood.
Regards,
Nishant
Sent from my MotoG3 using Tapatalk