Speaker Stand - My take on DIY

demigod

Member
Joined
Dec 16, 2009
Messages
51
Points
8
Location
Pune
Hello Everyone,

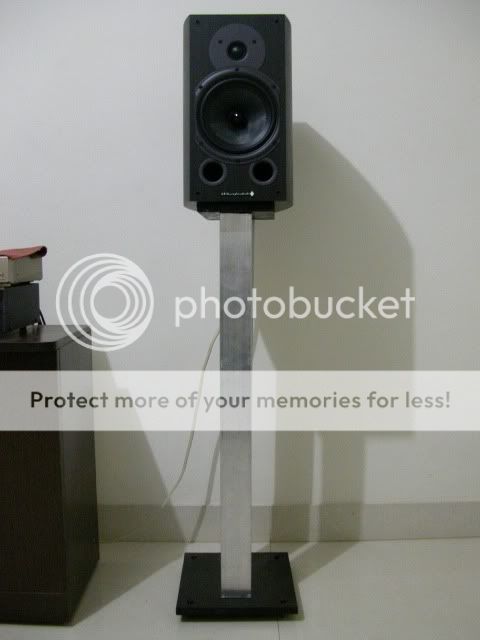
During the long weekend, i tried myself building my own speaker stands for Wharf9.2 BS.
Searched for several designs on the net, but most of the common ones are - the one "connecting two plates with a PVC pipe filled with sand".
Like someone mentioned earlier, some how i did not find the cylinder shaped column more suiting the BS moreover i wanted something with Steel/Metallic/Alloy kind of look like the ones QUAD makes. (Also the one Magma made)

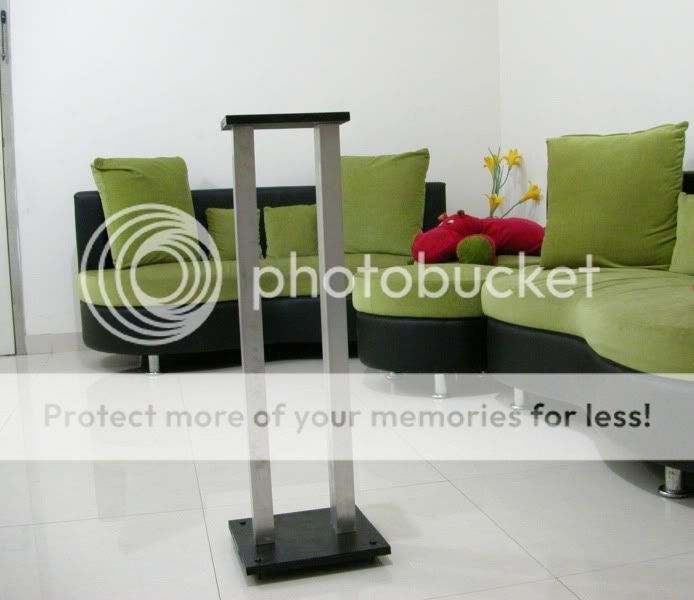
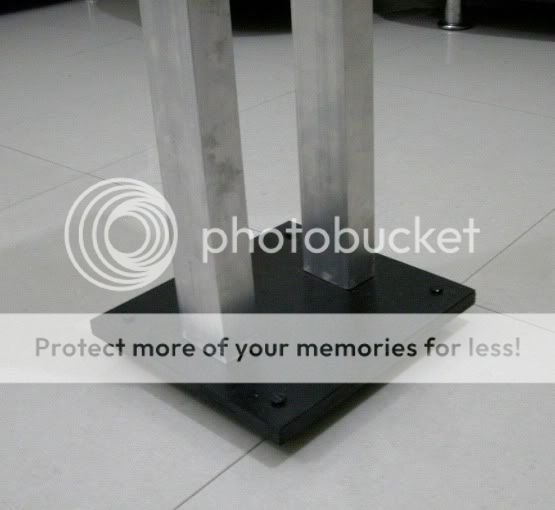
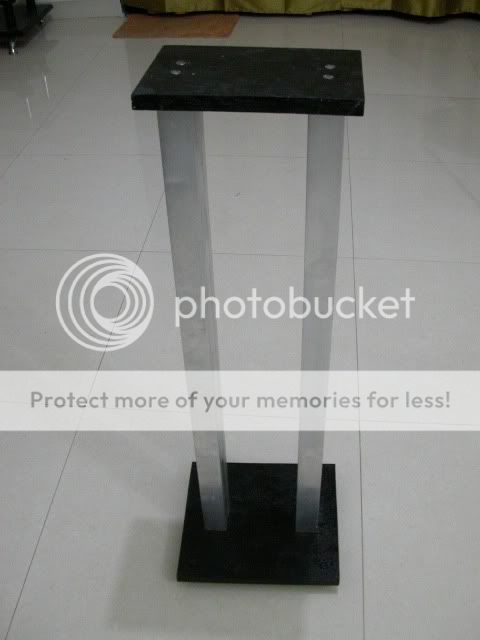
So thought of using Aluminium hallow blocks for the outer frame. (Well that's poor man's metallic look)
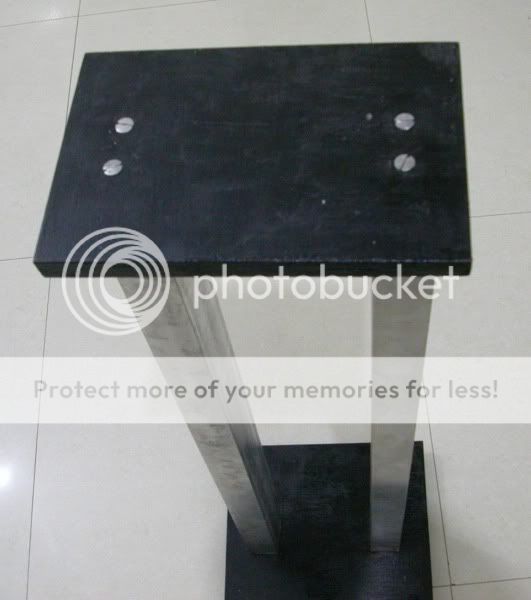
But i needed something to filled inside those hallow frames, so i got few wooden bars with the same size as these frames and inserted them to hold it tight. Then rest of them fallen in place, as easy as screwing them with upper and bottom plates. Got those wooden plates painted with the black color to get black and aluminium - a contrast look.

Only the toughest job was to cut the aluminum filled with wooden bars to the same size. Since the aluminium hallow blocks and wooden bars were cut in the shops manually the shop keeprs did not do it properly. So i had to get a hack saw and do that also myself. Ofcourse my better half helped me, i think she realized that i'm finally settling down for something very cheaper.

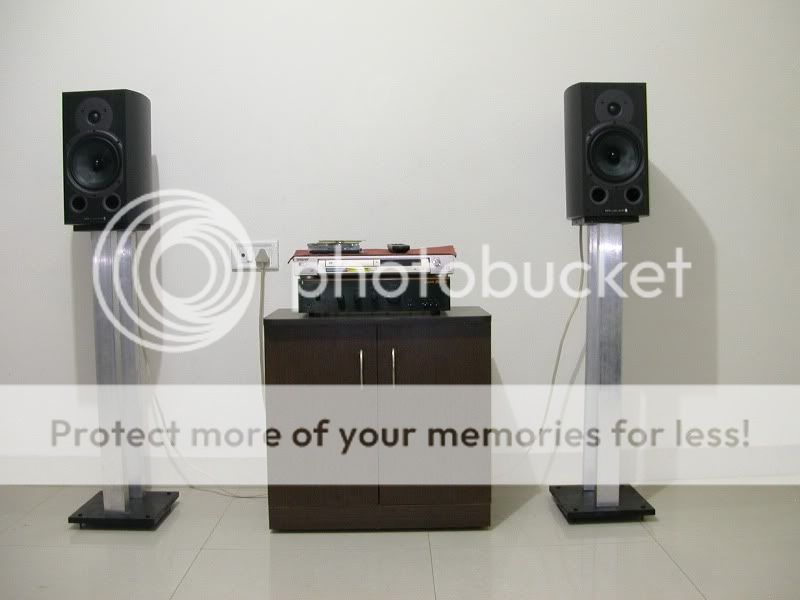
So everything was done in 3 days and by end of Monday, they are ready and already holding those sons of beast!

Material and cost :

Aluminium Hallow Frames/blocks - 4 each of 32 inch height - 320Rs
Wooden bars to the size of hallow frames - 4 each - 400 Rs
MDF - 4 pieces (2 upper and 2 bootom plates) - 200Rs
Hack Saw with a Holder / Hand Frame - 150Rs
Primer + Black Paint + Sand Papers - 100Rs
Screws - 30Rs

Total = 1200Rs.

Tools already had - a hand driller, Hammer, Screw driver.

And how does it come out - that's for you to see and comment :yahoo:

DSCN8849.jpg


DSCN8850.jpg


DSCN8854.jpg


DSCN8852.jpg


DSCN8851.jpg


DSCN8856.jpg


DSCN8858.jpg
 
Last edited:
Looks Great.

But have few concerns.
Is the Stands heavier than the Speakers? I fear the speakers may topple even for slight contacts .
suggestions will be
-- increase the Base area (bottom one)
-- and/or make it heavier ( may by iron base - bottom one atleast)

I guess others experienced DIYs members can have better suggestions ( and that... i may be wrong )
 
Hi

Nice to look at, but since you used Aluminium Hallow Frames does the Low Freqency's sound good.

Regards

Sub

Video: Panny 32 LCD, PS3, Sony DVP-NS78H, Samsung DVD-P365H, WDTV, Big TV.
Audio: Yamaha RX-V661, Sansui G-5000, Hand Made Towers for stereo, Pioneer Linear Power for HT with Onkyo SL-107 powered sub.
 
Demigod, Nice work there! And some cool furniture you have got there.

When you screwed the parts together, you mean the wooden base plate and the wood in the hollow aluminium pillar?
 
Looks Great.

But have few concerns.
Is the Stands heavier than the Speakers? I fear the speakers may topple even for slight contacts .
suggestions will be
-- increase the Base area (bottom one)
-- and/or make it heavier ( may by iron base - bottom one atleast)

I guess others experienced DIYs members can have better suggestions ( and that... i may be wrong )

Hi SBG, yes the stand is heavier than the speaker - since the hallow frames or holding 4 wooden sticks inside. However i do agree for your suggestion to the bottom plate. I'll add some more weight there :licklips:
 
Hi

Nice to look at, but since you used Aluminium Hallow Frames does the Low Freqency's sound good.

Regards

Sub

Video: Panny 32 LCD, PS3, Sony DVP-NS78H, Samsung DVD-P365H, WDTV, Big TV.
Audio: Yamaha RX-V661, Sansui G-5000, Hand Made Towers for stereo, Pioneer Linear Power for HT with Onkyo SL-107 powered sub.

Hello Sub Sir,

Yes those columns are not empty so i don't see any difference in LF, at least with my observation.
 
Demigod, Nice work there! And some cool furniture you have got there.

When you screwed the parts together, you mean the wooden base plate and the wood in the hollow aluminium pillar?

Thanks iaudio,

Thanks for your compliments. And yes, that's correct. Wooden pieces are screwed up together.
 
Hi,

Indeed Nice and Simple :) !! Nice work buddy


Like others have said,I'll also say that the bottom plate needs to be bit bigger then it is currently ! Also try Spiking the base for additional isolation and better transfer of resonance energy !

Another suggestion I would say is,Try filling the alu pillars with fine sand in addition to the wooden bars (if you have some space or if its possible) ! Further can you change the orientation of the stand ?? I say the 2 pillars visible from the front would be a ideal position as opposed to current !

Checkout on the above and see how it works for you.

Regards.
 
Good work and nice looking to your decor. As suggested, make the base more sturdier to hold the columns. all the best.

swami
 
Hi,

Indeed Nice and Simple :) !! Nice work buddy


Like others have said,I'll also say that the bottom plate needs to be bit bigger then it is currently ! Also try Spiking the base for additional isolation and better transfer of resonance energy !

Another suggestion I would say is,Try filling the alu pillars with fine sand in addition to the wooden bars (if you have some space or if its possible) ! Further can you change the orientation of the stand ?? I say the 2 pillars visible from the front would be a ideal position as opposed to current !

Checkout on the above and see how it works for you.

Regards.

Thanks everyone for your suggestions.

Actually there is no space left out in aluminium pillar. I got them filled in with exact size of wooden bars. Also i couldn't get those ready made spikes, so for now they are standing on long screws.

Changing the orientation provides better look, but the speaker sitting is aligned only with this orientation (as i did not want the top plate projected / visible, they are of size 6x9 inches)

Few more things planning to do :

- add additional weight to bottom. Attaching a steel plate etc.
- Get rubber sheets on top - to have better cushion for speaker sitting
- get the wharf logo - stickers done in black and put them on those alu pillars.
 
@demigod: Great work, Sir :clapping:. Looks Nice. Can you post the Dimensions (If possible, the gauge of the alu pillars also) of the materials used, please?:)
 
lovely attempt
im glad to see you did it

orientation is correct

if possible
make base plate of 15mm MS minimum size 9*11 inch
also since youve done the work screwing the bars to the wood if you want you can directly srew on the bottom MDF plate to the 9*11 iron plate ( though i would prefer the rods directly on MS)

Another thing i noticed
your stand seems a bit high if you are gonna sit on the couch thats on the first photo
32inch Al rods + 2 inches MDF and screw clearence puts the stands at 34 inches
thats a wee bit high na?

Later when and if you plan to disaasemble to add the MS plate
better Finish options would be
1. - Powder coat the MS plate rather than paint
2. Get the Al tubes Anodised from a vender who also offers blasting or Buffing services before he Anodises
If possible Micron Anodize For better results
3. Screw the Bars closer together so that the distance between them is not more than twice the width of each bar ( this is purely for aesthetics)

P.S
by the end of this month i should have built stands similar to these
Currently Dinyaar and me cant decide on the NO. of columns or the best bolting arrangement

Happy that you liked it. thanks for your valuable suggestions and i'll try to get them corrected when i'll get time.

Reg Height - i agree with you, that it's bit taller and i'm afraid it may get taller further when i'll attach MS plate in the bottom. I'll try to attach it directly with the pillars.

PS: This is my very first attempt and this can stand nowhere to the one you made. They are the solid ones.
 
Me sailing in same boat. Looking urgently to build a stand for my Wharf 9.2. They are currently sitting on ugly make-shift stands ( two identical cardboard boxes filled with books!!!). I have PMed you on this. Guide me through the process. Thanks.
 
Hi Demigod
Nice work with the stands.
Would like to know if the speakers are screwed to the slab on the top?
Also why have you not used a slab which is say 10 percent bigger then the speaker?
I am not sure how is it with speaker stands so wanted to know. Ideally a base which is bigger will help in balancing the speaker if i am not wrong
 
Another suggestion - weigh down the speakers. A slab of granite on top of the speakers will anchor it well. Get the slabs shaped like those curvaceous cabs and no one will be the wiser.
 
Nice !!!
Loved as these are low cost option and look good ,
but the why compromise cheap with aluminum bar look...

grab a spray can of your choice, give a nice metallic /other color
or get the bars spray painted at fab shop
 
Get the Wharfedale EVO 4.2 3-Way Standmount Speakers at a Special Offer Price.
Back
Top