duncan_mclaud
New Member
Hi,bijinmb! Can u send a crossover scheme pls?

][/url]
hi bijinmb
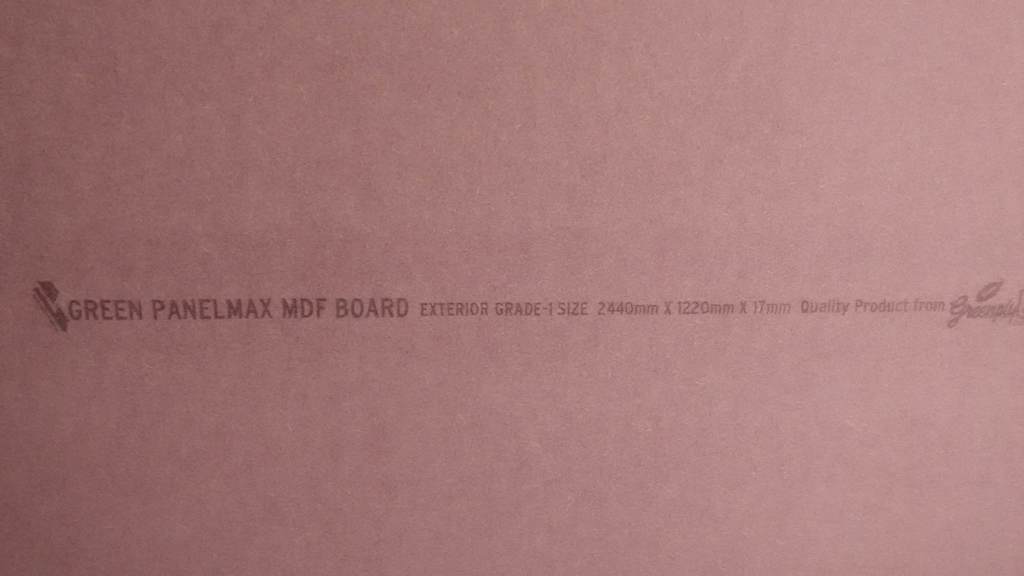
Like to know at what price did you buy these 8x4 green ply exterior grade panelmax mdf sheets??
Do you recommend only greenply brand,or any other brand i can buy for my diy box build,i think hdf can also be used but for a heavy price???
thanks
r/s
I purchased unbranded MDF @ Rs. 45/- per sqft. It was more than enough for my sealed sub IMHO.
In unbranded the density of wood fibre used will be less compared to branded ones,even the thickness in mm will be not the same as required.if we order for 18mm the actual thickness will be 1 to 2 mm less,that will deteriorate quality of the box.
I enquired Greenply exterior mdf board at my place a 4x8 cost rs. 88/- per square feet.another make "Tesa Action" cost 76/- per sq.ft.
Why would one need to sand vinyl?vinyl also not bad but sanding has to be done properly for smooth finish
Are you sure that the density is different? How did you measure the difference in density between branded and a non-branded mdf boards? Did you measure the weight?
Are you sure that greenply sells 19mm mdf only and they are not at all 17mm?
I'm just curious to know.
Why would one need to sand vinyl?
") Sharp edges versus rounded edges make an impact on the sound only for directly radiating sound which is in front of you and radiating towards you, and this too impacts only high frequencies. If these edges are inside an enclosure, their impact won't be audible outside the box. (Bevelling the rear opening of the midbass cutout is a different matter -- that bevelling (not rounding-out) is needed to avoid standing waves which otherwise may form in the short cylindrical tunnel behind the speaker cone.)
Sharp edges versus rounded edges make an impact on the sound only for directly radiating sound which is in front of you and radiating towards you, and this too impacts only high frequencies. If these edges are inside an enclosure, their impact won't be audible outside the box. (Bevelling the rear opening of the midbass cutout is a different matter -- that bevelling (not rounding-out) is needed to avoid standing waves which otherwise may form in the short cylindrical tunnel behind the speaker cone.)Ok...got it. Thanks a lot.Saikat
Lower grade i.e. cheaper MDF is fairly easy to identify-it weighs less, for similar spec material.
Saikat
Lower grade i.e. cheaper MDF is fairly easy to identify-it weighs less, for similar spec material.
using 25mm mdf will be too heavy,why cant we use 18mm with sufficient bracing,its like 25mm with no bracing = 18mm with sufficient bracing.Just my preference, but I go with 25mm MDF. I don't see what is to be gained by using thinner, considering how much of a struggle it is to build inert enclosures.
I suggest not using MDF for braces. Use 20mm (or 18mm, depending on the brand) ordinary commercial ply. And make sure you put a 2" wood screw through the outer wall into the brace plywood edgewise every 4-6 inches, in addition to Araldite. This forces the brace to lock down on the outer wall tightly. My carpenter missed the screws for my Darbari lower enclosure, and I immediately heard the effect and had to force him to put them in.
Make the grill frame from thinner material if possible. I tried making a grill frame once, using stainless steel rods maybe 3-4mm diameter. It worked out really well, because it's strong and very thin. Any metalwork shop which makes stainless steel drawers and cages for kitchens will be able to make them for you.
I use double-thickness for the front baffle, since that's the most important to get inert, by far. In other words, I use 2 sheets of 25mm MDF stuck together to give me a 50mm front baffle.
For your next build, don't bother with rounding out the edges of the cutouts in your braces. Sharp edges there shouldn't impact the sound audibly. You have taken enormous pains to do a finely crafted job -- maybe this will save you a bit of labour.
You are right. 25mm MDF bookshelves almost need no bracing at all. With 18mm, you can definitely get similar inert walls with good bracing. It's just that it's cheaper (in all aspects, time, effort, money) to do 25mm and eliminate or reduce the bracing. I've never bothered about reducing weight -- I find that heavier speakers sit on their stands better, and this alone improves sound. But if you want to optimise weight, go for 18mm and bracing by all means.using 25mm mdf will be too heavy,why cant we use 18mm with sufficient bracing,its like 25mm with no bracing = 18mm with sufficient bracing.
What you need from walls is different from what you need from braces. The walls need to be inert, dull (in the sense of vibrations) and "unwilling" to vibrate. What you need from bracings is rigidity -- they shouldn't flex. Rarely will you get both these properties in a single material. 12mm or thicker glass sheet will give you both (for audio frequencies), but glass is damn difficult to work with.why cant we use mdf as bracing since the ultimate goal is to see that all the four corner of box are linked together in turn to make the box tight,whats the advantage in using ply as bracing,and disadvantage of using mdf
No, Fevicol doesn't have 1/10th the strength of Araldite, and is useless for areas which will face tremendous vibrations. You have to use Araldite there. Fevicol is only useful for sticking large surfaces, e.g. sticking laminate or veneer on plywood. It is of no use where the contact area is small, e.g. where the edges of your bracing come into contact with the walls of your enclosure.Your suggestion of using screws for every 4in is nice,but instead of Araldite i will be using fevicol.
Sorry, I don't have any. I dumped the steel frames too, when I dumped the speakers -- that was an aborted project.Any pics or video of doing the stainless steel rods as a frame will be great.
Front baffles are the most susceptible to vibrations, because your drivers are directly coupled to them. Therefore making them deader is more difficult than making dead side walls. Therefore, I try to play safe and do 25mm x 2. My logic is: if I'm taking all this trouble to design, measure and build my own speakers, I should not scrimp on a few mm of material to risk a drop in quality, specially when it's not snake oil -- it's not a case of cryogenically treated cables. :lol:As i earlier said i will be using 18mm 2 sheets for front baffle as many do,using 25mm as double has any benefits to quality of sound.
Rouded-off bevelling and 45-degree bevelling are both done the same way -- choose the right router bit and use a router.great advice,but how do you do the bevelling for the rear being spherical for front baffle doing the bevelling at 45-degree is not a problem since i own a circular saw as well a router
In general, this is true. Plywood will split easily if you insert a screw edgewise. But if you pour Araldite first into the hole, then put in the screw, I am willing to bet that it'll stay that way.Plywood doesnt work too well for my for braces simply because ply is multiple layers pressed on so it does not take to well with screws nails or even glue applied along the thickness
If your speaker's final sound is being affected by the tonality of the material for the walls, then the walls are not dead enough. You either need to change the material, or add bracing, or increase damping linings, or some such thing.Also plywood has a very differnt tonality when used for the full box
(that i hope you would concurr)
This is not a grey area in my book, or in Neil Patel's book (Avalon speakers), or in Rockport (the famous Rockport Antares) or the Watt Puppy, etc. Most speaker designers will agree that their aim is to make inert enclosures, and various designers use various techniques to achieve this. All speakers above a certain price point actually achieve this to such an extent that the enclosure's influence on the sound is, for all practical purposes, inaudible.About thickness of wood used
this is a highly grey area with BBC designs instructing smaller wall thickness etc since the speaker is actually part of the sound you hear
you can never ask it to be absolutely inert
MOST commercial manufacturers use thin walls ONLY to save costs. Some, very few manufacturers use thin walls and still build very expensive speakers. They exist, but they are a very small minority. I am asking you to do a reality check -- check the prices of speakers which have thin(ish), resonant, "live" enclosures. Check how many of them are really expensive. I remember only one in my limited experience: the very expensive Dunlavy speakers.Commerical manufacturers dont use thin walls JUST to save costs and make speakers light
One of the most important lessons I've learned while interacting with the DIY audio community is this: your "better" may not be the same as my "better". In fact, it's surprising how few DIY audio enthusiasts say "For me, more accurate is better." For most people, it's a very subjective idea which they seek, when they think of "better". I have no issue with such enthusiasts. I respect them 100%.the tabaqs infact sound better unbraced and thin walled
You are right. 25mm MDF bookshelves almost need no bracing at all. With 18mm, you can definitely get similar inert walls with good bracing. It's just that it's cheaper (in all aspects, time, effort, money) to do 25mm and eliminate or reduce the bracing. I've never bothered about reducing weight -- I find that heavier speakers sit on their stands better, and this alone improves sound. But if you want to optimise weight, go for 18mm and bracing by all means.
i will go with 18mm with sufficient bracing but yes doing the bracing in horizontal position for eg: if you have 4 set of drivers (woofers) in a box then bracing will be placed between each driver.
its not about optimising weight,even i prefer weight,more weight more deadness the cabinet will sound i agree to this,but cost factor also counts.
What you need from walls is different from what you need from braces. The walls need to be inert, dull (in the sense of vibrations) and "unwilling" to vibrate. What you need from bracings is rigidity -- they shouldn't flex. Rarely will you get both these properties in a single material. 12mm or thicker glass sheet will give you both (for audio frequencies), but glass is damn difficult to work with.
Therefore, 20mm ply being much more rigid than MDF, I feel you should use it for braces. In fact, you can build entire speakers using 20mm ply -- good quality commercial ply available in any good shop. My first speakers, the Asawari 1, were made using ply entirely. (I used EVA sheets to damp the walls, plus did extensive bracing, again with plywood.)
i would prefer box build and bracing with mdf of a superior brand say "greenply panel max exterior grade" the one bibin has used in this thread,it has a unique fibre-interlocking technology which leads to high bonding strength and rigidity.
Even plywood board sags or bows provided its of good quality like marine grade.
No, Fevicol doesn't have 1/10th the strength of Araldite, and is useless for areas which will face tremendous vibrations. You have to use Araldite there. Fevicol is only useful for sticking large surfaces, e.g. sticking laminate or veneer on plywood. It is of no use where the contact area is small, e.g. where the edges of your bracing come into contact with the walls of your enclosure.
good suggestion i will try the araldite way,but its available in so many forms like standard,express glue liquid/gell,instant fix,for wood repair.
What type of solution you use,is the price on the higher side,for eg: if making
a huge tower how much we require..
Rouded-off bevelling and 45-degree bevelling are both done the same way -- choose the right router bit and use a router.
For inner side of the baffle cutouts the 45-degree bevelling is very much required so that the drivers can perform well,as well breath free,where can we get this bit,is it still available in ebay??/
Incidentally, I do 45-degree bevelling for the inner side of the front baffle cutouts -- I don't believe there's anything to be gained from doing rounding-off. In fact, there may be some small thing to lose. See this page from the Darbari pages to get a clearer idea of the router bit I use and the way I do the bevelling.
Now the battle is between doing the baffle round edges vs 45-degree bevelling which is more effective,but for 45 degree bevelling we need a 25mmx2 sheet to do the job coz it eats lot of wood,round over can be done on a 18mmx2 sheetbut sharp edges is for sure to be avoided.
Here's an interesting article i am still going through for the above subject,hope it can be useful to you.
What's with the sharp edges on speaker boxes these days? - diyAudio
I have gone through your site and i am very much thankful to you for giving so much indepth details that will certainly boost my desire/moral to do the boxes in a calculated and systematic manner.
This discussion will help many diy'ers in this site to learn a lot hope other members also put there ideas/suggestions and keep this topic alive.
thanks
rajesh.
Great build. Thanks for the pics, they really help.
I thought I'll chip in with a few points about the physical design and construction.
- For your next design, I suggest moving the tweeter much closer to the midbass. We strive to get to ideal point sources, and tweeter-midbass distances do make a difference to the coherence of the sound, specially for critical nearfield listening. In fact, the midbass units you used have straight-cut flanges to allow close placement of the adjacent driver.
- Don't put the tweeter on the vertical centre-line of your front baffle -- offset it to one side by at least an inch or so. The theory says that the distances from the two edges should be 1.6:1 or some such ratio. Offsetting it helps even out the SPL by distributing out edge reflections across a wider range of frequencies.
- The largest panels in this enclosure are the side panels. In other words, spurious vibrations are most likely to emanate from them. I would suggest horizontal braces, not vertical, for such enclosures, so that the side walls are properly locked down and stiffened. (If I understood your design right, you have only one brace, which is vertical.)
- Just my preference, but I go with 25mm MDF. I don't see what is to be gained by using thinner, considering how much of a struggle it is to build inert enclosures.
- I suggest not using MDF for braces. Use 20mm (or 18mm, depending on the brand) ordinary commercial ply. And make sure you put a 2" wood screw through the outer wall into the brace plywood edgewise every 4-6 inches, in addition to Araldite. This forces the brace to lock down on the outer wall tightly. My carpenter missed the screws for my Darbari lower enclosure, and I immediately heard the effect and had to force him to put them in.
- Make the grill frame from thinner material if possible. I tried making a grill frame once, using stainless steel rods maybe 3-4mm diameter. It worked out really well, because it's strong and very thin. Any metalwork shop which makes stainless steel drawers and cages for kitchens will be able to make them for you.
- I use double-thickness for the front baffle, since that's the most important to get inert, by far. In other words, I use 2 sheets of 25mm MDF stuck together to give me a 50mm front baffle.
- For your next build, don't bother with rounding out the edges of the cutouts in your braces. Sharp edges there shouldn't impact the sound audibly. You have taken enormous pains to do a finely crafted job -- maybe this will save you a bit of labour.
- You've done lovely rounding of the baffle edges, which is the textbook prescription to do. But I am now beginning to feel that just bevelling them 45-degrees will probably give almost identical results acoustically, and are sometimes easier to build -- you don't even need to run a router along the edges. May save you a bit of labour.
These are just my thoughts. There are a thousand different ways to do the same thing in DIY.
It's always great to see how much effort you put in for your builds and how well you finish your enclosures. :clapping: I really love well-finished DIY, and I love your dedication to good finishing. Commercial speaker manufacturers apparently spend upto 60% of their costs on finishing of enclosures, I'd read somewhere.
I wasn't aware of multiple types of Araldite. The one I use is the only I've been seeing for the last fifty years. It's a two-part exoxy adhesive which needs to be mixed before applying.good suggestion i will try the araldite way,but its available in so many forms like standard,express glue liquid/gell,instant fix,for wood repair.
Have you looked on Ebay? This chap is a professional seller, not an individual selling one or two personal items.where can we get this bit,is it still available in ebay??/
I am sorry, but I couldn't understand this point.Now the battle is between doing the baffle round edges vs 45-degree bevelling which is more effective,but for 45 degree bevelling we need a 25mmx2 sheet to do the job coz it eats lot of wood,round over can be done on a 18mmx2 sheetbut sharp edges is for sure to be avoided.
True.I would normally agree about keeping the c-c distances as small as possible, but on a tilted baffle, as long as the listener is a few feet away, it can work... especially with shallow slopes.
Never heard of this one. Can you point me to something I can read up? (I have Vance Dickason 7/ed, if that helps.) Also, offsetting the tweeter helps reduce (or distribute, to be precise) edge diffraction, which impacts on-axis SPL evenness. I tend to worry about on-axis first, before off-axis. Will wait to hear more from you.Offsetting the tweeter is usually not a good idea, it can make a mess off axis.
Oh yes. In fact, strips, say 2" wide, cut from 20mm plywood, long enough to stretch from one sidewall to the other, could be inserted through the driver openings. Then, drill the sidewalls and the brace edgewise, then pour Araldite and insert screws. Hate to think what it would do to the finish, though.... especially the need for horizontal braces. You could still install some dowels through the driver openings and glue them to the center brace and side walls.

I wasn't aware of multiple types of Araldite. The one I use is the only I've been seeing for the last fifty years. It's a two-part exoxy adhesive which needs to be mixed before applying.
got it its a mixture of resin + hardner,but does it cover the gaps properly??? whereas in fevicol the glue spreads and covers the gaps evenly, This product from fevicol is supposed to be good "Fevicol SH (Synthetic Resin Glue)" its called carpenter's glue,here a link about its specification.
http://www.pidilite.com/upload/brands/pdf/Fevicol_5_1.pdf
tried ebay but no results.Have you looked on Ebay? This chap is a professional seller, not an individual selling one or two personal items.
There is no need to have a 25mm x 2 thickness baffle to do a 45-degree bevelling. You can have thinner baffles. Similarly, there is no reason to believe that 18mm rounding off is adequate. The rounding-off is not a cosmetic issue -- the radius of the rounding directly impacts how much of edge diffraction you can reduce. The larger the radius, the more useful it is for reducing edge diffraction. The 18mm you saw earlier in this thread is not a magic number. Neither is 25mm x 2.
Thanks for the information i will go with 18mmx2 edge rouding with larger radius.
Nother point using 25mm sheet for a box will be good when you use 10inch and above drivers,but for 8inch or 6inch drivers i feel 18mm will be sufficient.
thanks
rajesh
Totally unsuitable. It doesn't bond metal. For braces, I want the adhesive to bond plywood, MDF and metal (the screws) permanently.got it its a mixture of resin + hardner,but does it cover the gaps properly??? whereas in fevicol the glue spreads and covers the gaps evenly, This product from fevicol is supposed to be good "Fevicol SH (Synthetic Resin Glue)" its called carpenter's glue,here a link about its specification.
http://www.pidilite.com/upload/brands/pdf/Fevicol_5_1.pdf
My web page on the Darbari construction gives a hyperlink to this seller. What happened when you clicked on that link?tried ebay but no results.
Each builder chooses his own optimum points I guess.Nother point using 25mm sheet for a box will be good when you use 10inch and above drivers,but for 8inch or 6inch drivers i feel 18mm will be sufficient.