DIY Sealed Subwoofer

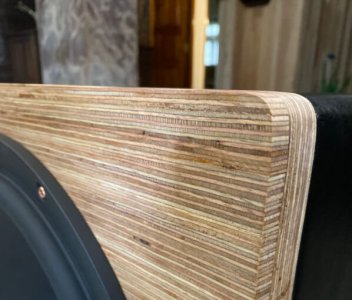
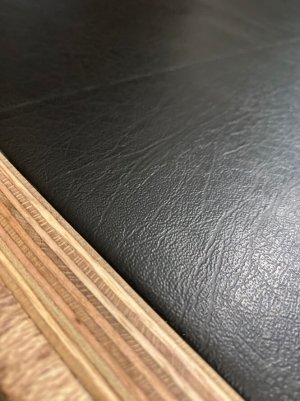
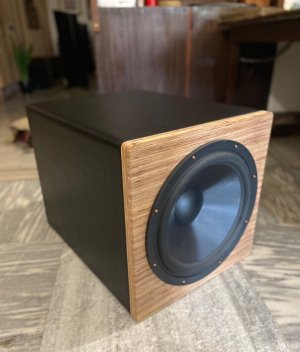
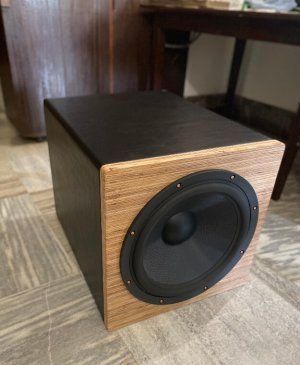
It's the cross-section of the plywood. I cut about 20 pieces of 10mm width, and then stuck them together on the baffle. The baffle is now 46mm. But, the extra thickness is on the outside, so it's fine.
Oh man! If you had let us know before, you could have made a "pseudo" CLD baffle. 😞
The last time I touched it, it scalded my finger; bloody iron!
Ah! Now we all know what you look like.

1664005249993.png
A fitting response was mated by dunking the iron in ice-cold water. Die Iron Die!
I'm sure the iron stood suitably castigated post this assault. :p
 
@aeroash : Wow. Just amazing. Feels very happy to see these kind of efforts.. :)

Now did you hook up the sub to the amplifer and heard how it sounded..? :D

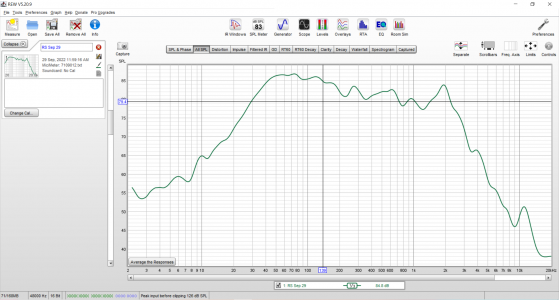
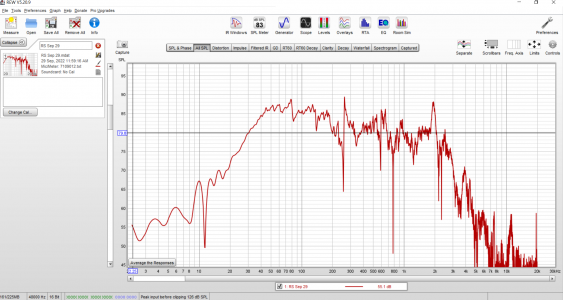
Let's take a nearfield measurement with a minidsp Umik-1. Mic about 0.5-1 cm away from the dustcap of the woofer. Run a sweep from 20Hz - 20kHz :)

Based on it, we also need to determine if any more testing equipment it needed/how much filling material, damping material etc need to be added.
 
Wow. How is it sounding?
Now did you hook up the sub to the amplifer and heard how it sounded..? :D
The original location I had in mind is not working out. I have now moved it closer to the main speakers. Walking around the room there are some locations where it sounds just right. Moving it around is a task, I have to now find the best spot for it. Will let it run in for a couple of days before I move it around.

Let's take a nearfield measurement with a minidsp Umik-1. Mic about 0.5-1 cm away from the dustcap of the woofer. Run a sweep from 20Hz - 20kHz :)


1.png
 
The original location I had in mind is not working out. I have now moved it closer to the main speakers. Walking around the room there are some locations where it sounds just right. Moving it around is a task, I have to now find the best spot for it. Will let it run in for a couple of days before I move it around.


View attachment 72293
@aeroash: This doesn't look like a nearfield measurement..
Did you place the mic at 0.5cm away from the centre of the dustcap? (I am not looking for an in room measurement). Also with a nearfield measurement, we don't need to apply any smoothing.
 
@aeroash: This doesn't look like a nearfield measurement..
Did you place the mic at 0.5cm away from the centre of the dustcap? (I am not looking for an in room measurement). Also with a nearfield measurement, we don't need to apply any smoothing.
It is at 1cm away from the dust cap. I initially thought my laptop mic was picking up the sweep. I double checked. I get the same measurement from near field.

2.png
 
It is at 1cm away from the dust cap. I initially thought my laptop mic was picking up the sweep. I double checked. I get the same measurement from near field.

View attachment 72294
It looks like we have serious resonances at integer multiples of 80 Hz (80Hz, 160 Hz, 240Hz etc) . Those sudden flips in amplitude usually indicate that. So you need some additional testing equipment. Will send you a P. M.
 
Clean bass? yes, please!

I initially wanted the sub right next to my chair so that I could use it as a table. It turned out to not be the most ideal location for it. I slid a matt underneath and pushed it around to different locations in the room and has now found its final resting place and it sounds sublime!

This driver can reproduce bass line textures as precisely and articulately as possible without being lost in the mix of other lower frequencies. The bass drum kick is realistic and pronounced with the correct amount of weight and minimal decay. I'm not much of a bass-head, but I can appreciate how a good bass rendition may elevate the listening experience. The crossover began at 200hz and has now settled at 85hz.

This driver's LF reproduction is not intrusive or overbearing in any way; rather, it gently fills the room and pressurises it when necessary so that you can "feel" the bass. My typical listening volumes do not exceed 70-75db, and yet, the bass is renditioned beautifully.
I have two 12" Rythmiks, and I thought they were excellent at what they did before I heard what a single 15" driver could deliver!


Beginnings.

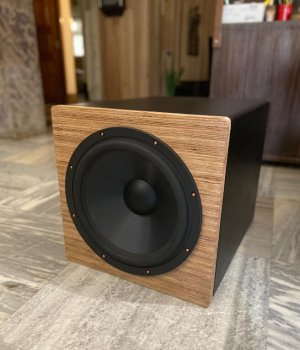
I was on a hunt for a subwoofer that would complement my bookshelves in the smaller room. Going by the prevailing prices of branded subwoofers, I reckoned I could have one built for a lesser price and perhaps of better quality.

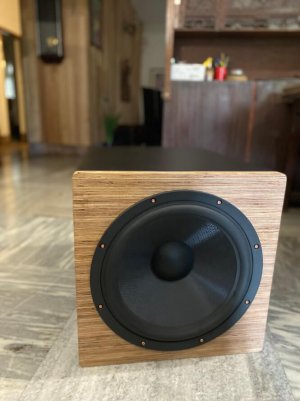
Going into this project my brief was simple; i.e. good quality bass in a sealed box with a 15" driver. I didn't care for high SPL. I wanted someone to take up this project for me, as I have never built a speaker box before.
When there were no takers, I decided to go forth and cut the wood myself. All I had for this build was a marble cutter, an angle grinder and a drill machine.
But I never would have ventured into this build blind. The enthusiasm and attention of @Vineethkumar01 were enough to spur me on to forge ahead. I genuinely appreciate and thank him for his ongoing advice. Thanks to my local audio enthusiast and buddy @ssf for loaning me his Crown XLS to power the sub. @keith_correa , and everyone else who contributed.

The build has gotten my juices flowing. Not simply because it was satisfying and successful, but also because I have a renewed appreciation for DIY audio. Terrific value is on offer in building tried and tested speaker designs, and at a reasonable price; Kairos by Jeff Bagby, perhaps? I know that @Prodigy owns these, and I hope I have an opportunity to listen to these next.


Here's the cost breakup for the keen.

Driver: 37,500
Plywood: 3,000
Old Monk: 110
Masala peanuts: 15
Gum & Screws: 300
Sound deadening coating (whatever): 599
Old Monk: 110
Green Peas: 10
Faux Leather: 600
Binding Posts: 1331 (inclusive of Rs 150 as shipping fees)
Hex Screws: 240 (inclusive of Rs 130 as shipping fees)
Old Monk: 110
Pickle: 5

I hope I did not overspend on the peanuts!
 
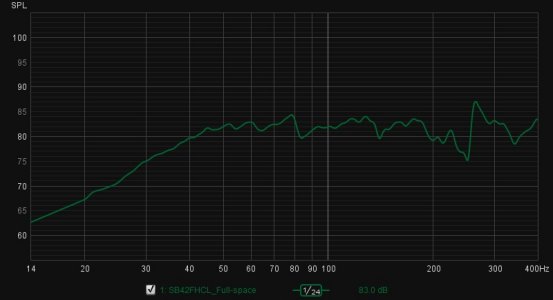
This is what the bass response looks like from your measurement (hearing-wise may be even better.. :) ).
I have not considered the in-room response.
subwoofer_response.jpg

It can all get only even better from here once we identify the resonance at 80Hz (and its integer multiples) and treat it if necessary...
Happy listening.. :)
 
.Heree's the cost breakup for the keen.

Driver: 37,500
Plywood: 3,000
Old Monk: 110
Masala peanuts: 15
Gum & Screws: 300
Sound deadening coating (whatever): 599
Old Monk: 110
Green Peas: 10
Faux Leather: 600
Binding Posts: 1331 (inclusive of Rs 150 as shipping fees)
Hex Screws: 240 (inclusive of Rs 130 as shipping fees)
Old Monk: 110
Pickle: 5

I hope I did not overspend on the peanuts!
Can i be a teetotaller and still execute this project? Is there a viable substitute (rather, can there be) for old monk?

Also, what's on the menu for amplification in the long run?
 
Clean bass? yes, please!

I initially wanted the sub right next to my chair so that I could use it as a table. It turned out to not be the most ideal location for it. I slid a matt underneath and pushed it around to different locations in the room and has now found its final resting place and it sounds sublime!

This driver can reproduce bass line textures as precisely and articulately as possible without being lost in the mix of other lower frequencies. The bass drum kick is realistic and pronounced with the correct amount of weight and minimal decay. I'm not much of a bass-head, but I can appreciate how a good bass rendition may elevate the listening experience. The crossover began at 200hz and has now settled at 85hz.

This driver's LF reproduction is not intrusive or overbearing in any way; rather, it gently fills the room and pressurises it when necessary so that you can "feel" the bass. My typical listening volumes do not exceed 70-75db, and yet, the bass is renditioned beautifully.
I have two 12" Rythmiks, and I thought they were excellent at what they did before I heard what a single 15" driver could deliver!


Beginnings.

I was on a hunt for a subwoofer that would complement my bookshelves in the smaller room. Going by the prevailing prices of branded subwoofers, I reckoned I could have one built for a lesser price and perhaps of better quality.

Going into this project my brief was simple; i.e. good quality bass in a sealed box with a 15" driver. I didn't care for high SPL. I wanted someone to take up this project for me, as I have never built a speaker box before.
When there were no takers, I decided to go forth and cut the wood myself. All I had for this build was a marble cutter, an angle grinder and a drill machine.
But I never would have ventured into this build blind. The enthusiasm and attention of @Vineethkumar01 were enough to spur me on to forge ahead. I genuinely appreciate and thank him for his ongoing advice. Thanks to my local audio enthusiast and buddy @ssf for loaning me his Crown XLS to power the sub. @keith_correa , and everyone else who contributed.

The build has gotten my juices flowing. Not simply because it was satisfying and successful, but also because I have a renewed appreciation for DIY audio. Terrific value is on offer in building tried and tested speaker designs, and at a reasonable price; Kairos by Jeff Bagby, perhaps? I know that @Prodigy owns these, and I hope I have an opportunity to listen to these next.


Here's the cost breakup for the keen.

Driver: 37,500
Plywood: 3,000
Old Monk: 110
Masala peanuts: 15
Gum & Screws: 300
Sound deadening coating (whatever): 599
Old Monk: 110
Green Peas: 10
Faux Leather: 600
Binding Posts: 1331 (inclusive of Rs 150 as shipping fees)
Hex Screws: 240 (inclusive of Rs 130 as shipping fees)
Old Monk: 110
Pickle: 5

I hope I did not overspend on the peanuts!
Oh no my friend….I thought you were a bit too stingy on the old monk and therefore stingy on the peanuts, green peas and pickle. Now that the subwoofer is done, do go generous on the old monk during late listening sessions.😉

One way you are using your new sub, it would be the way I would too. Just enough spl to make its presence felt and not heard. Again I am a big fan of sealed boxed enclosures having grown up with them. They are something else.
 
Follow HiFiMART on Instagram for offers, deals and FREE giveaways!
Back
Top