New Design, SE 6005 Directly Coupled Audio Amplifier

Status
Not open for further replies.
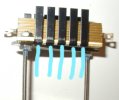
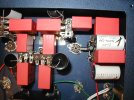
I have used bypass capacitors in my monoblock but have used them hapazardly for values not considering the frequency / impedance curve. TBH I am unable to decode sound quality attributes using different values and hence gave up due to budget and time constraints for film capacitor purchases. Maybe one day I would start this activity all over again as this is so much fun.

Thanks for your insights Jeff. Appreciated.
 
Today - a partial discussion of capacitors and applying of same .

Warning :

( All that follows is in my own experience, in my own opinion, my own experience, and in my own belief system : )

A basic truth is that in audio, there is not a single capacitor that exists, that plays all ranges of the music, at their fullest fidelity. Not a one, no matter what the cost or size !!

Generally speaking a large microfarad cap plays the low end well, and vice versa for a small microfarad cap being able to intrinsically play the high end well. This relationship of cap uF and frequency has been known for decades, but sadly, very little has been done in audio, so as to OPTIMIZE a capacitor in a circuit, so that the cap plays well at ALL audio frequencies.

Only a handful of Manufacturers consistently practice combining multiple capacitors to obtain a wide playback response. Out of that handful, I am only aware of one, who seems to do it fabulously well, but I would hope this is not the sole proponent and instance.

Most ( 90% plus) of commercial audio equipment is designed to give the listener a decent swath of the midrange's music information. It is cheap and easy to do this, with a single ( musically deficient ) capacitor in a circuit's " capacitor" position. Conversely, it takes LOTS of money, and a talent in design, to develop a pre amplifier or amplifier that plays back music convincingly. Manufacturers would promptly go broke, providing such a level of playback.

What are the audio frequencies ???

Easy...same as the frequencies of live unamplified music. Music is wide band, and audio playback equipment should be, IF it is to mimic music.

Important Note: One does NOT need to have stellar hearing, to appreciate the music content in the highest frequencies. What is " beyond" our measured high frequency hearing, filters down, into the midrange, where people with compromised overall hearing, will readily appreciate the " above - 20KhZ " information, and say " thank you " for providing it in your audio equipment. Look up the word " resultants ".

AS a DIYer, one can apply whatever they want to have in their circuits, for any capacitor position !!! Assuming the DIYer can afford the parts cost, their motive is purely music enjoyment. Turning a profit on a part's cost, is not in the equation.

OK, let us " GET TO IT !!! "

The simplest answer is to combine multiple capacitors of high quality ( film types ) and of differing smaller values, into a circuit's single capacitor position. That makes sense, but you HAVE to do so - properly. This approach ASSUMES the builder has certain capabilities, which most do not have, unfortunately.

FIRST, it assumes the builder knows what precise uf ( microfarad ) value capacitor plays in each music range. Very very few audiophiles know !!!

SECOND, it assumes the builder has a audio system sensitive enough, good enough overall, to reveal where there exists playback problems.

THIRD, it assumes that the builder has the experienced hearing to quickly determine where a frequency range is missing in playback, or over-emphasized in playback. ( Where adjustments are needed. )

FOURTH, it assumes the builder knows what brands, types and values of film caps to add to a multiple bunch.

FIFTH, it assumes the builder has sufficient financial capability, to purchase the best caps for the job . This factor sadly, often looms largest, to hinder one's genuine build progress and education.

WHAT HAPPENS :

Someone " tries" multiple film bypassing, but ONLY by adding one cap. Yes, that region which the newly-added cap should play, may be better, but now, there are discontinuities, suck-outs, holes, VS hearing one cap alone !! At that point, they may "give up " or at the most, they may try two added caps. In all likely hood, possibly or probably one or both of the added caps are now the wrong uF values needed !! So, the ill prepared audiophile " gives up " on multiple film cap bypassing. Does that describe you ??? I did this, very early on.

Several decades ago, there was a favorite article of mine presented in I think USA's " Sound Practices " magazine. It covered a two stage DIY direct coupled SET amplifier build, by a couple of Italian DIYers, Marzio and Jelasi. It is on-line today . See it easily by clicking on the following URL :


What I want to bring to everyone's attention is their use of multiple film cap bypassing, of the most basic type, presented in writing, way back then. Notice in their posted parts list, out of seven cap positions in a mono amp, six cap positions are specified to be of three differing values. A main cap, and two specific value, constantly prescribed values .

Read the article.

We can do better than that circuit in 2021 BTW !! Notice the Italians' C2 through C7 are all " Triplet Bundles ". Differing uF MAIN caps as needed, each combined with a 0.22uF and a 0.022 uF film capacitor as a bypass !!!! Six out of seven cap positions, fully bypassed !!!

Hooray for the DIYers from Italy to divulge this information.

For your information, 0.22uF is probably the one best uF value to enhance the middle mid-range of music frequencies. Also, 0.022uF is likewise the best uF value in a SINGLE cap, to enhance the upper most frequencies, music's top-end.

How come it is three or maybe four decades later, where this finally gets pointed-out to interested-in-audio readers. ???

OK, BACK to 2021, this 6005 build.

1) For less chance of gaps, ( and better overall musical expression ) this thread's earlier-described" Modules " have not two or three caps in a bundle, but more like five minimum, starting with a film cap value optimizing the mid-bass.

2) Film caps available in 2021, such as WIMA caps, are lower in ESR and higher in performance, than Marzio's EARLY caps used in his filter chain. WIMAs just need some minor help, also possibly to offset wiring losses. So, for caps located in the 6005 amp's first three filtering stages ( C1, C2, C3, / 30uF, 80uF, 50uF ) we only need to address the music range where Marzio and Jelasi ( and others today ) might use a 0.022 uF cap.

3) But we wanted a bit more than what a single high frequency cap provides. In lieu of a single 0.022uF, we employ a single 0.033uF bypass AND a single 0.01uF bypass, ( to cover the highest of highs ) well enough. This combo of 0.033uF and 0.01 uF, ( assuming you select good caps ), will out-play musically a single 0.022uF cap.

We do not allow caps bodies to closely touch each other, so as to minimize field interactions. Picture's worth a 1,000 words.


C1 bypassing with an unshown 5 uF GTO :

View attachment 64268

View attachment 64269

View attachment 64270

C2 with a 5 uF GTO :

View attachment 64271

AND FINALLY :" C3, .................no GTO, GTOs just go to OUTPUT stage duty :

View attachment 64273


Thanks again for looking. This multiple bypassing above was done on Sunday 11-14-21.

Jeff
Thanks! drlowmu for a detailed, informative and richly illustrated post.

It has generally accepted practice, for several years, to bypass Electrolytic Capacitors by 1% of the Original Value and then again by a 1% OF THE 1%. (The smaller value capacitors are chosen for good audio properties in their frequency range over which they operate in the Circuit.)

As an Example:

a 1 mfd Cap will have in parallel
a 0.01 mfd (ie 10 nF) + in parallel ------ ie 1% of 1 mfd
a 0.1 nF ie 100 pF ------ ie 1% of 10nF

Most Electrolytic Caps have zero capacitance above 100 KHz and are actually inductors at 100 KHz and higher frequencies..... Not surprising when you consider the substantial length of electrolytic film that is tightly rolled to create the capacitor..... and then there is ESR as you have also mentioned.

Very Nice post .... :)
 
11-19-2021 ....................................... Mini Report .............. " An inch of BAD wire "


My first Audio mentor, the late Mr. Robert W. Fulton, used to say " An inch of BAD wire can ruin the musical experience".


Of course, I believe him to be 100% correct.

Today 11-19-21, I wire modified the leads to a Hammond 6 Ohm DCR 1 Ampere rated B+ choke. ( 159ZA, a pair in L1/C1/L2/C2 series is a favorite .)

Replaced the stock thin 22 AWG black wiring, to two 14 AWG Mil Spec yellow wire leads, copper stranded and silver plated.

While we have today's unit " exposed ", and half way done, a few photos were taken, so that other friends who DIY might observe.

You may critique the soldering, and it will not bother me. Such a big solder " blob ". 'Used a Weller D-550 gun, 325 Watt setting. Honestly, I would rather have poor soldering and good wiring, than vice versa.


005.JPG
006.JPG

Thanks for viewing.

Jeff
 
Last edited:
Today - a partial discussion of capacitors and applying of same .

Warning :

( All that follows is in my own experience, in my own opinion, my own experience, and in my own belief system : )

A basic truth is that in audio, there is not a single capacitor that exists, that plays all ranges of the music, at their fullest fidelity. Not a one, no matter what the cost or size !!

Generally speaking a large microfarad cap plays the low end well, and vice versa for a small microfarad cap being able to intrinsically play the high end well. This relationship of cap uF and frequency has been known for decades, but sadly, very little has been done in audio, so as to OPTIMIZE a capacitor in a circuit, so that the cap plays well at ALL audio frequencies.

Only a handful of Manufacturers consistently practice combining multiple capacitors to obtain a wide playback response. Out of that handful, I am only aware of one, who seems to do it fabulously well, but I would hope this is not the sole proponent and instance.

Most ( 90% plus) of commercial audio equipment is designed to give the listener a decent swath of the midrange's music information. It is cheap and easy to do this, with a single ( musically deficient ) capacitor in a circuit's " capacitor" position. Conversely, it takes LOTS of money, and a talent in design, to develop a pre amplifier or amplifier that plays back music convincingly. Manufacturers would promptly go broke, providing such a level of playback.

What are the audio frequencies ???

Easy...same as the frequencies of live unamplified music. Music is wide band, and audio playback equipment should be, IF it is to mimic music.

Important Note: One does NOT need to have stellar hearing, to appreciate the music content in the highest frequencies. What is " beyond" our measured high frequency hearing, filters down, into the midrange, where people with compromised overall hearing, will readily appreciate the " above - 20KhZ " information, and say " thank you " for providing it in your audio equipment. Look up the word " resultants ".

AS a DIYer, one can apply whatever they want to have in their circuits, for any capacitor position !!! Assuming the DIYer can afford the parts cost, their motive is purely music enjoyment. Turning a profit on a part's cost, is not in the equation.

OK, let us " GET TO IT !!! "

The simplest answer is to combine multiple capacitors of high quality ( film types ) and of differing smaller values, into a circuit's single capacitor position. That makes sense, but you HAVE to do so - properly. This approach ASSUMES the builder has certain capabilities, which most do not have, unfortunately.

FIRST, it assumes the builder knows what precise uf ( microfarad ) value capacitor plays in each music range. Very very few audiophiles know !!!

SECOND, it assumes the builder has a audio system sensitive enough, good enough overall, to reveal where there exists playback problems.

THIRD, it assumes that the builder has the experienced hearing to quickly determine where a frequency range is missing in playback, or over-emphasized in playback. ( Where adjustments are needed. )

FOURTH, it assumes the builder knows what brands, types and values of film caps to add to a multiple bunch.

FIFTH, it assumes the builder has sufficient financial capability, to purchase the best caps for the job . This factor sadly, often looms largest, to hinder one's genuine build progress and education.

WHAT HAPPENS :

Someone " tries" multiple film bypassing, but ONLY by adding one cap. Yes, that region which the newly-added cap should play, may be better, but now, there are discontinuities, suck-outs, holes, VS hearing one cap alone !! At that point, they may "give up " or at the most, they may try two added caps. In all likely hood, possibly or probably one or both of the added caps are now the wrong uF values needed !! So, the ill prepared audiophile " gives up " on multiple film cap bypassing. Does that describe you ??? I did this, very early on.

Several decades ago, there was a favorite article of mine presented in I think USA's " Sound Practices " magazine. It covered a two stage DIY direct coupled SET amplifier build, by a couple of Italian DIYers, Marzio and Jelasi. It is on-line today . See it easily by clicking on the following URL :


What I want to bring to everyone's attention is their use of multiple film cap bypassing, of the most basic type, presented in writing, way back then. Notice in their posted parts list, out of seven cap positions in a mono amp, six cap positions are specified to be of three differing values. A main cap, and two specific value, constantly prescribed values .

Read the article.

We can do better than that circuit in 2021 BTW !! Notice the Italians' C2 through C7 are all " Triplet Bundles ". Differing uF MAIN caps as needed, each combined with a 0.22uF and a 0.022 uF film capacitor as a bypass !!!! Six out of seven cap positions, fully bypassed !!!

Hooray for the DIYers from Italy to divulge this information.

For your information, 0.22uF is probably the one best uF value to enhance the middle mid-range of music frequencies. Also, 0.022uF is likewise the best uF value in a SINGLE cap, to enhance the upper most frequencies, music's top-end.

How come it is three or maybe four decades later, where this finally gets pointed-out to interested-in-audio readers. ???

OK, BACK to 2021, this 6005 build.

1) For less chance of gaps, ( and better overall musical expression ) this thread's earlier-described" Modules " have not two or three caps in a bundle, but more like five minimum, starting with a film cap value optimizing the mid-bass.

2) Film caps available in 2021, such as WIMA caps, are lower in ESR and higher in performance, than Marzio's EARLY caps used in his filter chain. WIMAs just need some minor help, also possibly to offset wiring losses. So, for caps located in the 6005 amp's first three filtering stages ( C1, C2, C3, / 30uF, 80uF, 50uF ) we only need to address the music range where Marzio and Jelasi ( and others today ) might use a 0.022 uF cap.

3) But we wanted a bit more than what a single high frequency cap provides. In lieu of a single 0.022uF, we employ a single 0.033uF bypass AND a single 0.01uF bypass, ( to cover the highest of highs ) well enough. This combo of 0.033uF and 0.01 uF, ( assuming you select good caps ), will out-play musically a single 0.022uF cap.

We do not allow caps bodies to closely touch each other, so as to minimize field interactions. Picture's worth a 1,000 words.


C1 bypassing with an unshown 5 uF GTO :

View attachment 64268

View attachment 64269

View attachment 64270

C2 with a 5 uF GTO :

View attachment 64271

AND FINALLY :" C3, .................no GTO, GTOs just go to OUTPUT stage duty :

View attachment 64273


Thanks again for looking. This multiple bypassing above was done on Sunday 11-14-21.

Jeff
Very informative post Jeff, learning a lot from you. A big thanks and high regards.
Dev
 
Very informative post Jeff, learning a lot from you. A big thanks and high regards.
Dev


Thanks Dev,

In a conversation last night, my audio mentor ( for the last three decades ), tells me he has found a single 12 AWG m22759/11 will outperform my doubled up pair of 14 AWG m22759/11 wires. He has listened to both configurations, on his superb Serious Stereo sound system. MLTLs.

Looks like I will re-do this and the other choke, to single 12 AWG leads - today. Want to have best possible sonic result !!

You have P.M.

Jeff

setup 1 2020 SJNIPPED.jpg
 
Last edited:
Thanks Dev,

In a conversation last night, my audio mentor ( for the last three decades ), tells me he has found a single 12 AWG m22759/11 will outperform my doubled up pair of 14 AWG m22759/11 wires. He has listened to both configurations, on his superb Serious Stereo sound system. MLTLs.

Looks like I will re-do this and the other choke, to single 12 AWG leads - today. Want to have best possible sonic result !!

You have P.M.

Jeff

View attachment 64483
I am using a single 12 awg millspec wire for the chokes with superior dynamics.
 
I am using a single 12 awg millspec wire for the chokes with superior dynamics.

OK Hari. ..... 11-21-2021 ............................. DOUBLE YELLOW 14 AWG -- to Single ORANGE 12 AWG

As suggested to Dev.R today, we ( un-modded and re-modded ) - changed both of those double 14 AWG yellow lead chokes, to single 12 AWG lead sexy looking ORANGE-colored wiring. This was for the second amp, the one destined for a nice client, and good use.

To re-cover the "cut-open" chokes we used one inch wide tape, used medically to hold dressings on a patient. The tape comes in paper, plastic and cloth with an adhesive backing. Today, we bought a roll of CLOTH and we like cloth tape the best - of those three tape choices. It looks very close to the stock covering. See both Hammond chokes,, now re-done, below :


001.JPG

And below again, a second ( amplifier ) view - with some parts notations for you.

I didn't have to do this re-mod. But in clear conscience, knowing where this 6005 DC amp is to be used, ( on Lowther Beauhorns ), and WHO is to use it, we really HAD to include - this small wire improvement.


002 EDITED.jpg

It is ideal. We have free hand on this build, and KNOW without asking, the client would be happy if we took one extra day to re-do this. Both chokes done " forever " as of now !!

Thanks everyone - for looking. We like the orange color, very " peppy " and upbeat.

Jeff
 
Last edited:
11-23-2021 ...................... Latest Build Idea .......................... Implemented

A 50,000 Ohm SHUNT resistor, across a B+ measuring 411 VDC, draws 8 milliamperes of current to ground. The power dissipated by this Shunt resistor is ( Ohms Law ) 411 VDC times 0.008 Amperes, or about 3.38 Watts, continuous.

We design for maximum reliability.

We use a ARCOL HS series 50 Watt resistor, because it is voltage rated at 1,250 VDC, well above 411 VDC in use, and it is a PULSE - designed resistor, which we know " sounds acceptable ".

The 50 Watt rated resistor depends upon a heat sink, to obtain it's maximum 50 Watt power rating. With no heat sink, the device can do up to 14 Watts, with an elevated operating temperature. We have conservatively added a " 10 Watt " rated heatsink to the bare resistor. The ARCOL HS 50 Watt resistor ( Ohm's Law ) operates a 3.38 Watts. Very conservative design and part use.

The question over the past two weeks was this : " How to mount the resistor, below the chassis, without making lots of unsightly chassis ( bolt ) holes. Also, how to place it where it would be ideally located - chassis space wise - relative to all the other power supply parts.

After two weeks of thought, here was what was " invented " yesterday, ...... finally !!


6 Edit 2 USE.jpg

And , another view, below:

009.JPG


This all fits with trying to efficiently build in three dimensions, below deck, not just two dimensions.

FYI, these parts were slightly modified Keystone "Board Brackets " and 4-40 by two inch sized stainless steel bolts. We sanded the anodizing off the back of the ARCOL HS and applied thermal paste to enable heat transfer to the " mini" 10 Watt add-on heat sink. That small heat sink was obtained from Michael Percy Audio..

Thank you for looking. Now, on - to more power supply wiring.


Jeff

yes ,............ " repositions " ....................is the right spelling.
 
Last edited:
The heat sink looks puny to me. Efficient heat transfer is key for performance. I still like the chassis mounting idea to distribute heat evenly.
 
The heat sink looks puny to me. Efficient heat transfer is key for performance. I still like the chassis mounting idea to distribute heat evenly.

I agree with your comments, from what little you were shown. But there is more to this than what meets the eye when judging from those two photos alone !!

* * * * * * * * * * * * * * * * * * * * * * * * * * * * * * * * * * * *

When you run out of attaching-to-the-chassis space, .............. we need to improvise free-air mounting.

That is what this is.

F
ree air mounting, in a limited space, in a stereo amplifier.

* * * * * * * * * * * * * * * * * * * * * * * * * * * * * * * * * * * * *

The ARCOL HS resistor with no heatsink at all ( see data sheet below ) is rated 14 Watts maximum, and can probably do 3.38 Watts continuous - in a less than ideal fashion. That ten watt rated add-on heatsink is OK in my opinion. Underside space for any add-on heat sink is limited.


Also, not shown in the posting and very important : the resistor is able to now be positioned purposefully and almost ideally, relative to the adjoining below-chassis power supply circuitry.

Many considerations Hari were taken into account, simultaneously, ............and they have been.


Jeff
 

Attachments

  • ARCOL HS - Datasheet Rs.pdf
    297.6 KB · Views: 5
Last edited:
Nice build.
I am technically challenged with little experience but would it help if the heatsink are inverted as shown in the pic ? This way the air flow around the resistor would not be obstracted (Which would be dissipating maximum heat) and black heat sink fins would also get some air. Also shouldn't the star ground be cleaned off powder coating ? In my lm3886 build I cleaned off the paint with electric drill with bit going through and the chuck scrapping off the paint.
kindly see three pic. below.
Regards
 

Attachments

  • lm3886 .jpg
    lm3886 .jpg
    68.4 KB · Views: 15
  • Ground .jpg
    Ground .jpg
    90.5 KB · Views: 14
  • inverted HS.jpg
    inverted HS.jpg
    69.1 KB · Views: 15
Nice build.
I am technically challenged with little experience but would it help if the heatsink are inverted as shown in the pic ? This way the air flow around the resistor would not be obstracted (Which would be dissipating maximum heat) and black heat sink fins would also get some air. Also shouldn't the star ground be cleaned off powder coating ? In my lm3886 build I cleaned off the paint with electric drill with bit going through and the chuck scrapping off the paint.
kindly see three pic. below.
Regards


Great comments, good thinking.

Yes, the mini heatsink would cool a bit better if 180 degree reversed.

The reason why it is not reversed is that room is limited. Internal chassis space is at a premium.

We often run 12 AWG Mil Spec power supply wiring - which would interfere if the heat sink were reversed as suggested

The huge 5 uF ( high-peak- amperage ) GTO bypass caps typically use double 12 AWG wire runs. This requires routing space. Parts and their wiring are placed and routed - in three dimensions.

Consider this : the resistor is operating at only 3.38 Watts continuous, and the 50 Watt body-sized ARCOL HS has a maximum " no heatsink / free air " rating of 14 Watts. Any heatsink, mounted any way, will be a help - to have the resistor operate unstressed.

Simultaneously :
1) the new assembly is holding the resistor precisely ( 3-D wise ) where it was deemed to be best located,
2) and at a 13 degree angle from vertical, for better cooling,
3) using an already- existing chassis bolt hole. These were all factors that determined the simple-looking design.

You are correct about the star ground bolt.

We intend to bevel the top of the chassis, use a large bolt for decent surface area - bare metal contact. Yes, scraping off the powder coating internally, ( inside the chassis ) around the bolt hole, is also planned.. Somewhere in the build process, we have to do the powder coating, and continue with the build, while trying to do minimum damage to the applied finish.

Thank you Hiten ............ for your excellent and thoughtful comments. Appreciated.

Jeff
 
Last edited:
11-25-2021 ................... ' EVER see a #4 WIRE-SIZE RING TERMINAL inside a TUBE AMP ????

C2 ( 80 uF , WIMA film, photographed below ) gets bypassed with a high current 5 uF " GTO " film capacitor. It was decided to use the positive end of this GTO ( round gray colored ) capacitor's large terminal, to feed both the amp's output transformers, the B+ supply for the front end, and the B+ for the G2 supply.

That is
FIVE 12 AWG ( orange colored ) wires, terminating on the positive end of the " C2 's" GTO cap. ( 1st photo ).

( You might recall from earlier in this thread, GTO caps are unique in audio . GTOs DEFINE the precise leading edge of music's transients, unlike all other caps we are aware of. It is rated at 1,500 Amperes - peak instantaneous. One can readily spot the GTO's hefty terminal design, which supports the current delivery possibilities of this unique capacitor. )

To attach five 12 AWG Mil Spec ( m22759/11/12 ) B+ wires, to the positive end of this second GTO cap, it was decided to employ a #4 WIRE RING TERMINAL.

Using this #4 RING terminal in a stock manner, there will be inadequate room to get a 13 mm wrench onto the brass bolt, to tighten the ring terminal to the cap. By reversing the ring terminal's wire barrel 180 degrees ( 3rd photo ) , the
FIVE 12 gauge wires are less in the way. By bending the ring terminal's " lip " as shown for clearance, a wrench to secure the RING to the cap - can be employed .

Likely, this is the first use ever of a number four wire size ring terminal, inside a tube amplifier design ! It should work OK.


Note" C1 " first main WIMA capacitor, 30 uF not shown / not installed yet.

005 edited 2.jpg


017.jpg

012.JPG

018.jpg

We really like directly feeding the B+ to (1 ) the output transformers, (2) the front end, and (3) to G2, ........from this GTO cap. Lead lengths are short. The GTO cap is small ( 5 uF ) and nimble, with the highest peak-current-delivery. It uniquely resolves and defines music's playback on our favored efficient, large-radiating-area speakers.

Thank you for looking.

Jeff
 
Last edited:
11-25-2019 ................... ' EVER see a #4 WIRE-SIZE RING TERMINAL inside a TUBE AMP ????

C2 ( 80 uF , WIMA film, photographed below ) gets bypassed with a high current 5 uF " GTO " film capacitor. It was decided to use the positive end of this GTO ( round gray colored ) capacitor's large terminal, to feed both the amp's output transformers, the B+ supply for the front end, and the B+ for the G2 supply.

That is
FIVE 12 AWG ( orange colored ) wires, terminating on the positive end of the " C2 's" GTO cap. ( 1st photo ).

( You might recall from earlier in this thread, GTO caps are unique in audio . GTOs DEFINE the precise leading edge of music's transients, unlike all other caps we are aware of. It is rated at 1,500 Amperes - peak instantaneous. One can readily spot the GTO's hefty terminal design, which supports the current delivery possibilities of this unique capacitor. )

To attach five 12 AWG Mil Spec ( m22759/11/12 ) B+ wires, to the positive end of this second GTO cap, it was decided to employ a #4 WIRE RING TERMINAL.

Using this #4 RING terminal in a stock manner, there will be inadequate room to get a 13 mm wrench onto the brass bolt, to tighten the ring terminal to the cap. By reversing the ring terminal's wire barrel 180 degrees ( 3rd photo ) , the
FIVE 12 gauge wires are less in the way. By bending the ring terminal's " lip " as shown for clearance, a wrench to secure the RING to the cap - can be employed .

Likely, this is the first use ever of a number four wire size ring terminal, inside a tube amplifier design ! It should work OK.


Note" C1 " first main WIMA capacitor, 30 uF not shown / not installed yet.

View attachment 64589


View attachment 64590

View attachment 64591

View attachment 64592

We really like directly feeding the B+ to (1 ) the output transformers, (2) the front end, and (3) to G2, ........from this GTO cap. Lead lengths are short. The GTO cap is small ( 5 uF ) and nimble, with the highest peak-current-delivery. It uniquely resolves and defines music's playback on our favored efficient, large-radiating-area speakers.

Thank you for looking.

Jeff
I too have used a similar tinned copper ring terminal but with steel bolts for my GTOs. I was not able to source brass bolts locally and hence settled for stainless steel with 12AWG mill spec wires.
 
Consider this : the resistor is operating at only 3.38 Watts continuous, and the 50 Watt body-sized ARCOL HS has a maximum " no heatsink / free air " rating of 14 Watts. Any heatsink, mounted any way, will be a help - to have the resistor operate unstressed.
Yes I understand the resistor itself is sufficient heatsink is only for additional help. Thanks for sharing your build.
regds.
 
11-29-2021 ......................... Independent USER Comments ..............on GTO CAPACITORS......

People are seeing photos and reading about GTO capacitors in this thread. Likely, it is a brand new component type to most, and you are getting newly-exposed to this.

We discovered this part, as applied to audio, back in about 2016 or 2017. We applied it to audio before anyone we know of - or since heard of, and discovered it to be uniquely audio-beneficial ......in speaker crossovers and in audio amplifiers.

Our GTO use is always as a " 5 uF bypass cap " in speaker crossovers and amps.

Inside amps we apply GTOs in the filter path, bypassing C1 AND C2, - the B+ filter path leading to the finals. Precisely as shown in this amp-building thread. See .... https://www.hifivision.com/threads/...tly-coupled-audio-amplifier.82963/post-923306

To confirm this GTO performance we ( " JDM " below ) is providing, a recent independent testimony. A second opinion of what the GTO cap does in audio systems.. A GTO is unique. Here we are :


GTO Boli436.JPG


A couple of comments.

1) We do not know who this Boli46 person ( wring above ) is.

2) Since he ( or she ) runs an ALTEC A5, a very large radiating / efficient / professional movie theatre speaker system, I would imagine this is a very advanced and very sophisticated audiophile.

3) To our knowledge, only about four or five people in the audio world are presently using and hearing GTO caps in their audio equipment, as bypasses.

One other prolific amplifier builder, a musician based in St. Louis , Missouri / USA heard it and converted all his home's ALTEC speaker crossovers and his best amp, to GTOs. He instantly " heard it", understood what it does. Like Boli46, he "flipped-out" at the unique result, the gain.

4) In all of India, likely only Forum Member Harri Iyer is hearing GTO caps. Hari is a great guy. His DC KT88 SE amps are the FIRST tube amps he has ever scratch built. As a tube amp building " newbie ", we provided Hari with the circuit, the guidance, and the four GTO caps for his monoblocks, back in 2020.

5) The purpose of this post is to encourage casual HFV readers to become ACTIVE DIY builders, and to discover what a 5 uF GTO will uniquely do ............for one's listening enjoyment.

It defines the leading edge of transients precisely , unlike anything else in our opinion, ever heard. 1.500 Amperes rated, peak instantaneous.

Have fun listening.

Jeff


* * * * * * * * * * * * * * * * * ** * * * * * * * * * * * * * * * * * * * * * * ** * * * * * * *

PS, I found a second comment by 'Boli46" regarding " Oil Caps, Polyprops, DC Link s( hopefully 4 PINS !! ) and GTOs, made in 2021. " Next step up the ladder ".

Boli2.JPG

Thanks for looking. You DIYers have something to gain here.
 
Last edited:
11-29-2021 ................... mini PHOTO UPDATE

Power Supply, .............about 80 percent done.

001 edited.jpg


.008 ok snip.jpg


012 OK.jpg


Notice please, ( above and below photos ) the ultra short lead lengths often seen. Less than three inches length between the 80 uF WIMA 4 pin " C2 " and it's associated 5 uF GTO bypass cap, using a ( previously - described ) 4 AWG ring terminal . This GTO cap's negative lead is also positioned quite close to the chassis' centrally positioned star ground. Good !


014 ok.jpg


On each side of the two WIMA 50 uF "C3" Caps we used two of the four output transformer mounting bolts ( used for mounting each Softone RW-20 R-Core ), and we attached "Keystone's" tallest " board brackets". Keystone part number 1569.

The chassis is 4 inches deep, up from 3.5 inches. Next build will be 4.125 inches. This allows for vertical parts placement and parts access. Such a spacious depth helps with parts and wiring layout in all three dimensions.

Thank you again, for looking. More to do for the power supply. Use GE Silicone 2, to install into chassis and wire in " C1 " next.

Jeff


.........................................Keystone Board Brackets SNIP.JPG
 
Last edited:
12-05-2021

With a Direct Coupled tube amp, the circuit design goal is to totally eliminate a series " coupling capacitor " from the circuit's path, between the Input and Output tube stages. ( See the yellow highlighted horizontal line, the direct couple in the " drlowmu moniker ", to the left )

This means the entire second stage is elevated in voltage, by two things :

1) The Plate voltage of the first tube, of the Input stage, ( estimated at 210 VDC ) and

2) The amount of self- bias voltage needed to bias the Output tube. ( estimated at 15 VDC ).

This self- bias Cathode Resistor, fulfills the addition of 1) and 2) voltages mentioned above ( a total of 225 VDC ). It is always a large ( hopefully GOOD sounding ) POWER resistor.

This thread's DCed 6005 Output tube is biased conservatively at 32 mA. , times the targeted Cathode voltage desired, 225 VDC .

This is a continuous Cathode Resistor power dissipation of 7.2 Watts ( .032 A. times 225 VDC ), per Output tube. This totals 14.4 Watts of power dissipation for both channels. ( One SE tube per channel ).

The entire DC amplifier is " stacked " or elevated upon this critical Cathode Resistor , in a DC two-stage tube amplifier.

- - - - - - - - - - - - - - - - - - - - - - - - - - - -

Caddock manufactures a high quality MP820 " Kool Tab " power film resistor Series, rated 20 Watts maximum dissipation if on a proper heat sink. This 20 Watt - rated resistor should be able to handle 7.2 Watts continuous.

Here below, are three photos of a planned implementation. For this thread's stereo amp, it requires two Caddock MP820s, two heatsinks, two Keystone Board Brackets, two Keystone 817 terminals, and four 2 inch long 4-40 stainless steel bolts and nuts.

This amp's chassis has lazer cut rows of holes, both below and above the heat sink's intended position inside the amp, ..........for natural convection airflow and cooling.

Thanks for looking. Such a output tube Cathode Resistor solution should be both high in performance and long- term reliable.


010.JPG005.JPG002.JPG

Jeff
 
Last edited:
12- 07- 2021...............................MINI UPDATE ...... with PHOTOS

First, today we finalized the grounding of the circuit's second '"GTO" capacitor. ( Pictured right below , green heavy wire ). Recall, this " GTO" cap can deliver 1.500 Amperes of peak instantaneous current.

So, our amp's "GTO" gets double runs of 12 AWG M22759/11 Military Spec wire, and a very nice short wire path to the amp's adjacent 8-32 Single STAR- ground brass bolt.


004 EDITED.jpg


The POWER SUPPLY section is 99% finished - and working OK.

It was tested ( on a Variac, by applying Power to it for the first time ). Next , we were curious to see how the various Multiple Film Cap B+ MODULES would fit when bolted inside the chassis. WE needed to see that, before wiring the AUDIO circuit. Six of the eight Modules are bolted in, so as to temporarily view it all.


Below is the FIRST view.

In such a stereo amp, there is not much space, about 1/4 of an inch, between Modules !!

This first view " tells us " the audio circuit needs to be built initially, then the eight Modules can be wired in above it all. NOT an easy job at all. Mono amps are SO MUCH NICER to build.........besides performing a bit better sonically.

The remainder of this build we expect will be tedious, and a challenge .

NOTICE how SHORT we have designed the wire lengths to be !! All part of designing........the lay out.


039.JPG

Looking ( above ) at the top most " GTO " cap, we can see how it has purposefully been given a placement priority, to feed this circuit dynamically. The Green wires are the negative terminal - heavy and close as possible - to star ground. On the other side of the GTO, ( the " positive B+ side ) we see a " star " Orange wire ( 12 AWG Mil Spec ) of five leads, ( 1 in, 5 out for the B+ ). It is feeding critical sections of the amp.

We want this power supply and amp to " boggie "., be FUN to hear all the time.

In each case ( photo below ) 15 uF is the main film cap value used,. All else we see is some bypassing of the main 900 VDC four Pin WIMA 15 uF capacitor. A very good cap. Industrially priced.


038.JPG

Pictured above is a three inch brass standoff - on the right side, ( Orange Arrow ). But amp will use 2 1/2 inch standoffs, not 3 inches in length.


041.JPG


045.JPG

We will stare at this assembly for at least one more day, with these six MODULES temporarily bolted in, and hopefully figure out how to decently proceed.

Firing up the main power supply for the very first time a couple days ago was exciting !!

Well, thank you for looking !

Jeff
 

Attachments

  • 043.JPG
    043.JPG
    401.1 KB · Views: 13
Last edited:
12-09-2021 ........ Mini REPORT

Started on the AUDIO section of amplifier today ( as opposed to the Power Supply ). Positioned two Keystone 817 terminals and laid in the filament wiring for the Input and Output tubes.

Notice please, the purposely planned-for short connecting wire distances : between the RCA Input jack, the Input tube, the Output tube, and even the Cardas Speaker posts ( white washers ) on the left side.

This is simply basic good design lay out, and importantly..........., it is seldom seen.

It is " better performance for free. " BUT, you have to be thoughtful of it, in laying-out the design.

RANT : Think about this : 98% of the amps you see, will have their RCA Input jacks placed in the rear vertical chassis panel of the amp - probably to hide the interconnect wires and have a nice " clean look ". This makes absolutely NO electronic design sense at all !!

Two avoidable negatives occur with rear chassis entry : The wire lead length is greatly increased and the wires have to run past miscellaneous under-chassis FIELDS inside the electronic unit.

Think some about it, this is the input signal to the equipment. It is the lowest level signal in the entire unit, subject to degrade the most and the easiest. !!!

Now notice below please, that the spacing ( RCA Input jack to Input tube's control grid ) .........is only about two inches. :)


004.JPG

Also observe above, how the amplifier's RCA Input jacks were attached first to that plexiglass mounting. They have now become double-insulated - from eddy currents that flows in the chassis. ( " Double " is the plexiglass AND the red and white insulating washers ).

Pictured below we can see two small black cylindrical " Hash Chokes " or small inductors.

They are placed between the newly added Keystone 817 terminal strip, and and are connected to Pins # 4 and #5 ( the filament Pins ) of the Input tube's tube socket. These are small inductors serve to " clean up " the AC waveform ( a 60 cycle sine wave ) and the voltage that powers the filament or heating of the vacuum tube.

Only one manufacturer - in all of tube audio design - does this to the best of our knowledge ! I am simply copying the idea from my audio Mentor and friend, Dennis Fraker of Serious Stereo, with his embellishment.

The description above and following photo, is likely an introduction to this idea :


014.JPG

The pictured large ( 2.5 inch long ) nickel plated Brass Standoff to the right, is simply there to show us a distance that the Final Filter Modules will protrude from the side wall. We can not be positioning parts, and then have them collide / interfere with each other, on final assembly !!

Lots more work to do, over this weekend.

Thank you so much, for viewing.

Jeff
 
Last edited:
Status
Not open for further replies.
Back
Top