GloTone Cockeyed Monkey - A Directly Coupled SET

FlaCharlie

Member
Joined
Jun 22, 2023
Messages
22
Points
18
Location
Gainesville, FL
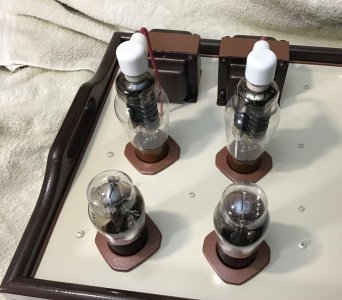
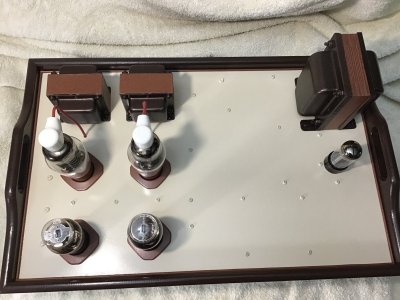
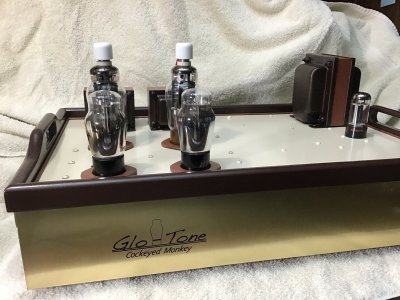
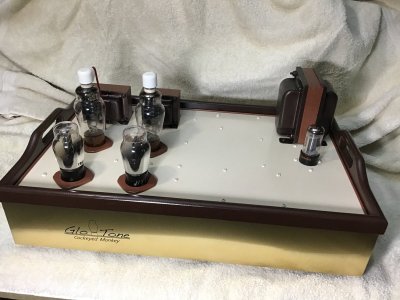
So here's my latest DIY amp, the Cockeyed Monkey . . .
*IMG_0078.jpg

*IMG_0089.jpg

*IMG_0115.jpg

I always like to try some things that are "new to me" in my builds and this one has several elements that I've been meaning to try for a while.

I had never built a directly coupled amp so I figured it was time. I decided on using this particular design after reading a comment by someone who had built many 300B amps and considered this circuit to be the best he had ever tried. Although everyone's preferences are different, I figured it must be pretty decent. It's the popular "Monkey" design, variations of which are also known as Direct Reactance Drive (DRD) and the Free Lunch.

My technical understanding of it is quite limited as I'm mostly a copy and paste builder not an engineer or designer. If you're interested in the history and technical aspects of this circuit there is plenty of information online. It's a proven design that's been popular with DIY builders for over 20 years now and has been used with many different types of tubes. Some claim that the design actually originated with Western Electric.

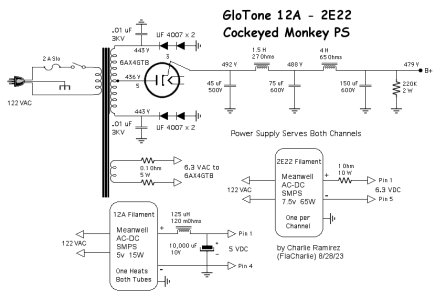
The power supply is a design that was promoted by Eli Duttman who used to post over on Audio Asylum and DIY Audio. Since the diodes are arranged in an uncommon manner he called it the Cockeyed Bridge. I love to meander down the "road less travelled".

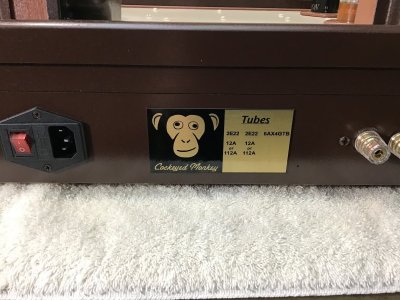
In this version SS diodes handle the rectification and an indirectly heated rectifier tube is used purely as a soft start device. I'm using a common TV damper diode, the 6AX4GTB. If you've ever come across a pile of old TV tubes there are likely some damper diodes in there somewhere. I had accumulated several over the years.

Damper diodes have a reputation for being tough and reliable. They are similar to the 5AR4 in that they have low voltage drops and ramp up voltage very slowly. They are also cheap. The big dealers list NOS 6AX4s for $3 to $4.

Obviously, this combination of circuits had to be called the Cockeyed Monkey.


More details, pics and schematics to follow . . .
 
Thanks folks . . . here's more pics . . . .

*IMG_0091.jpg

*IMG_0103.jpg

Continuing with the "new to me" aspects of this build . . .

I've never built anything with any of the tubes used here. I'm using the 12A as a driver tube. I first tried it when I was breadboarding my last amp, the Nuance iSET.


One thing I've learned from this build is that the sound of a particular tube type can be quite different when used in a different circuit.

I auditioned numerous DHT (directly heated triode) input tubes during the Nuance iSET's breadboard phase and in that circuit the 12A was good but nothing special. I ended up using the 26 in that amp. I went through the same process during this amp's breadboard phase. I must have tried a dozen or more different types, some of which were indirectly heated and some directly heated. Surprisingly, the 26 sounded totally unexciting here. I even tried using the same pairs of 26s (ST and globe) I use in the Nuance but the results were the same.

This amp would not sound nearly as good if I had simply relied on my experience with the Nuance and built it with the 26. Turns out my pre-conceived notion of how a 26 sounds didn't apply when using a different circuit with a different combination of tubes.

That's why I like to breadboard a design instead of just jumping in and building it. Breadboarding can save a lot of grief and you don't end up wasting a lot of time and resources building something that, in theory, "should have worked".

In this circuit the 12A had a rich, full sound that brought out the timbres and textures of the instruments with plenty of detail. I also could have been happy with the 49, which sounded a bit more detailed but leaner overall. Perhaps I'll use it in another build.

The output tube, like the 12A, is also directly heated. Using all directly heated tubes in the signal path is another first for me.

One of the advantages of DIY is that you're not limited to using tubes that are in current production. I try to avoid types that are well known and trendy whenever possible. I prefer "under the radar" old production tubes that were produced during a time when "quality control" actually meant something. Others may choose a different course, which is understandable, but the "under the radar" / "road less travelled" approach appeals to me. The total cost of all tubes used in this amp was ~$120.

For this build I chose the HY1269 for the output tube. The HY1269 (and its cousin the HY69) is a directly heated transmitting pentode that I wired in triode. I had picked up a couple a while back and I really liked them.

I usually buy several spares, particularly for output tubes. But when I started looking around I only found one on eBay. I kept looking for several months but I just wasn't finding any. Dealers listed them and they were cheap but nobody actually had any in stock. I don't care if a tube is not available in large quantities but being relatively unobtainable is a red flag.

So I switched to another inexpensive "under the radar" directly heated transmitting pentode, the 2E22. I had picked up some of these a while back too and I was easily able to find more. If you're patient, prices in the $25 to $30 range for NOS are not uncommon.

I'm running them in triode, which I preferred over UL, though I admit that I didn't experiment with feedback in UL. I found that they sounded essentially the same as the HY1269s, perhaps even a bit better. This reinforced my impression that input / driver tubes tend to affect the sound signature of an amp more than the output tubes.

*IMG_0097.jpg

I have no way to measure power output but I estimate that it's ~7 wpc. That's based on a comment by someone who was running them, also in triode, at a dissipation of 24w and was getting 8 wpc. Since I'm running them at 22w of dissipation I figure I'm getting 7 wpc. So that's at least twice the power of a typical 2A3 amp and about the same as a 300B. Whatever it is, it's more than adequate for my needs. The maximum plate dissipation is 30w so the tubes should last a very long time.

More to come . . . including under chassis pics and schematics . . . .
 
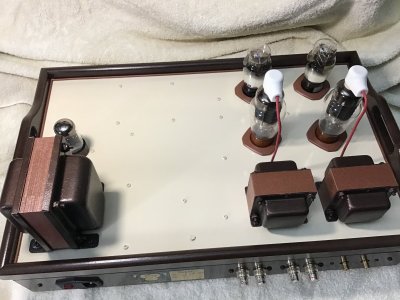
Once again, I'm using a wooden chassis. For my Boogie Factor 1626 preamp I used a bamboo cutlery box and for the Nuance it was a wooden drawer. Here I'm using a bamboo serving tray that I found at Aldi for the top. The sides are leftover pieces of wooden flooring that I found at my favorite local junk store, the Repurpose Project. The trim rings on the tubes are plastic curtain grommets from a thrift store.

Transferring a breadboarded circuit into a chassis is my least favorite aspect of DIY. The layout process is not so bad, just tedious. My chassis fabrication skills are not the best, though, so it's a bit rough around the edges. But it's certainly sturdy enough and the built in handles are convenient.

I went with a rather subdued color scheme, especially compared to the art deco inspired Nuance. The top deck is the same, warm, Navajo White I used on the Nuance. The rest is somewhat simian - brown with copper highlights.

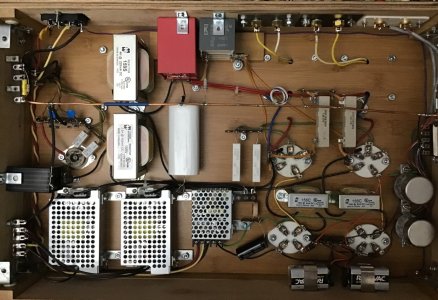
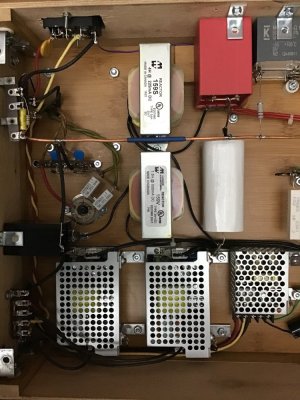
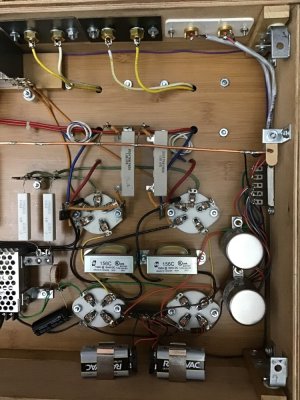
Here's some under chassis pics and schematics . . . .

*IMG_0021.jpg

*IMG_0026.jpg

*IMG_0023.jpg

C Monkey PS.jpg

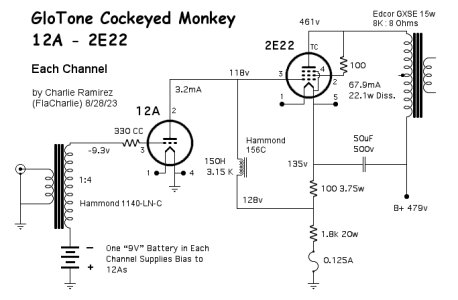
C Monkey SUT-12A-2E22.jpg

Another "new to me" element in this build is the use of Meanwell SMPS (switch mode power supplies) to heat the 12As and 2E22s. I had used one on the Nuance breadboard to heat the 26s with DC but I used a conventional DC supply when I built the amp.

When using a SMPS it's important to de-rate the current draw spec considerably. On the Nuance breadboard I was running 2.1A of filaments on a 3A rated Meanwell and after ~8 months I started having some issues.

Here I'm using a single 5v 3A supply to heat the 12As whose filaments run on 5v and the pair only draw a total of 0.5A. As I did with the Nuance, the 12As are battery grid biased, which allows them to share a filament supply. One 7.5v 65w (8.67A) unit is used to heat each 2E22. Dropping resistors are used to reduce the voltage to 6.3v and each filament only requires 1.5A.

While inexpensive and convenient, SMPS are supposedly not the cleanest source of DC, though I have no way to measure except for my ears. I'm not a stickler for "ear to the tweeter" silence and with my ear to the tweeter I could only hear a very faint hiss so this didn't really bother me. And nothing was audible a couple of feet away.

Still, I decided to experiment with some additional filtration. I added a cap after the dropping resistor on one of the 6.3v supplies but it didn't sound much different than the unfiltered channel. Then I remembered that I had some hash chokes that I had bought, also on Eli Duttman's advice. So I added an LC filter on the 5v unit that supplies the 12As. This eliminated all the audible hiss. The amp is now dead silent, to the ear at least.

Another first for me is the use of input transformers. Andy Evans started using the Hammond 1140-LN-Cs "in reverse" (with their normal secondaries as primaries) as step-up transformers (SUTs). In such a configuration they provide a 1:4 step up. This allows DHT input tubes, which are low mu, to drive the output tubes more easily. This has been a huge step forward for him since he typically uses 2A3 output tubes which are relatively hard to drive. The 2E22 is easier to drive so the SUTs are not as critical here but they work very well.

This is also the first time I've built anything with the popular Edcor output transformers. I'm not a fan of their signature blue color so I've repainted them.

As is my custom, I like to build using re-purposed and recycled materials when possible.

The power transformer was rescued from the remains of a discarded monophonic Operadio "Phono Amp" that ran 6L6s in PP. It was chosen because it's the highest voltage scrounged PT I have. Use of a higher voltage PT would result in a bit more power output but there is more than enough power for my needs. I like to use what I've got in the parts bin whenever possible.

All the caps in the power supply are films, PS chokes are Hammonds as are the chokes that load the 12A plates.

It may not be the best looking amp that I've built but, fortunately, the sound is fantastic.

The detail, speed / immediacy is striking. I assume this is generally due to the direct coupling and more specifically to the Monkey circuit. Of course, the lack of coupling caps also makes the project less expensive - especially if one is fond of using boutique cap$. As the saying goes, "the best coupling cap is no coupling cap".

The bass is solid and deep, as you would expect with a SS rectification scheme, but with the added bonus of a slow start due to the damper diode. And the 12A / 2E22 combo produces a rich, natural and vibrant sound with plenty of detail. Timbres and textures from things like bowed bass and sax are amazing. Sometimes detail can be traced to an overemphasis on certain frequencies, typically upper mids. But the detail here sounds very smooth and wide range, so the clarity never comes across as "hyped up".

So, weird circuit? Check. Cheap oddball tubes? Check. Repurposed and recycled materials? Check. It all adds up to another successful GloTone build!

Special thanks to Palustris who posts on various forums for his encouragement and advice on the Monkey circuit, which he has also used. Also to Eli Duttman and Andy Evans for their contributions to the DIY community.
 
True spirit of DIY. Thanks for sharing. The assembly looks clean and spacious.
 
For excellent sound that won't break the bank, the 5 Star Award Winning Wharfedale Diamond 12.1 Bookshelf Speakers is the one to consider!
Back
Top