
I completed the build couple of weeks ago, only now I could find time to post the details.
First and foremost, my sincere thanks to Captain making this possible for many of us. For all his efforts right from informing us about this deal till the kit reached our home safely.
I opted to make the Floor stander with the same X-LS Encore bookshelf kit. I could find a link where Danny provided the diagram for the floor stander and I just followed that.
The entire pictures are available in google+ album at following url
https://plus.google.com/photos/107361765185238952016/albums/5790502229074411569?authkey=CI2uoL_qr7_reg
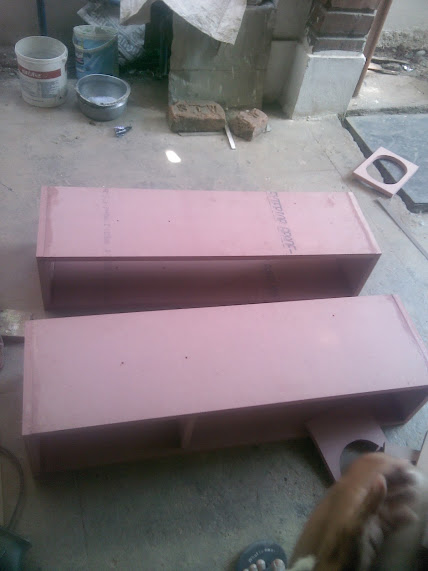
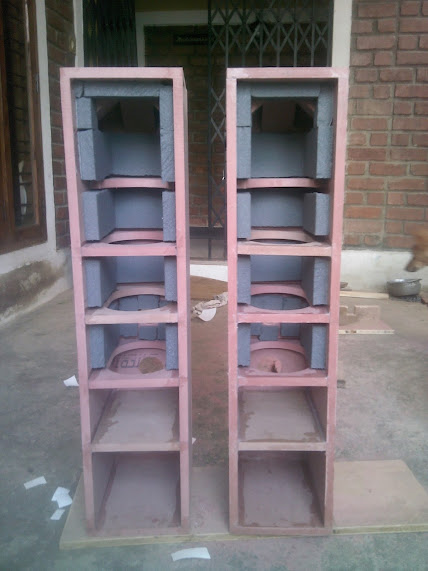
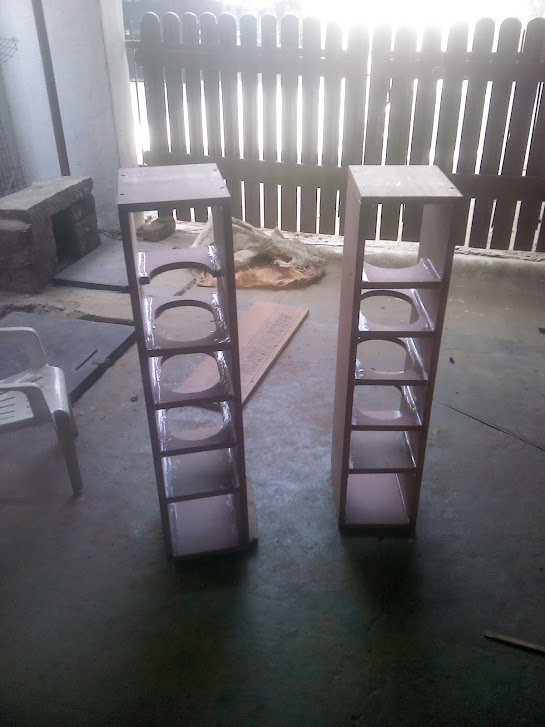
Build in Progress
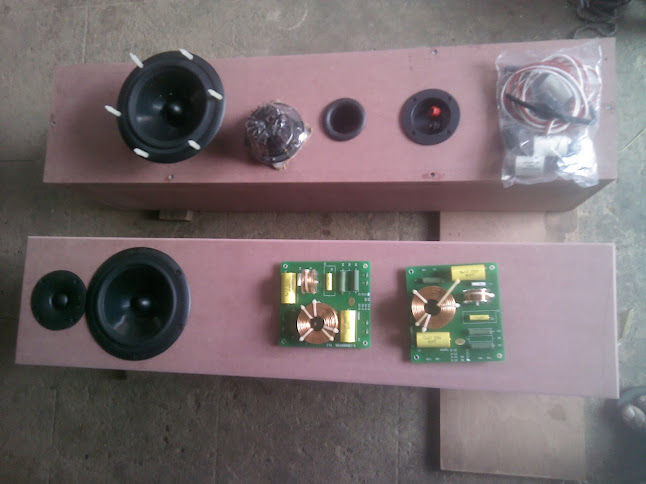
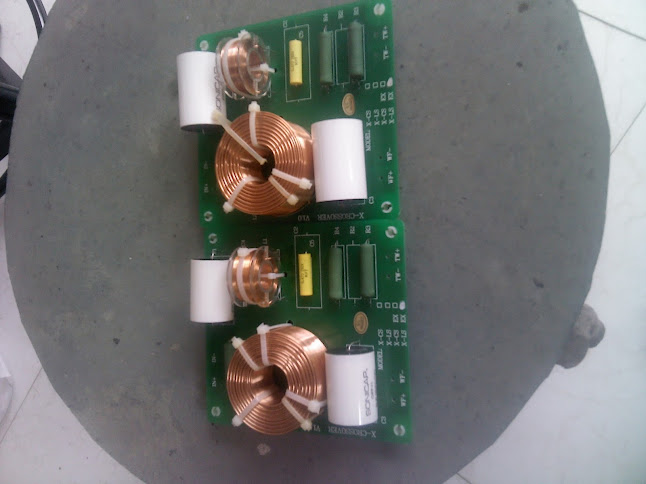
Original Kit and the X-over replaced with Sonicap
Used MDF 17mm boards as that was available. The next available was 25mm and that was too expensive for me. So decided to go with 17mm board
For me the search for a carpenter did not succeed. Asked few guys, but none of them were willing to take up the work when I told them it is a speaker cabinet. So the first thing I did is procuring few wood working tools like chisels, drill bits etc.
Found one workshop doing CNC cutting and got the MDF cut into sizes. Altogether 28 pieces for the 2 boxes including braces. Cost of MDF around Rs 3000+ and cutting cost around Rs 2500.
Box making. The boards were joined using screws and Fevicol SH.
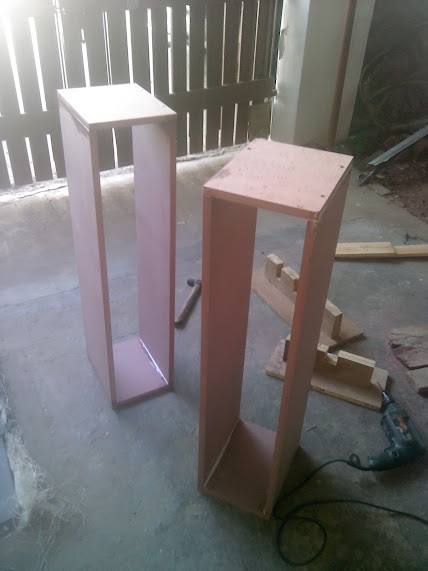


Making the box part took couple of weeks as I could work only on weekends.
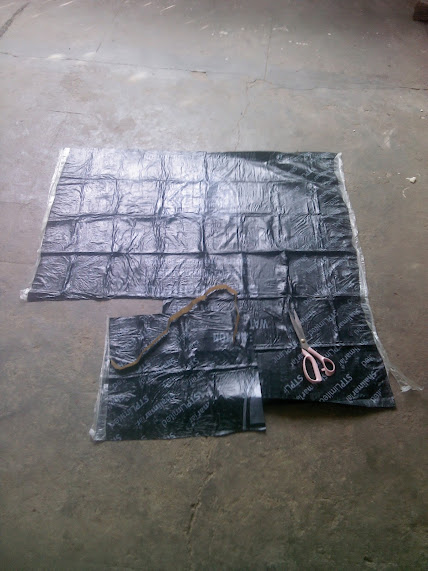
Once I started to paste the No-Rez, realised that I dont have sufficient quantity. I could source the Tar sheet instead from a local hardware shop and pasted those in the remaining areas.
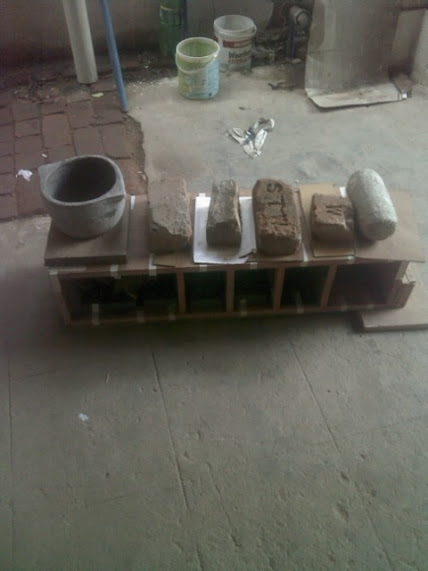
Rounding off the woofer hole at 45 degree was another challenge. The chisel I bought from the hardware shop was not that good. But with lot of effort, I could manage it.
Then the next hurdle was sourcing veneer sheets to paste on the box. Search for 1 or 2mm veneer did not succeed. Searching for veneer delayed the project by almost 2 months. Finally decided to go with the 3mm veneer which was available in every plywood shops.
Pasting veneer on MDF, Veneers pasted only on the 2 sides, top and bottom.
For finishing the veneer, used clear polish added with some coloring agent and then couple of TouchWood coating over it. The front and back panels were painted black.
The bottom cell was filled with dry sand. The speakers became quite heavy due to this.
Total project costed me around Rs 23000+
Kit + customs around 16k
MDF around 3k
CNC cutting around 2.5k
Other miscellaneous items such as Tar sheet, paint, screws, Veneer sheets, Recron etc around 2k
Final outcome
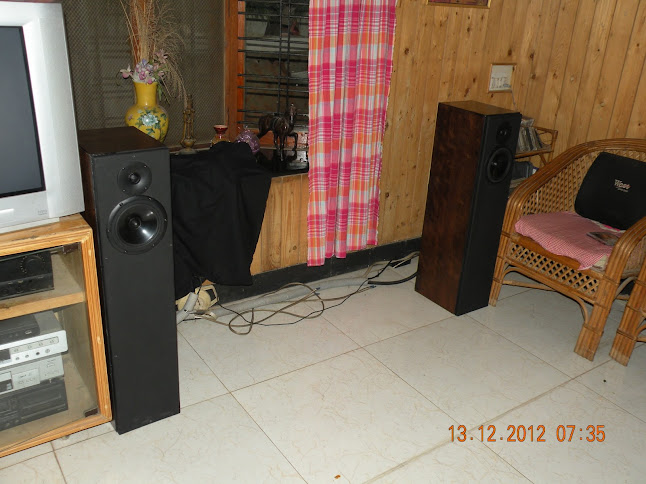
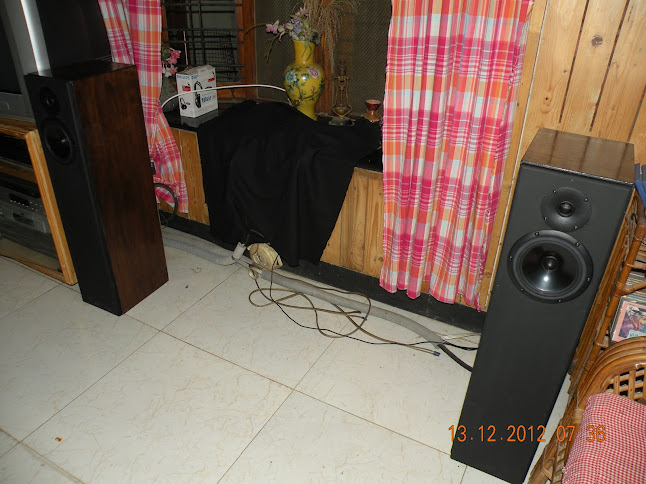
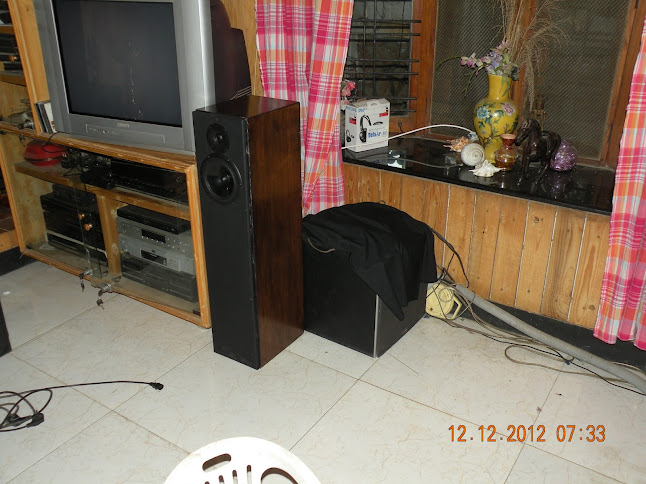
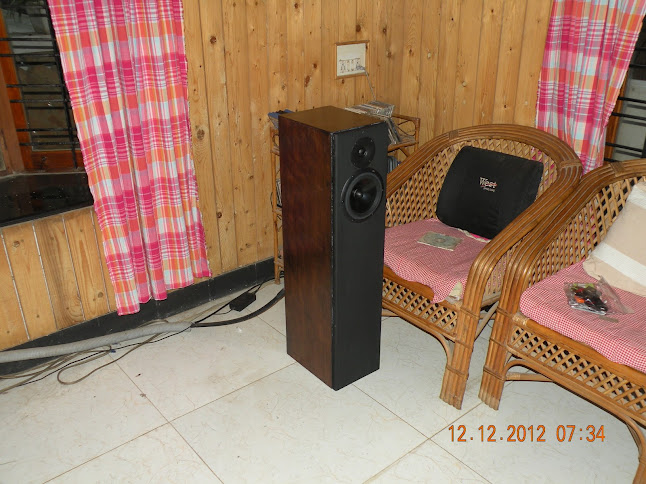
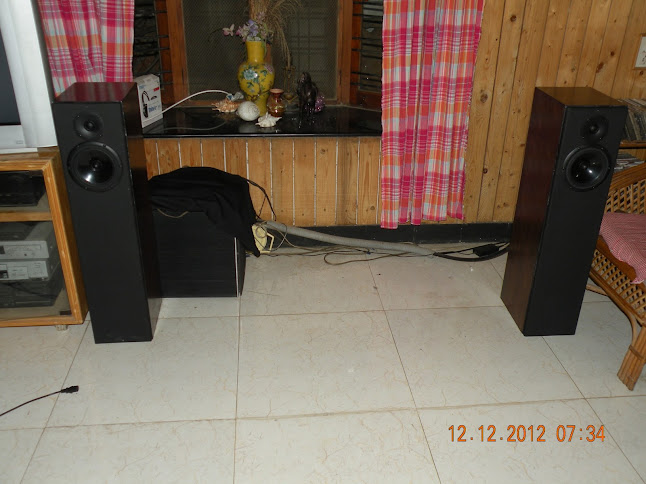
I find the performance much better than my old vintage polk audio monitor 5 series. The speakers are connected to Marantz PM-75 amp and source is Denon and Marantz CD players.
First and foremost, my sincere thanks to Captain making this possible for many of us. For all his efforts right from informing us about this deal till the kit reached our home safely.
I opted to make the Floor stander with the same X-LS Encore bookshelf kit. I could find a link where Danny provided the diagram for the floor stander and I just followed that.
The entire pictures are available in google+ album at following url
https://plus.google.com/photos/107361765185238952016/albums/5790502229074411569?authkey=CI2uoL_qr7_reg
Build in Progress
Original Kit and the X-over replaced with Sonicap
Used MDF 17mm boards as that was available. The next available was 25mm and that was too expensive for me. So decided to go with 17mm board
For me the search for a carpenter did not succeed. Asked few guys, but none of them were willing to take up the work when I told them it is a speaker cabinet. So the first thing I did is procuring few wood working tools like chisels, drill bits etc.
Found one workshop doing CNC cutting and got the MDF cut into sizes. Altogether 28 pieces for the 2 boxes including braces. Cost of MDF around Rs 3000+ and cutting cost around Rs 2500.
Box making. The boards were joined using screws and Fevicol SH.
Making the box part took couple of weeks as I could work only on weekends.
Once I started to paste the No-Rez, realised that I dont have sufficient quantity. I could source the Tar sheet instead from a local hardware shop and pasted those in the remaining areas.
Rounding off the woofer hole at 45 degree was another challenge. The chisel I bought from the hardware shop was not that good. But with lot of effort, I could manage it.
Then the next hurdle was sourcing veneer sheets to paste on the box. Search for 1 or 2mm veneer did not succeed. Searching for veneer delayed the project by almost 2 months. Finally decided to go with the 3mm veneer which was available in every plywood shops.
Pasting veneer on MDF, Veneers pasted only on the 2 sides, top and bottom.
For finishing the veneer, used clear polish added with some coloring agent and then couple of TouchWood coating over it. The front and back panels were painted black.
The bottom cell was filled with dry sand. The speakers became quite heavy due to this.
Total project costed me around Rs 23000+
Kit + customs around 16k
MDF around 3k
CNC cutting around 2.5k
Other miscellaneous items such as Tar sheet, paint, screws, Veneer sheets, Recron etc around 2k
Final outcome
I find the performance much better than my old vintage polk audio monitor 5 series. The speakers are connected to Marantz PM-75 amp and source is Denon and Marantz CD players.
Last edited:


")
")
