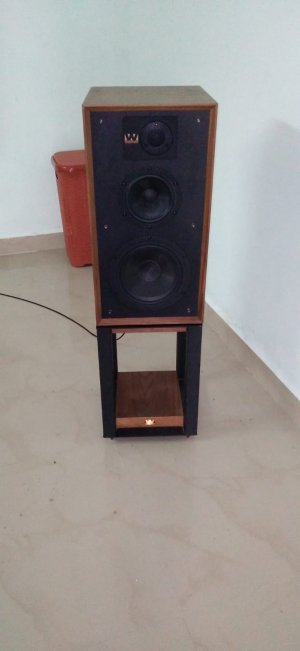
GR Research Wharfedale Linton 85 upgrade

@balavignesh002 Danny provides the frequencies where he has measured the dips and peaks . Before employing a hardware DSP, use a media player like JRIver or Foobar to EQ (use parametric) at software level by taking Danny's measurement as a base to hear how the sound changes.
Not sure if spending 800USD just on crossover upgrade without hearing the end result is worth it taking into consideration the price of the speakers.

Though it is not the best approach, but you can get a very good idea of how the sound changes.
I agree with this suggestion. Applying EQ via software DSP gives at least some vague idea about how spectral balance changes relatively and to identify if one likes the overall sound balance (off course it doesn't exactly convey the effect of a crossover change but still good to get some idea)
Stereophile also has given some measurements here:
But I don't know if they consider baffle step correction to their nearfield response so wouldn't trust anything below 400 Hz for EQ ing based on measurements. Even above 400 Hz, for this kind of speaker, I don't see much issues other than a slight dip between 1-2 kHz (probably caused by crossover?) and some early roll off around 14kHz or so.
Also most often I see Danny's measurements with about 25 dB dynamic range on 'y' axis of SPL plots (usually people consider 50 dB dynamic range), which tends to magnify things (issues or not).

Is there is reason you went with the Mundorf 20 watt resistors instead of the 5 or 10 watt? I'm just curious... I just started dabbling in crossover designs within the last year!
 
Before employing a hardware DSP, use a media player like JRIver or Foobar to EQ (use parametric) at software level by taking Danny's measurement as a base to hear how the sound changes.
Good idea... Will try it.
Not sure if spending 800USD
I can understand its big, but I will buy it only if I happen to go to USA or any of my friends coming from there. Its not going to happen immediately.

Also I do prefer to know the feedback from the users of the kit.
 
Is there is reason you went with the Mundorf 20 watt resistors instead of the 5 or 10 watt? I'm just curious... I just started dabbling in crossover designs within the last year!
To be honest, it was based upon HeadquarterAudios YouTube video, saying the Mundorf Supreme was very important. I think any of the mundorf resistors will be vastly better than stock sandcast. We are talking about nuanced differences here when changing a like for like resistor. It makes me feel better that I put the highest grade resistors in. Am I enjoying my music more? Not really, it was just as good before, but just different. Part of this process for me is just tinkering around with things, so my wife does not ask me to do something. LOL.
 
To be honest, it was based upon HeadquarterAudios YouTube video, saying the Mundorf Supreme was very important. I think any of the mundorf resistors will be vastly better than stock sandcast. We are talking about nuanced differences here when changing a like for like resistor. It makes me feel better that I put the highest grade resistors in. Am I enjoying my music more? Not really, it was just as good before, but just different. Part of this process for me is just tinkering around with things, so my wife does not ask me to do something. LOL.

Ah I watched his video don't think I remembered what he used since he was only doing the highs. Errrr I want to do this so bad, just priced out everything based on Jantzen Supreme and Mundorf classic 10 watt. I don't think I want to take another 10 watts away from the mids and highs. It's a little over $600 which is doable but I still hate to throw my new amp money away... Specially if it's doesn't keep the tonality, bring out a "little bit" sweeter nuance and maybe a little better imaging. I may order new crossover boards and build from scratch later, after I get my amps. I want to try those new Schiit TYR mono's when they are released and or pick up the Van Alstine M225 mono's as well so I'm so hesitant.
 
Update:
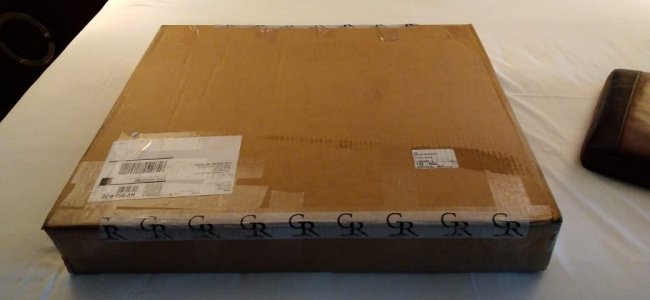
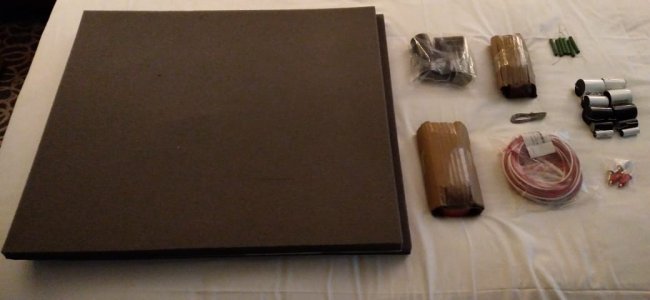
Got a chance to buy Crossover upgrade kit (full) for Wharfedale Linton from GR Research.
1. All Polypropylene caps,
2. All MOX resistors.
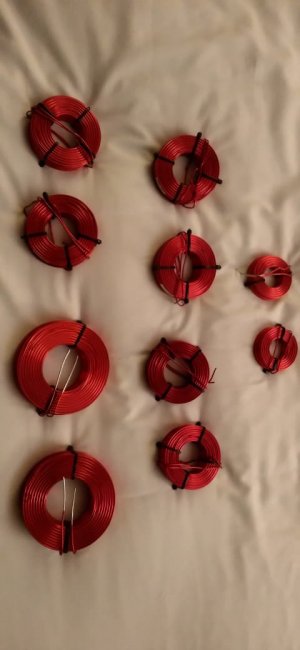
3. All Air-core inductors
4. New wires and tube connectors.
5. No RES Damping sheet.

WhatsApp Image 2022-08-31 at 08.29.51.jpeg

WhatsApp Image 2022-09-03 at 14.26.41.jpeg
WhatsApp Image 2022-09-03 at 14.31.34.jpeg

Inductors alone weights 3.6 KG. built on thick copper wires. should be 14 AWG. Will keep posted on the listening impressions.
 
Update:
Got a chance to buy Crossover upgrade kit (full) for Wharfedale Linton from GR Research.
1. All Polypropylene caps,
2. All MOX resistors.
3. All Air-core inductors
4. New wires and tube connectors.
5. No RES Damping sheet.

View attachment 71719

View attachment 71720
View attachment 71721

Inductors alone weights 3.6 KG. built on thick copper wires. should be 14 AWG. Will keep posted on the listening impressions.
Congratulation.
Could you please share me the value of each resistor and each capacitor please ?
 
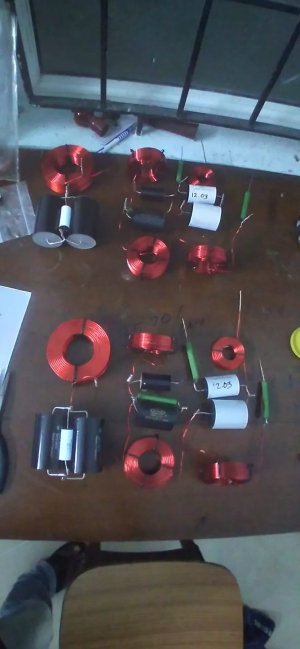
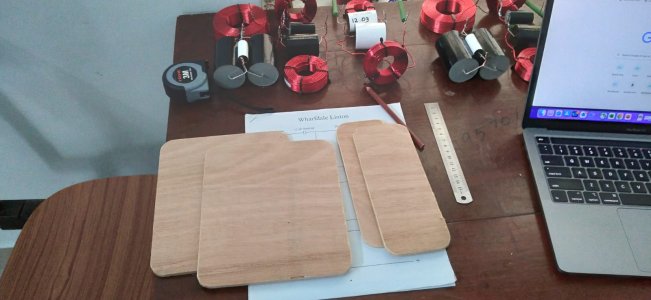
It's been a long work and time consuming job than what I really thought. After all the these days I made few progress on building this crossover and sharing the updates. To start with I have to decide on the layout on which these components to be put across, especially the orientation of inductors etc.

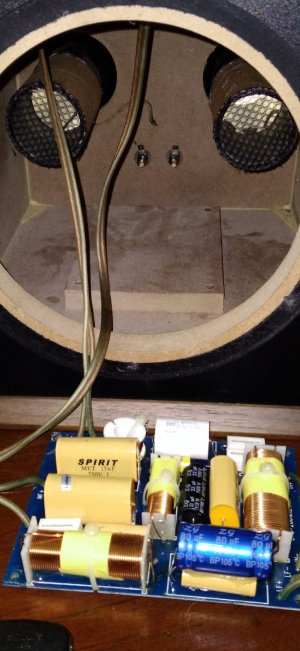
Finally put all the components together.

These Inductors are super heavy and has 14 AWG thickness its not really easy to twist it all together. I un-tinned all lead wires so that it will have copper to copper contact and twisted it all together.

WhatsApp Image 2022-09-11 at 18.32.48.jpeg

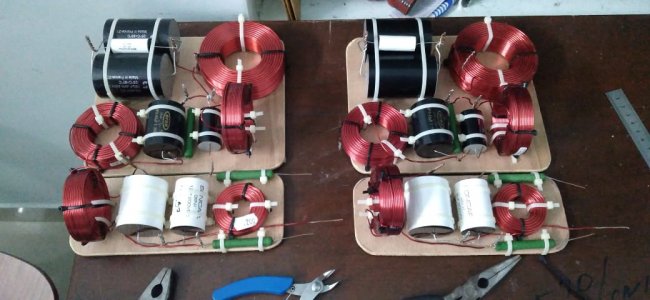
Next i may need a board to mount these and to get them in the speaker box it has to go through the woofer mounting hole. so made 2 boards 3 x 7.5 inches one for Tweeter circuit and 6 x 7.5 inches one for mid and low circuit. and used a sandpaper to smooth the edges.

WhatsApp Image 2022-09-14 at 09.30.05.jpeg

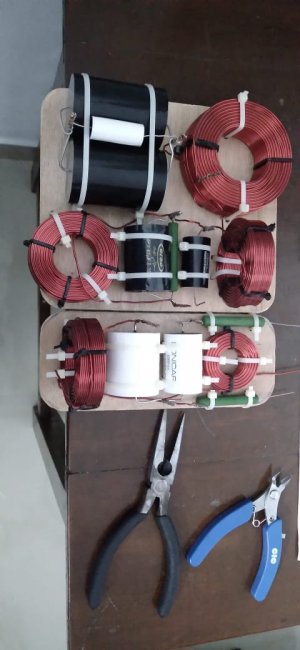
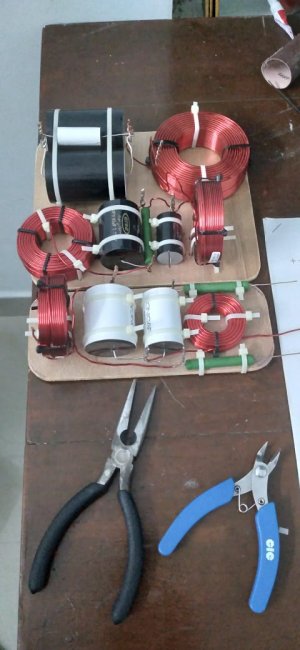
Mounted all the components by marking and drilling holes on the board and used zip tie to hold them on the board.

WhatsApp Image 2022-09-14 at 21.10.06.jpeg
WhatsApp Image 2022-09-14 at 21.11.26.jpeg

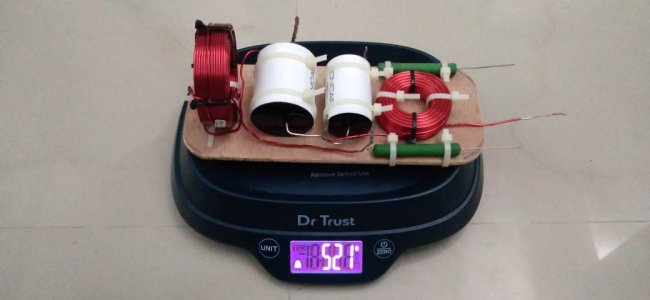
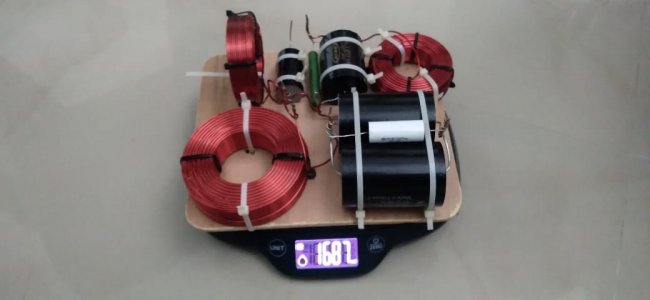
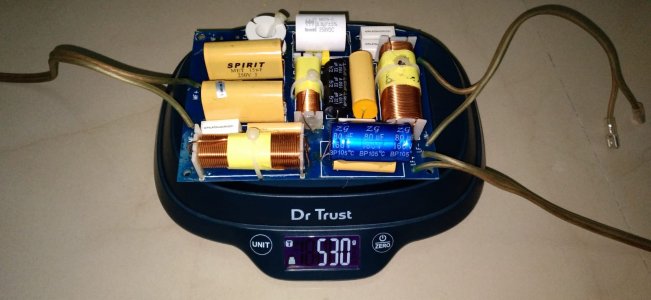
The crossover is very heavy. Tweeter circuit alone weighted 520 Grams and woofer circuit around 1680 grams totalling more than 2.2 Kgs. each speaker.

WhatsApp Image 2022-09-14 at 21.12.36.jpegWhatsApp Image 2022-09-14 at 21.12.37.jpeg

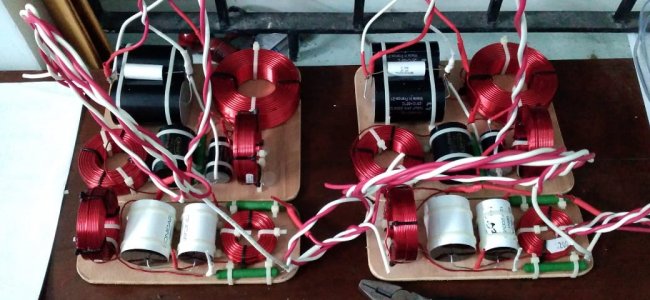
Finished building the other speaker crossover board too.

WhatsApp Image 2022-09-14 at 23.31.27.jpeg

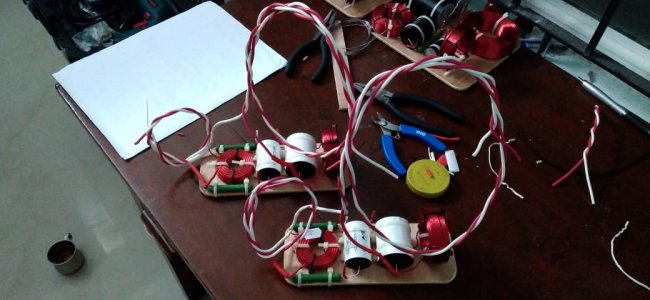
Thought of using the stock wires and found them of not so good quality as the negative leads are tinned one may be made of aluminium. Now i have to untwist the speaker terminating points and re-twist it all again.

The speaker hookup wires given by GR Research are single core with polyethylene sleeves, must be 14 AWG.

Now soldered all the joints with Mundrof 9% silver and 1 % gold soldering lead. I have to buy one 50w soldering gun as the 25w soldering gun what i have didn't help me with the big joints. post soldering just covered all the joints with heat shrink.

WhatsApp Image 2022-09-15 at 21.11.18.jpegWhatsApp Image 2022-09-17 at 00.21.15.jpeg
 
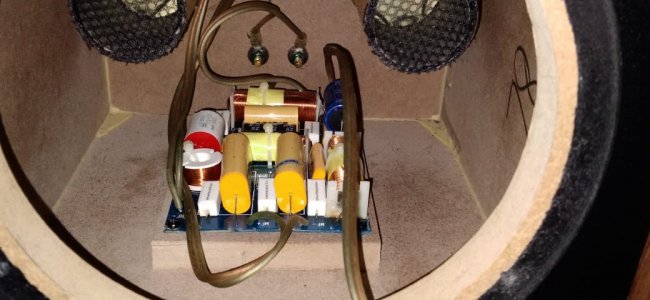
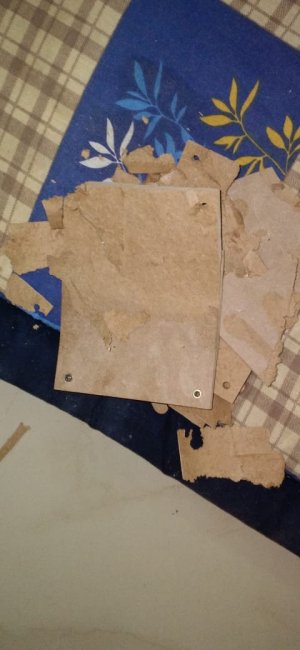
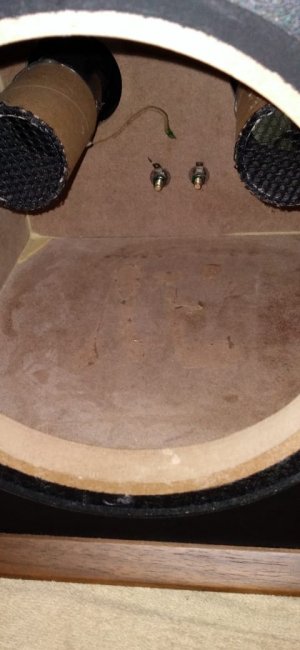
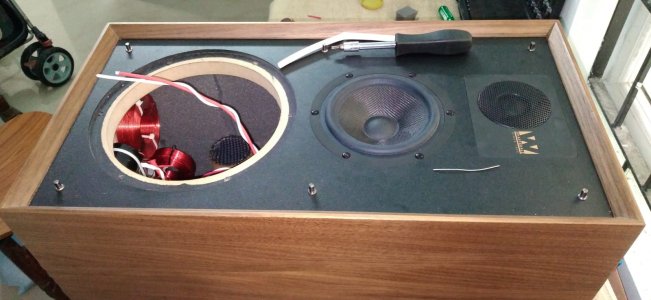
Sunday evening had some spare time. tried to open the speaker box and put the x-over boards inside. Post removing the speaker and polly stuffing inside Found the stock x-over mounted in a small MDF plank. I cannot mount the new x-overs on it.

WhatsApp Image 2022-09-19 at 17.48.35 (1).jpeg


It was pasted and nailed to enclosure.

WhatsApp Image 2022-09-19 at 17.48.36.jpeg

have to chisel them out.

WhatsApp Image 2022-09-19 at 18.25.29 (1).jpeg
WhatsApp Image 2022-09-19 at 18.25.29.jpeg

Stock x-over is only 500 grams. due to thin wires, iron core inductors and low value caps. The x-over tweeter circuit alone 500 grams.

WhatsApp Image 2022-09-19 at 18.25.28.jpeg

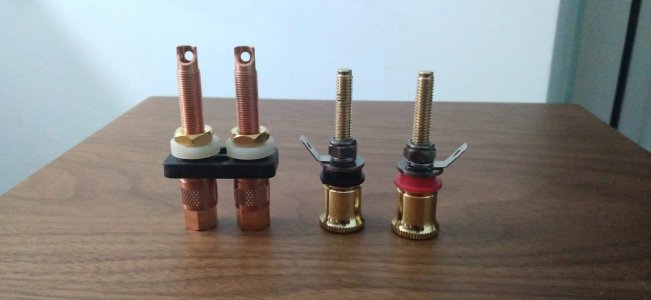
Noticed ferrous nut and washer on the binding post inner side and the terminal is clamped between them. Now the entire signal have to flow through ferrous nut to chrome plated alloy terminal for x-over.


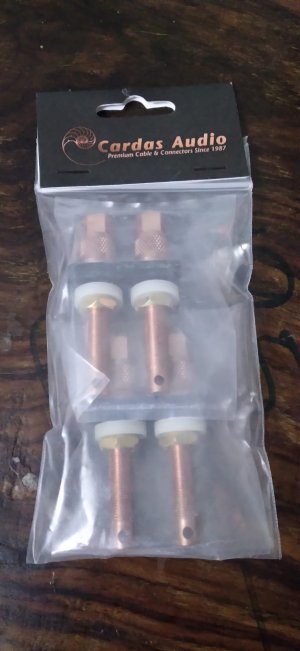
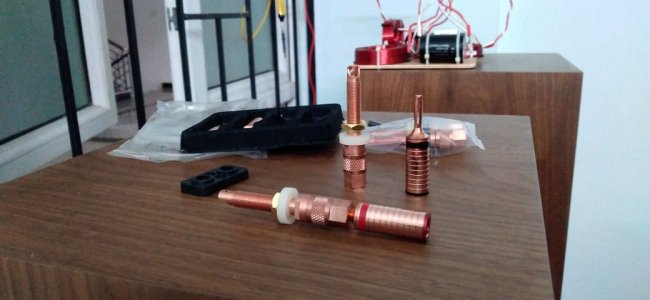
Now I thought of finding a brass or copper washer and nut to clamp the terminal. Then remembered of Cardas copper binding terminal which i bought 2 years back being unused. WhatsApp Image 2022-09-19 at 19.17.02.jpegWhatsApp Image 2022-09-19 at 17.51.44.jpeg

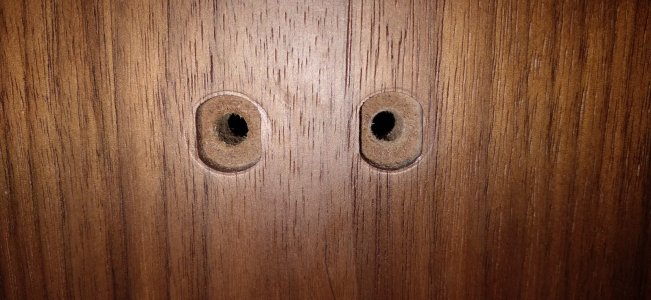
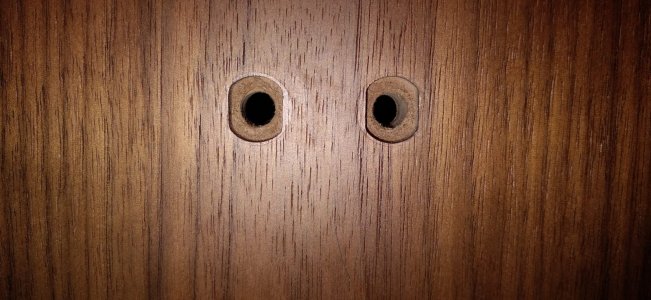
Stock holes for binding post may not be sufficient and the adapter of Cardas needs to be modified to fitted in to enclosure.

WhatsApp Image 2022-09-19 at 17.51.45 (2).jpeg

Carefully drilled through with a bigger drill bit and widened the port.

WhatsApp Image 2022-09-19 at 17.51.45 (3).jpeg

It's a perfect match with Yarbo Gaofei copper banana plugs which can be terminated on the existing speaker cable to have it all copper connectivity.

WhatsApp Image 2022-09-19 at 19.24.27.jpeg
 
Damping the enclosure:
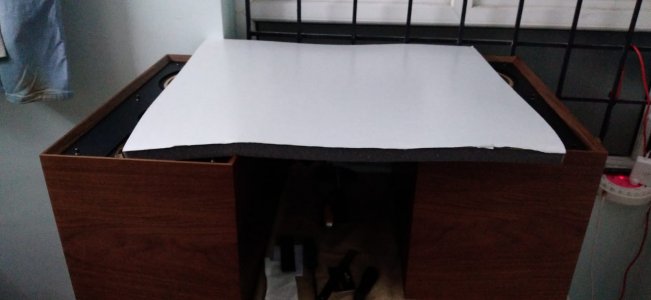
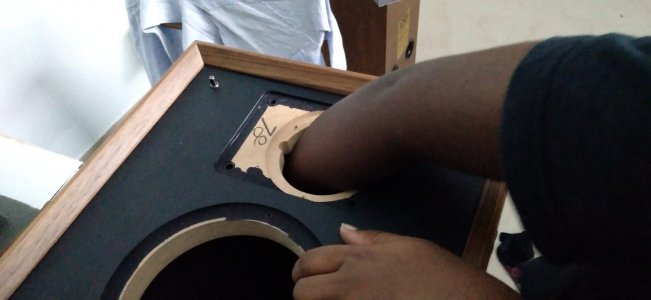
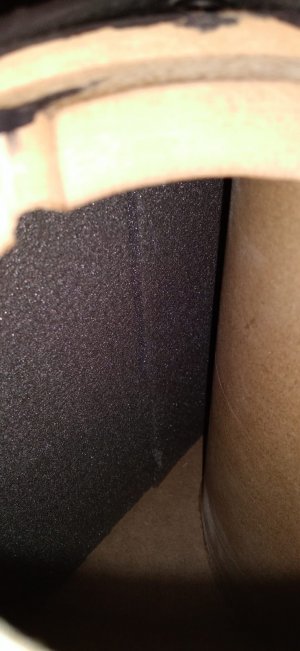
The speaker box is not braced as the midrange enclosure in the middle of the box doesn’t make things easy. can see only 1.5 inch gap between the sidewall and midrange enclosure. now damping the enclosure to reduce the resonance is not an easy task as every material to be taken inside the cabin through woofer and tweeter hole.

WhatsApp Image 2022-09-23 at 21.07.18 (1).jpeg

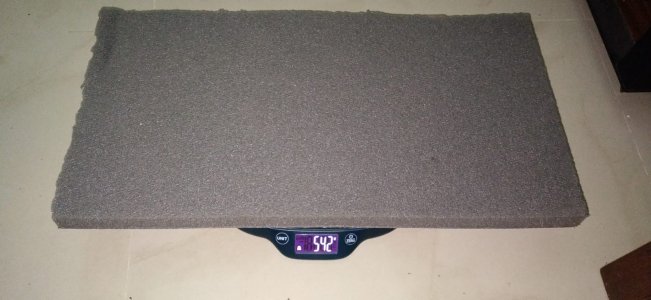
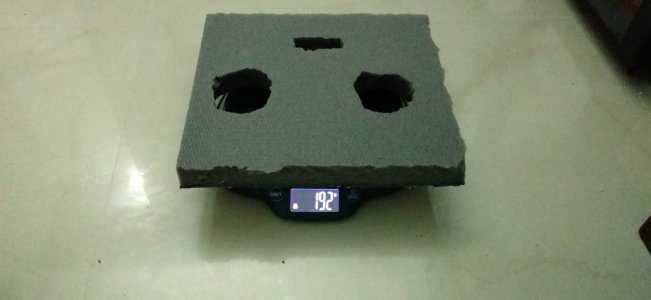
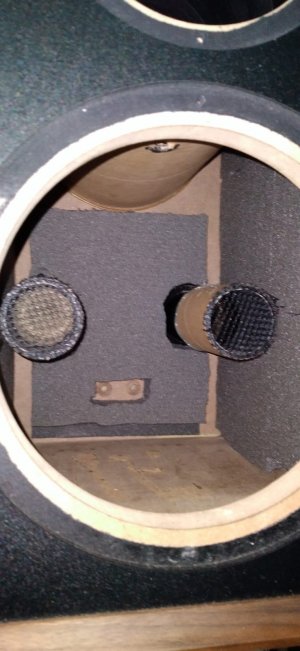
Damping material for one wall weights 550 grams. the one made for woofer back side is 190 grams. Totalling to approximately 1300 grams per speaker weight increase.

WhatsApp Image 2022-09-23 at 21.07.16 (1).jpeg
WhatsApp Image 2022-09-23 at 21.07.16.jpeg

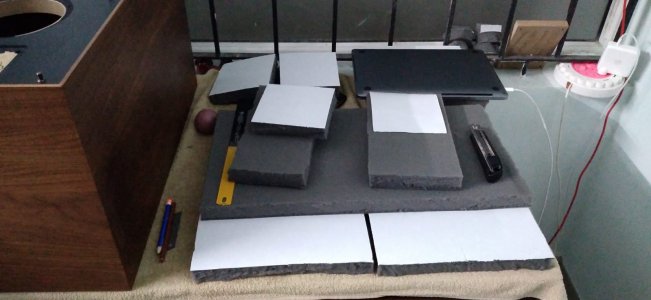
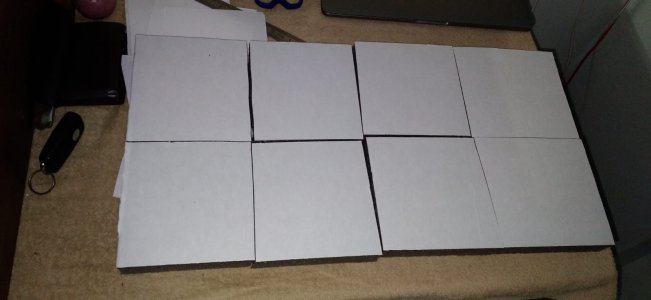
Just started by cutting the sheet based on the inner side wall measurement. This is not an east task with only blade and scissors. would appreciate if its pre-chopped as per the needs of specific kits what GR Research sells. Really its a pain and tedious task.

WhatsApp Image 2022-09-23 at 21.07.18.jpeg
WhatsApp Image 2022-09-23 at 21.07.15.jpeg

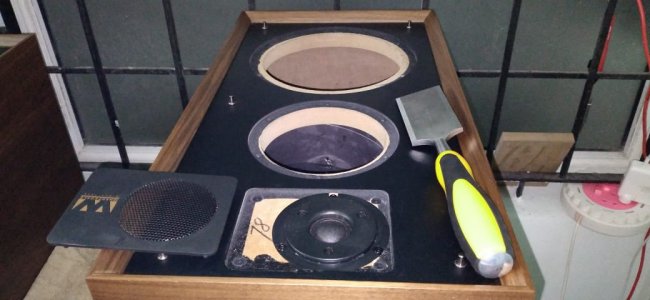
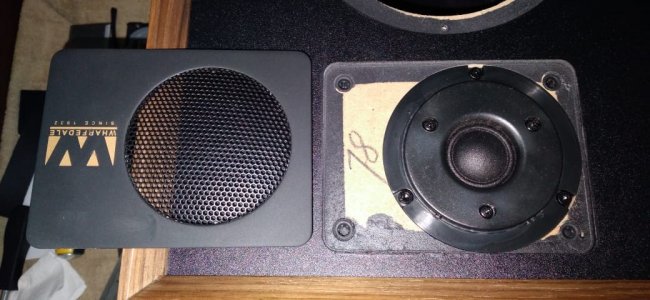
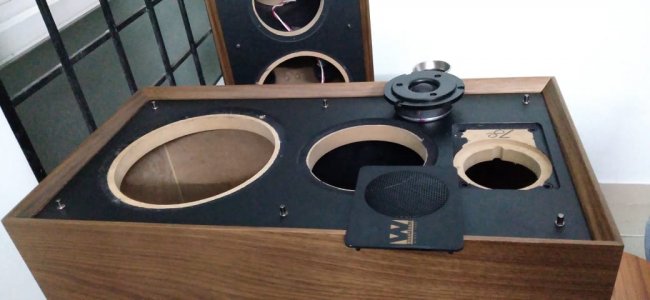
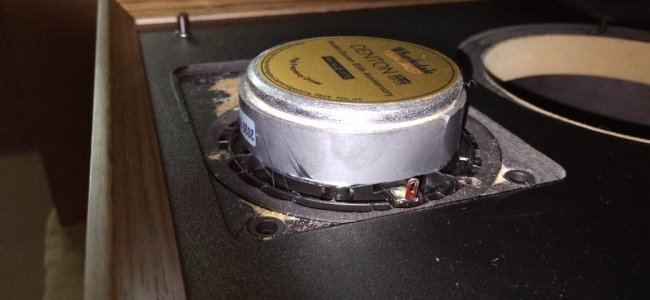
Have to remove the tweeter to gain access to the space behind it. Used a 50MM chisel to pope the face plate then there are 3 screws to pull the tweeter out. need to be carefully and slowly done. this is a brand new chisel and needs to be sharpened, I used a sand paper to sharp it.

WhatsApp Image 2022-09-23 at 21.47.16.jpeg
WhatsApp Image 2022-09-21 at 18.23.10.jpeg

WhatsApp Image 2022-09-21 at 18.23.09.jpeg

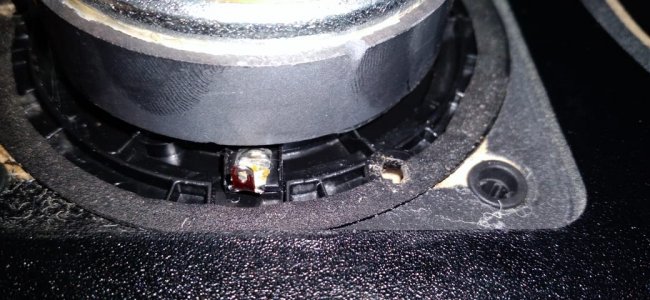
One observation, the tweeter doesn't have any + or - marking for the terminals. I just pulled the speaker cable and found they used a red paint on the terminal lead to mark +ve. The inner side of terminal is not painted though, if they have painted tweeter may not have put any output. I have to remove them as I need to twist the speaker wire and solder it.

WhatsApp Image 2022-09-21 at 18.32.00.jpeg

WhatsApp Image 2022-09-21 at 18.32.10.jpeg

Put one by one peaces, started from the top side by sliding the material through the gap of midrange enclosure and side wall. and my son helped to push the upper side peaces as my hand cannot get in the tweeter hole. Or else i may need a specialised tool to push them to the wall.

WhatsApp Image 2022-09-23 at 21.07.17 (1).jpeg

WhatsApp Image 2022-09-23 at 21.07.16 (2).jpeg

WhatsApp Image 2022-09-23 at 21.07.17 (2).jpeg
 
Binding post installation:
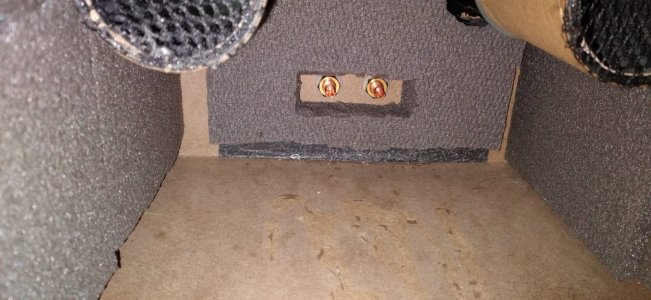
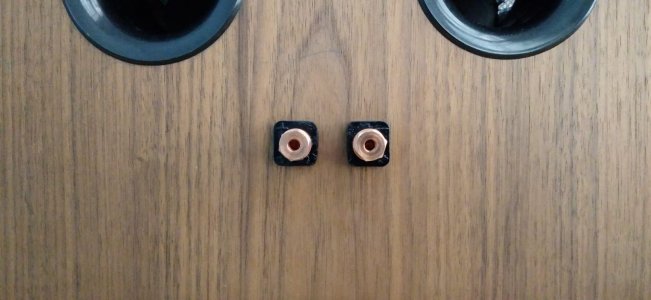
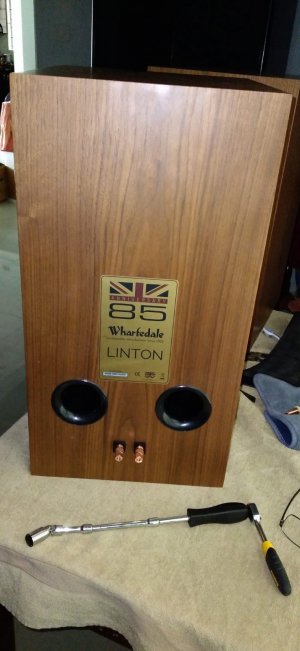
Post fully damping the enclosure Installed CARDAS COPPER binding post. I didn’t buy red and black single binding post insulator which can readily fit for Wharfedale Linton. So have to customise the standard insulator plate which came along the binding post. Used a blade to cut the insulator and sanded to smooth the corners. Then painted them with mat black spray paint.

WhatsApp Image 2022-09-25 at 18.42.28.jpeg

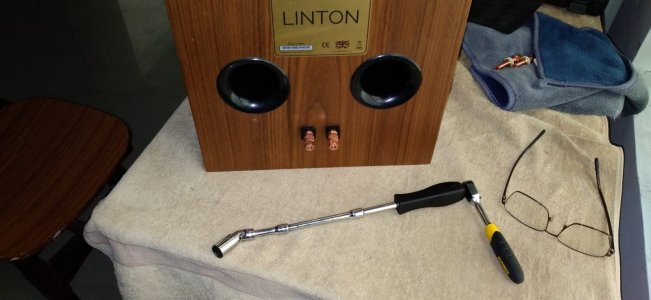
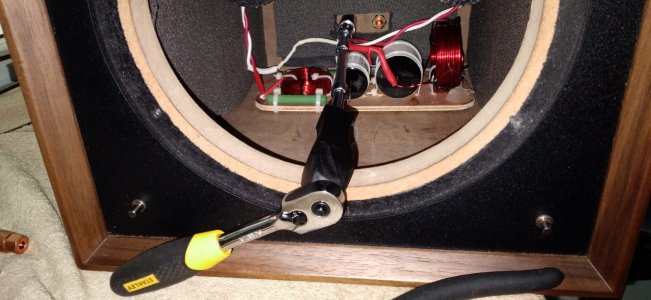
Used a box end nut driver bit and all the extension rods with rancher to drive the copper nut safely to secure the binding post on the speaker enclosure wall.

WhatsApp Image 2022-09-25 at 18.42.26.jpeg

WhatsApp Image 2022-09-25 at 18.42.27 (1).jpeg

CARDAS COPPER Binding post link for reference.

WhatsApp Image 2022-09-25 at 18.42.26 (1).jpeg

Copper Colour and black insulator suits very well to the wall nut wooden texture of Wharfedale Linton enclosure.

WhatsApp Image 2022-09-25 at 18.42.27.jpeg

Crossover Installation:
Now the only task I am eager to do is, to load the crossover boards in to the speaker cabin and connect soldering them to speakers.

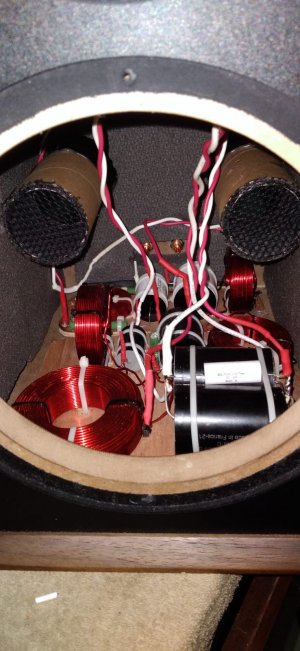
I have to do it through the speaker hole and post damping the space is limited. managed to install the crossover boards with 3M double sided stickers to give a grip and damp to ply wood and used 1/2 inch screws to clamp them down to enclosure's floor.

WhatsApp Image 2022-09-25 at 18.42.28 (1).jpeg

Ensured kick bass magnet and basket is away from crossover components and securely routed the cables to speaker terminals. Started with tweeters and went to mid and low.

Used MUNDROF Silver Gold soldering lead for all over the upgrade installation.

Sanded the all speaker terminals to remove the existing tin and the paint in positive terminal of tweeter.

The hookup wire in the GR Research upgrade kit is 2mm single core copper one, unable fasten the tweeter in the stock hole slot post soldering them, the wire is so rigid and didn’t easily bend. So used a flexible 16 AWG short wire (3 inch length) to solder in tweeter and soldered them to original xover wire.

The tweeter flange is all plastic so very carefully applying heat makes sense.

The GR Research Upgrade kit is very good one, but not enough for all joints the way what I made. I used additional heat shrinks wherever needed.

Post finishing one speaker, just tested if its working as expected, as I didn't test the crossover before loading them to speaker, so was sceptical. the speaker sounded flawless and I took some break while listening 3 songs on "Notting Hill SACD" on single speaker. Can sense the new signature of sound and revealing details. this gave me an energy to complete the other speaker too.

WhatsApp Image 2022-09-25 at 08.42.38.jpeg

Quickly moved in to the work room and started the work, this time things went fast as i have prior experience... LOL. While only one speaker left to soldered and loaded to finish line, I ran out of Mundrof soldering lead with 4 CM left over, Managed to solder the low bass and completed the install.


WhatsApp Image 2022-09-25 at 18.42.30.jpeg

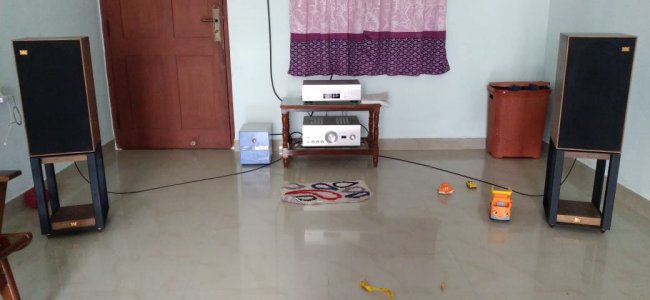
Couldn't resist and Didn’t wait any more to listen both speakers. Hooked them on amp and started replaying the Disc.

Got a WOW feeling, as the speaker started singing to is full glory.

WhatsApp Image 2022-09-25 at 18.42.31.jpeg

Listening Experiences:

1. The speakers sounded louder compared to the same volume level that I used to listen earlier.
2. Tweeters open up.
3. There used to be a gap between male vocals and female vocals which has gone.
4. The upper midrange is crystal clearly audible.
5. Can sense more details on audio now.
6. Bass boom has gone.

Need to give some more run in as the capacitors may need one ? not sure about this.

I am over all happy with the outcome of installing this upgrade kit and there is a real good value to quality crossover components in this speaker. Wood be good or better if there is a bypassing capacitor option available on tweeter. But don’t have space for big caps. Some day will try one if it makes sense.
 
Binding post installation:
Post fully damping the enclosure Installed CARDAS COPPER binding post. I didn’t buy red and black single binding post insulator which can readily fit for Wharfedale Linton. So have to customise the standard insulator plate which came along the binding post. Used a blade to cut the insulator and sanded to smooth the corners. Then painted them with mat black spray paint.

View attachment 72204

Used a box end nut driver bit and all the extension rods with rancher to drive the copper nut safely to secure the binding post on the speaker enclosure wall.

View attachment 72205

View attachment 72206

CARDAS COPPER Binding post link for reference.

View attachment 72207

Copper Colour and black insulator suits very well to the wall nut wooden texture of Wharfedale Linton enclosure.

View attachment 72208

Crossover Installation:
Now the only task I am eager to do is, to load the crossover boards in to the speaker cabin and connect soldering them to speakers.

I have to do it through the speaker hole and post damping the space is limited. managed to install the crossover boards with 3M double sided stickers to give a grip and damp to ply wood and used 1/2 inch screws to clamp them down to enclosure's floor.

View attachment 72209

Ensured kick bass magnet and basket is away from crossover components and securely routed the cables to speaker terminals. Started with tweeters and went to mid and low.

Used MUNDROF Silver Gold soldering lead for all over the upgrade installation.

Sanded the all speaker terminals to remove the existing tin and the paint in positive terminal of tweeter.

The hookup wire in the GR Research upgrade kit is 2mm single core copper one, unable fasten the tweeter in the stock hole slot post soldering them, the wire is so rigid and didn’t easily bend. So used a flexible 16 AWG short wire (3 inch length) to solder in tweeter and soldered them to original xover wire.

The tweeter flange is all plastic so very carefully applying heat makes sense.

The GR Research Upgrade kit is very good one, but not enough for all joints the way what I made. I used additional heat shrinks wherever needed.

Post finishing one speaker, just tested if its working as expected, as I didn't test the crossover before loading them to speaker, so was sceptical. the speaker sounded flawless and I took some break while listening 3 songs on "Notting Hill SACD" on single speaker. Can sense the new signature of sound and revealing details. this gave me an energy to complete the other speaker too.

View attachment 72211

Quickly moved in to the work room and started the work, this time things went fast as i have prior experience... LOL. While only one speaker left to soldered and loaded to finish line, I ran out of Mundrof soldering lead with 4 CM left over, Managed to solder the low bass and completed the install.


View attachment 72210

Couldn't resist and Didn’t wait any more to listen both speakers. Hooked them on amp and started replaying the Disc.

Got a WOW feeling, as the speaker started singing to is full glory.

View attachment 72212

Listening Experiences:

1. The speakers sounded louder compared to the same volume level that I used to listen earlier.
2. Tweeters open up.
3. There used to be a gap between male vocals and female vocals which has gone.
4. The upper midrange is crystal clearly audible.
5. Can sense more details on audio now.
6. Bass boom has gone.

Need to give some more run in as the capacitors may need one ? not sure about this.

I am over all happy with the outcome of installing this upgrade kit and there is a real good value to quality crossover components in this speaker. Wood be good or better if there is a bypassing capacitor option available on tweeter. But don’t have space for big caps. Some day will try one if it makes sense.
Dude, bravo.
 
Normally 100-150 hours. I changed the caps in my JBL x over and the changes were positive immediately, but as days went by the spk started to sound even better.
Happy Listening
 
For excellent sound that won't break the bank, the 5 Star Award Winning Wharfedale Diamond 12.1 Bookshelf Speakers is the one to consider!
Back
Top