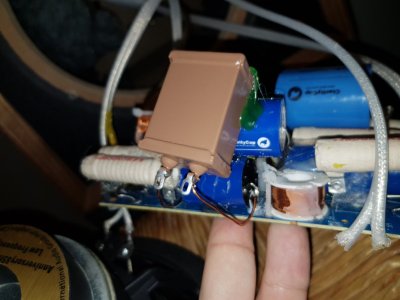
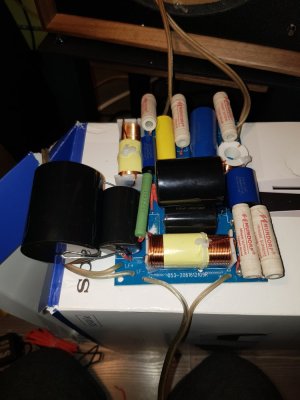
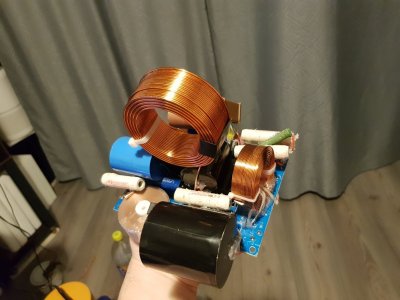
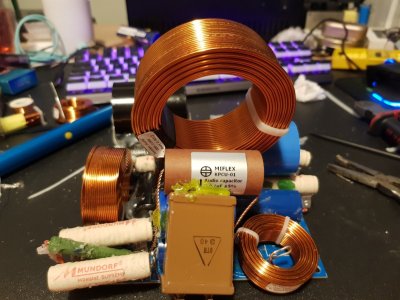
GR Research Wharfedale Linton 85 upgrade

People who change components and find improvements in burn in of 100 to 200 hours. My question is that the comparison is by playing a track out of the box, making notes, playing pink/white noise for the burn in and then playing the same tracks again

Or is the burn in time used up by playing the system as usual for daily listening?

I remember reading an article where burn in was done by playing the white noise with one speaker out of phase and both facing each other so that family is not disturbed
 
Danny Richie recommends 200 hours. That's far away. But will share my impressions for sure.


Happen to attend a conference in Las Vegas, so made use of that travel to get the xover upgrade kits.
Dear Brother. Absolutely mind blowing work done by yourself and with such care and precision. Im in awe of the minute details you have paid heed to including Mundorf solder , heat shrink and overall quality of work.
I have a small request to make, I'm planning on upgrading crossover for a pair of JBL stage A130 BS as I'm smitten with it's performance & want to enhance it further. Im following a thread about modding on the ASR forum & that's what I'm referring to mostly, but since I'm not familiar with such parts and terms it gets very confusing at times.
Would you be kind enough to guide me incase i have roadblocks and might not have an idea of how to go about doing things.
Example- he talks about adding a .22uf capacitor in parallel to the existing one for the woofer ( i was seeing stars as i had no clue how to parallel solder one cap to the existing one)
But it's just a request from my end and i can understand totally if you have better things to do . But it will be really generous of you incase you could guide me if needed. Thanks again.
 
Would you be kind enough to guide me incase i have roadblocks and might not have an idea of how to go about doing things.
Glad to help you. But I am not an expert in calculating xover values for frequency response.

But I would recommend to change the resistor and capacitors to a good quality one with the same value.

Try to choose a polypropylene cap of smaller size, so that it can fit in the board.
 
Dear Brother. Absolutely mind blowing work done by yourself and with such care and precision. Im in awe of the minute details you have paid heed to including Mundorf solder , heat shrink and overall quality of work.
I have a small request to make, I'm planning on upgrading crossover for a pair of JBL stage A130 BS as I'm smitten with it's performance & want to enhance it further. Im following a thread about modding on the ASR forum & that's what I'm referring to mostly, but since I'm not familiar with such parts and terms it gets very confusing at times.
Would you be kind enough to guide me incase i have roadblocks and might not have an idea of how to go about doing things.
Example- he talks about adding a .22uf capacitor in parallel to the existing one for the woofer ( i was seeing stars as i had no clue how to parallel solder one cap to the existing one)
But it's just a request from my end and i can understand totally if you have better things to do . But it will be really generous of you incase you could guide me if needed. Thanks again.
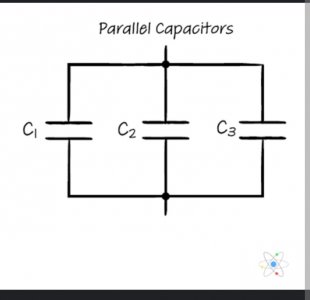
The .22mfd is the bypass cap commonly used in many JBL speakers. You just need to connect it in parallel to the existing cap ( which will be of a large value ). Find the attachment of how a parallel cap is done
 

Attachments

  • Screenshot_20230302-111857.jpg
    Screenshot_20230302-111857.jpg
    27 KB · Views: 32
Glad to help you. But I am not an expert in calculating xover values for frequency response.

But I would recommend to change the resistor and capacitors to a good quality one with the same value.

Try to choose a polypropylene cap of smaller size, so that it can fit in the board.
Thanks Brother, i won't trouble you with calculations and frequencies. I might only need help with connecting the caps and resistors ( joining 2 of them together etc) as I've never done it before.
 
Nice work, and photos. Was all that damping you added part of the modification, suggested by GR ??

The reason I ask is, I got the feeling much too much damping was applied, in which case, you will degrade the speaker's sonics rather easily.

IF you were doing damping on your own, it is best to listen to each and every piece you add or subtract, to hear HOW it effects the music. The proper amount of internal damping is determined only by INCREMENTALLY listening, and it surely can make-or-break a speaker's in-room performance.

Do not ever ASSUME you intuitively / initially selected the right amount, without incrementally listening and getting it optimal - by ear !!!!

Yes, it is a lot of work !! Do not " assume " and do not neglect this !!

Optimize it !!! Let us all know how this process works out VS what you heard !!!

Jeff
 
Last edited:
The .22mfd is the bypass cap commonly used in many JBL speakers. You just need to connect it in parallel to the existing cap ( which will be of a large value ). Find the attachment of how a parallel cap is done

Hi Dev,

A 0.22 uF bypass will typically effect the middle mid range. The next important bypass uF value to add MAY be 0.033 uF to get to play the highs a little better.

On my VOTT ALTEC crossover, I ended up by-ear using EIGHT caps where one is usually used, to roll off the tweeter and get FULL musical expression. Sounds good to me now.

8 CAPS listed, Value and Types.jpg
 
Thanks Jeff.


I applied all over with out incremental listening, but this is as per the recommendation from GR Research Danny.

OK. I would doubt his advice, and do it on your own !!!!!

With checking / listening, its not " by blind say-so " but you will double check HIS findings, and you know for sure !!!!!

I have done such things on my own, only to find one other OTHER ( really sharp audiophile ) reduced the use of damping, to the SAME EXACT ( and small ) degree !!! This, on classic vintage speakers, " industry standards ". We both must have removed about 75%, ........by listening to music incrementally.

Yes, its extra work,........... but you will KNOW for sure !! Do not assume. Usually the " back wall " opposite the rear of the drivers, is the most IMPORTANT one to stay intact. Start with taking out one top or bottom surface, LISTEN, and then remove one side wall's dampening. LISTEN. Incrementally remove damping until it sounds worse, than add as little as possible back.

Jeff
 
Last edited:
I did had a thought of trying to re-work on the damping part. Thought of trying it some other time but didn’t do so as I got busy with office work. will give it a try some time.

Binding post installation:
Post fully damping the enclosure Installed CARDAS COPPER binding post. I didn’t buy red and black single binding post insulator which can readily fit for Wharfedale Linton. So have to customise the standard insulator plate which came along the binding post. Used a blade to cut the insulator and sanded to smooth the corners. Then painted them with mat black spray paint.

View attachment 72204

Used a box end nut driver bit and all the extension rods with rancher to drive the copper nut safely to secure the binding post on the speaker enclosure wall.

View attachment 72205

View attachment 72206

CARDAS COPPER Binding post link for reference.

View attachment 72207

Copper Colour and black insulator suits very well to the wall nut wooden texture of Wharfedale Linton enclosure.

View attachment 72208

Crossover Installation:
Now the only task I am eager to do is, to load the crossover boards in to the speaker cabin and connect soldering them to speakers.

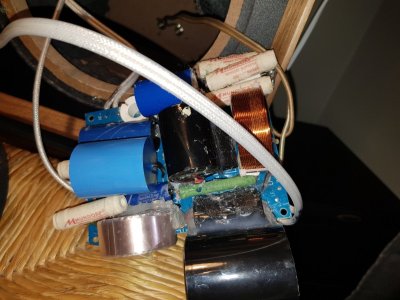
I have to do it through the speaker hole and post damping the space is limited. managed to install the crossover boards with 3M double sided stickers to give a grip and damp to ply wood and used 1/2 inch screws to clamp them down to enclosure's floor.

View attachment 72209

Ensured kick bass magnet and basket is away from crossover components and securely routed the cables to speaker terminals. Started with tweeters and went to mid and low.

Used MUNDROF Silver Gold soldering lead for all over the upgrade installation.

Sanded the all speaker terminals to remove the existing tin and the paint in positive terminal of tweeter.

The hookup wire in the GR Research upgrade kit is 2mm single core copper one, unable fasten the tweeter in the stock hole slot post soldering them, the wire is so rigid and didn’t easily bend. So used a flexible 16 AWG short wire (3 inch length) to solder in tweeter and soldered them to original xover wire.

The tweeter flange is all plastic so very carefully applying heat makes sense.

The GR Research Upgrade kit is very good one, but not enough for all joints the way what I made. I used additional heat shrinks wherever needed.

Post finishing one speaker, just tested if its working as expected, as I didn't test the crossover before loading them to speaker, so was sceptical. the speaker sounded flawless and I took some break while listening 3 songs on "Notting Hill SACD" on single speaker. Can sense the new signature of sound and revealing details. this gave me an energy to complete the other speaker too.

View attachment 72211

Quickly moved in to the work room and started the work, this time things went fast as i have prior experience... LOL. While only one speaker left to soldered and loaded to finish line, I ran out of Mundrof soldering lead with 4 CM left over, Managed to solder the low bass and completed the install.


View attachment 72210

Couldn't resist and Didn’t wait any more to listen both speakers. Hooked them on amp and started replaying the Disc.

Got a WOW feeling, as the speaker started singing to is full glory.

View attachment 72212

Listening Experiences:

1. The speakers sounded louder compared to the same volume level that I used to listen earlier.
2. Tweeters open up.
3. There used to be a gap between male vocals and female vocals which has gone.
4. The upper midrange is crystal clearly audible.
5. Can sense more details on audio now.
6. Bass boom has gone.

Need to give some more run in as the capacitors may need one ? not sure about this.

I am over all happy with the outcome of installing this upgrade kit and there is a real good value to quality crossover components in this speaker. Wood be good or better if there is a bypassing capacitor option available on tweeter. But don’t have space for big caps. Some day will try one if it makes sense.
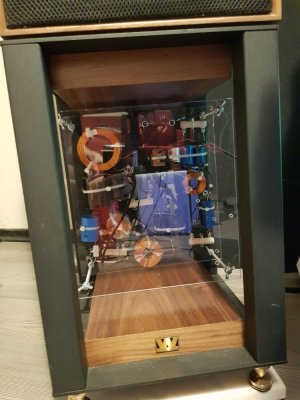
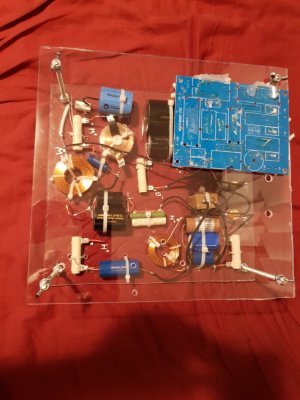
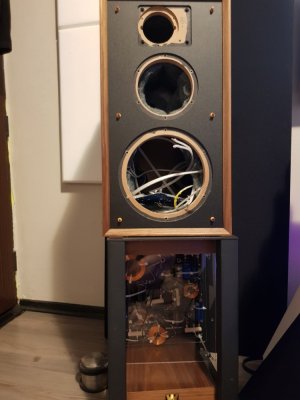
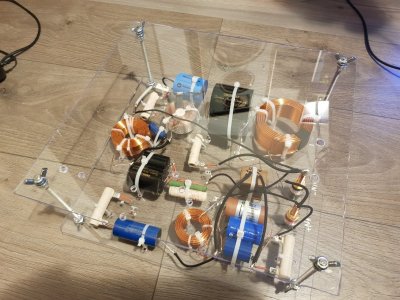
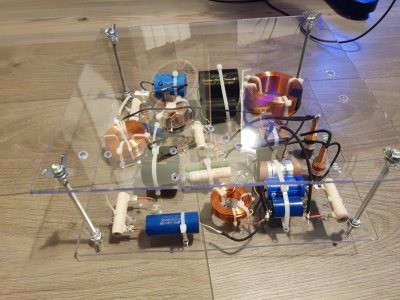
Wow! Congratulations!! Missed your post until now. I know how much work it is because also I upgraded completely the crossovers, wires and binding posts and added more padding. I speak with Danny on email about the upgrade but I already started it before him releasing his kit and anyway with the shipping and duty tax and vat the cost to import in Romania was getting to big. I made myself the crossovers, purchasing every part, a lot of money and time and work. At the final after incrementally changing all the parts I was pushed to move the crossovers outside box...no choice in this because they became to big...another hard work to make the box for them and find a way to remake the circuit . I do not know about damping perhaps also I stuffed them to much...About wires I do not like the solid core 2mm ones...take care also at the highs driver to not broke the contact ears...also applicable to the other drivers. I choose to replace all the wires including the external wires from speaker to amp with superb duelund ones.
 

Attachments

  • 20230602_191827.jpg
    20230602_191827.jpg
    117.1 KB · Views: 31
  • 20230602_131321.jpg
    20230602_131321.jpg
    117.1 KB · Views: 34
  • 20230602_130334.jpg
    20230602_130334.jpg
    86.5 KB · Views: 36
  • 20230602_130106.jpg
    20230602_130106.jpg
    243.2 KB · Views: 36
  • 20230602_130113.jpg
    20230602_130113.jpg
    218.9 KB · Views: 36
Wow! Congratulations!! Missed your post until now. I know how much work it is because also I upgraded completely the crossovers, wires and binding posts and added more padding. I speak with Danny on email about the upgrade but I already started it before him releasing his kit and anyway with the shipping and duty tax and vat the cost to import in Romania was getting to big. I made myself the crossovers, purchasing every part, a lot of money and time and work. At the final after incrementally changing all the parts I was pushed to move the crossovers outside box...no choice in this because they became to big...another hard work to make the box for them and find a way to remake the circuit . I do not know about damping perhaps also I stuffed them to much...About wires I do not like the solid core 2mm ones...take care also at the highs driver to not broke the contact ears...also applicable to the other drivers. I choose to replace all the wires including the external wires from speaker to amp with superb duelund ones.
Initial takes
 

Attachments

  • 20221005_115149.jpg
    20221005_115149.jpg
    167.6 KB · Views: 36
  • 20230217_212501.jpg
    20230217_212501.jpg
    116.3 KB · Views: 36
  • 20211206_192516.jpg
    20211206_192516.jpg
    102.2 KB · Views: 35
  • 20230526_021011.jpg
    20230526_021011.jpg
    129.7 KB · Views: 33
  • 20230526_020832.jpg
    20230526_020832.jpg
    175.5 KB · Views: 31
Unless you have auditioned the upgraded version of this speaker and found it to be really good, wouldn't it be a bit risky (in the sense that you may not find the upgraded crossover matching your tastes) to change the crossover. In this case, it looks like the upgrade also costs a significant amount.
Crossover changes usually don't change much the inherent directivity characteristics of a speaker under consideration (except in the crossover region and unless the crossover is really badly designed in the first place) since it is mostly decided by the box/baffle dimensions and the driver sizes and their radiation characteristics.
In this case, making the frequency response flat (as shown in the frequency response after upgrade in Danny's video) changes the overall spectral balance of the speaker from something like "warm" to "bright".
Wouldn't it be easier to apply EQ to the source material via a good quality DSP if the objective is to change the frequency response to a desired shape (at least the on-axis response). That way, one has more flexibility to tweak later also, I think.
Very true, with DSP you spend less, have more flexibility and yet you have the original Linton.
 
Wow! Congratulations!!
Thank you.

I saw Linton 85 crossover upgrade suggestions form Mike of HEADquarter Audio before GR Research one. But its a partial upgrade on the tweeter crossover circuit. I always preferred complete upgrade on the crossover. For me any quality components has to come from outside India. So when I found GR research I grabbed one.

I made myself the crossovers, purchasing every part, a lot of money and time and work.

Congratulation’s on your journey and accomplishments.

At the final after incrementally changing all the parts I was pushed to move the crossovers outside box
Yes, it makes sense to remake the crossovers in a correct layover and put it external. looks good with the acrylic enclosure. point to point soldering is always better than the PCB board one.

For me the GR research crossover has 3 components less than the original ones. So despite the size of capacitors and inductors, I can install it inside the speaker cabin it self.

I do not know about damping perhaps also I stuffed them to much
I still use the no-ress fully applied on the linton cabin. initially had Mogami 2804 speaker cable which was too thin and the bass response was not good. then after changing it with Mogami 3082 which is thicker, its lot better. I feel no need to touch the damping.

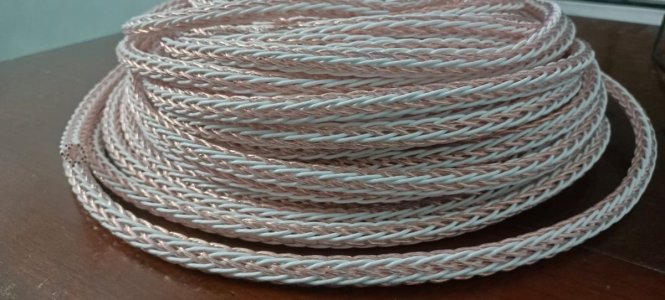
Now I have plans to work on 9 AWG DIY Solid core speaker cable, All raw required raw materials imported and lying on my table by now.

WhatsApp Image 2023-06-03 at 11.08.37.jpeg
 
Very true, with DSP you spend less, have more flexibility and yet you have the original Linton.
Good Quality DSP is not cheap. Helix DSP ultra is 1.7L INR in India. their lowest model would be 1L INR. With DSP I have to fiddle with wires and it adds more trouble.

My Source is CDP and cannot keep using a PC as a source and playing a software DSP doesn’t suit my lifestyle. PC as a source is a noisy affair.
Unfortunately the logistics + customs duties are too much here. Is the sound signature radically different after your upgrade ?
Anyways if you are happy with your upgrade then it's good , enjoy it :)
 
Is the sound signature radically different after your upgrade ?
Yes. A lot change above 500 Hz. EOD, its all Kevlar cones and fabric dome, this driver signature will remain same.

Anyways if you are happy with your upgrade then it's good , enjoy it :)
Its worth the effort and expense made as the outcome is great.
 
Why his speaker design is so poor in measurement in ASR? If he elevate or improve any branded speaker to next level…

 
I have known @balavignesh002 for many years and he has a keen listening sense, deft hands, patience and an insatiable appetitive for perfection within his technical limitations.
Though he started as a car audio enthusiast, his past 2-year journey with the Lintons and his attempts at improving its sound quality based on some outside researches and suggestions have been quite interesting.
Whether the amount spent on the upgrades is worth or value addition, is purely an individual perception as far as audio or any other passion is concerned.
That said he has accumulated some fantastic car audio gears over the years and has a lovely 4-way active set-up in his car, though I have not heard his last iteration after he moved out of Chennai.

Regarding DSP vs passive XO, the DSP is a no brainer, but Bala will not employ any cheaper DSPs from what know of him :) unlike a poor man audiophiile like me.
Again measurements are only half the story and not all changes that are reflected in measurements translate to their audible (analogue) equivalent due to conflicts between electrical and physical parameters of the drivers.

I am sure this journey of his will continue.
 
Get the Award Winning Diamond 12.3 Floorstanding Speakers on Special Offer
Back
Top