You are using an out of date browser. It may not display this or other websites correctly.
You should upgrade or use an alternative browser.
You should upgrade or use an alternative browser.
suspended av cabinet???
- Thread starter Kevian
- Start date

Venkat
{C'mon can my screen name be changed?....this kus kus venkus is not good..sounds like tus tus venkus..chose it under the influence of Gladiator...Ram says not possible}
Just create a new id, and we will see if we can delete this one. But talk me to Ram before you do anything.
Cheers
hifiashok
Well-Known Member
Ashok Sir...frankly..that was a bump...probably..I need some knowledge to understand your post..or some good english... do you have a picture of this on "Showcase your setup here" thread?
the showcase pic is there, but of my 2 channel setup and not the video setup. need to get those pix up. will do, soon.
'jhirri' is the term used by carpenters/contractors here to cut gashes into walls to conceal wiring, etc. these are then filled up and painted.

Brothers,
1)Is it possible to make above shown suspended cabinet with scales -->6 ft in length, 2 ft in depth and 2 ft in height?
2)Will it be able to take the load of all av components, tv(32 to 47 inch), front and center bookshelf speakers???
3)Do you guys think Indian brick walls are suitable for such a config?
4) Am I asking too much from such a config?
Any possible directions ?
Regards
Venkat
Yes this is very possible to make and will withstand all the load u are intending to put on it. The picture above is the rack just resting on the platform so this not suspended in any way.
It has to be done sensibly and thats where the problem comes in. Putting it on angles, pattis or anything that is visible is not the most aesthetic and it is most unlikely to withstand the load with just a 2 " chasing of the wall (Jhirri or as Mumbai carpenters say 'Jhari')
My suggestion to u is to get a custom built MS bracket inserted into the wall with long bolts( 8 bolts in all). Then the bracket is plastered over and then the wall is painted. The bracket is now a part of the wall and your cabinet will have the corresponding holes and will be pushed into those bolts and then Nuts will be tightened. These nuts will not be visible as the unit is 2 ft deep and will be filled with AV gear. This is the same concept as a wall hung WC. Now that can take the load of about 125 K (An obese or big built person for Ex)
I have seen similar units installed with Fasteners too but IMO that is very dependant on the quality of the wall and may sag with 100 KG plus load.
The unit itself can be built in plywood but something like an Anchor 72 or equivalent and the framework of the unit can be made in CP teak.
As mentioned by others u will need a 'smart' carpenter and a good mason which may be difficult to find.
Another thing to consider is the weight of the unit as that plus all the gear is going to be suspended.
This is how I would do it but it will involve quite a bit of 'messy' work.
Rgds
Last edited:
soulforged
Well-Known Member
Thanks a lot gentlemen for all your responses....I will wait for soulforged to get his work done....
@Soulforged
I share your fear about withstanding the weight....one small favour brother....plzz post relevant pictures of the ongoing work at your place on this thread...picture is worth thousand words you see...
Venkat...the work is yet to start...will try and post WIP pics as well...
edit: with all this discussion about ur screen handle...thought it best to address you by name

Last edited:
srinisundar
Well-Known Member
with soulforged please add me in the list , i am also doing typical design, may be by next week mine will start. will update")
At first my apologies. I was running into a lot of trouble uploading photos on Imageshack. It took me nearly 6 weeks to isolate the issue. It will take me another week or so to resolve the issue.
Venkus wanted photos of my UPS cabinet. I am showing them below.
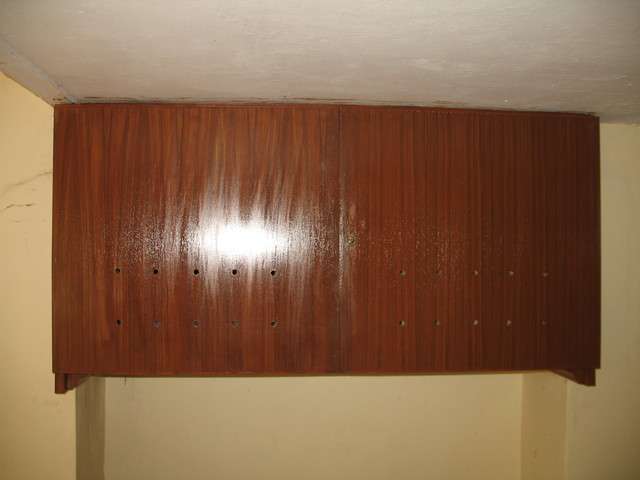
This is the cabinet as seen from outside. Fortunately I had a U shaped alcove in the wall, and I made the cabinet to fit inside that. The cabinet has been designed and made to stand the weight of two full size batteries as well as an inverter.
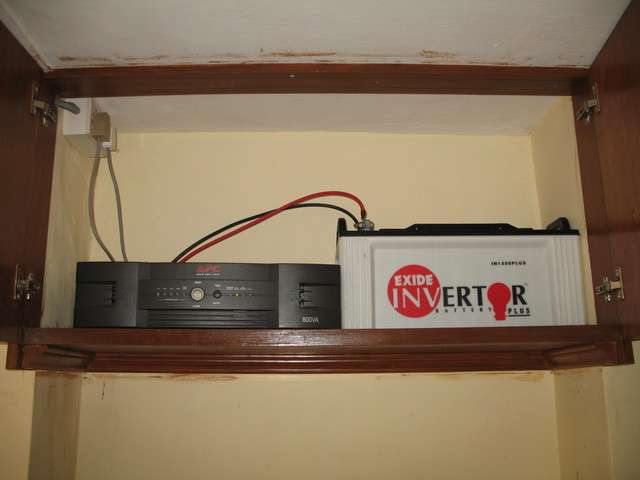
Another view of the cabinet with it doors open.
Here is view of the cabinet's bottom. What I did was as follows. I got a solid Teak wood block of 2 inches by 2 inches by 70 inches. I got one diagonal of the block carved in a wood lathe. The wood block was cut to the appropriate sizes and a 'V' joint was cut in the corners to fit into each other at the back. I now had three wooden block - two of approximately 14 inches long and one of 42 inches length. The longer one goes on the back wall and the shorter ones on the side wall.
I sank 12 metal wall plugs (that uses a nut instead of a screw) into the wall - 3 on each side and 6 on the back wall. I drilled small holes into the teak wood block as needed after measuring the exact position of the wall plugs. The holes in the wood block were sunk using a drill bit that matched the diameter of the wall plug nut. This went all the way through. Then using another bit that matched the diameter of the nut head, another 1/4 inch hole was sunk on top of the existing hole. This way the nut will go completely into the wood and can be covered with putty. I now had a solid shelf holder ready.
I fixed the wooden block on the wall. I then got a solid teak plank that was 42 inches (length) by 14 inches (width) by roughly 2 inches (thickness). I just placed the plank in top of the wooden shelf holder.
On the outer edges of the cabinet I got a small frame constructed using teak ply, and go two doors fixed on the frame. the frame was fixed to the wall using plastic wall plugs and ordinary wood screws.
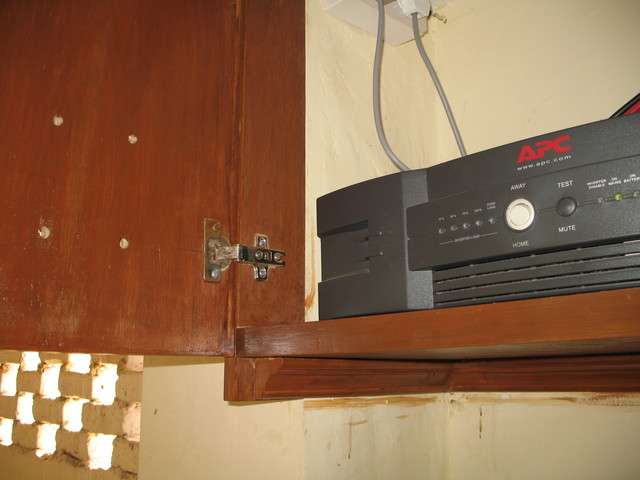
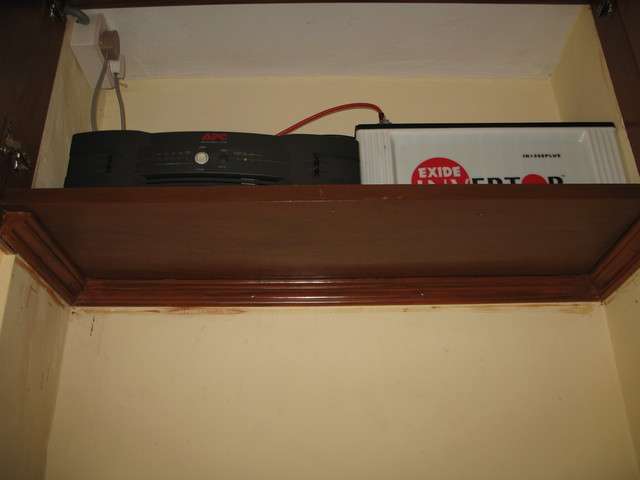
A view of the left corner bottom.
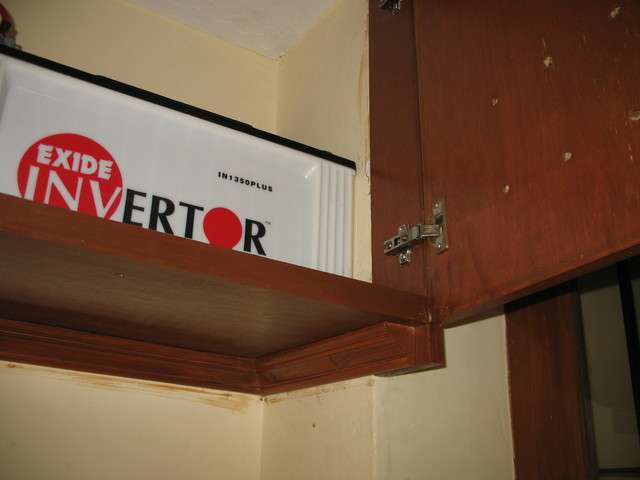
A view of the right corner bottom.
I am quite confident that this cabinet will hold close to 100 kg without any issue, though I may never need to load it that much.
Cheers
Venkus wanted photos of my UPS cabinet. I am showing them below.
This is the cabinet as seen from outside. Fortunately I had a U shaped alcove in the wall, and I made the cabinet to fit inside that. The cabinet has been designed and made to stand the weight of two full size batteries as well as an inverter.
Another view of the cabinet with it doors open.
Here is view of the cabinet's bottom. What I did was as follows. I got a solid Teak wood block of 2 inches by 2 inches by 70 inches. I got one diagonal of the block carved in a wood lathe. The wood block was cut to the appropriate sizes and a 'V' joint was cut in the corners to fit into each other at the back. I now had three wooden block - two of approximately 14 inches long and one of 42 inches length. The longer one goes on the back wall and the shorter ones on the side wall.
I sank 12 metal wall plugs (that uses a nut instead of a screw) into the wall - 3 on each side and 6 on the back wall. I drilled small holes into the teak wood block as needed after measuring the exact position of the wall plugs. The holes in the wood block were sunk using a drill bit that matched the diameter of the wall plug nut. This went all the way through. Then using another bit that matched the diameter of the nut head, another 1/4 inch hole was sunk on top of the existing hole. This way the nut will go completely into the wood and can be covered with putty. I now had a solid shelf holder ready.
I fixed the wooden block on the wall. I then got a solid teak plank that was 42 inches (length) by 14 inches (width) by roughly 2 inches (thickness). I just placed the plank in top of the wooden shelf holder.
On the outer edges of the cabinet I got a small frame constructed using teak ply, and go two doors fixed on the frame. the frame was fixed to the wall using plastic wall plugs and ordinary wood screws.
A view of the left corner bottom.
A view of the right corner bottom.
I am quite confident that this cabinet will hold close to 100 kg without any issue, though I may never need to load it that much.
Cheers
Anil kumar
Well-Known Member
Provide 3 L clamps under the cabinet (pictured here) or provide a MS L bracket which runs horizontally under the cabinet attached to the wall. Get it electroplated or powder coated for better look.
Regards,
Anil


Regards,
Anil
Provide 3 L clamps under the cabinet (pictured here) or provide a MS L bracket which runs horizontally under the cabinet attached to the wall. Get it electroplated or powder coated for better look.
Regards,
Anil
I have used two 18 inch brackets like above and kept a 15 kg oven on it. It will take up to 20 kg easily but beyond it is risky.
Lets say you put 4 of these. The load bearing can go up to 40 kg then.
If that sounds less, Another idea is to get 4 custom made brackets like above of about 25 inches then drill a hole right through the wall and bolt this bracket with a big nut bolts through the wall. That will make it super strong.
On a lighter note...if your cabinet is designed as per vaastu shashtra it should not fall no matter how you put it up, no ? :lol: :lol:
Last edited:
If you don't want the supporting brackets to be visible below the unit, you can install them "inside" the unit itself so that the underside of the top ply rests on the brackets.
I have a similar unit installed without the use of any brackets, and it is strong enough to take my own weight (80 kg, tested by sitting on it several times). This is done by having a back wall made of 12mm ply (like they do in wardrobes). This back ply wall has been screwed to the brick wall using 3" screws (10 of them spread evenly).
I have a similar unit installed without the use of any brackets, and it is strong enough to take my own weight (80 kg, tested by sitting on it several times). This is done by having a back wall made of 12mm ply (like they do in wardrobes). This back ply wall has been screwed to the brick wall using 3" screws (10 of them spread evenly).
soulforged
Well-Known Member
Hi Venkat,
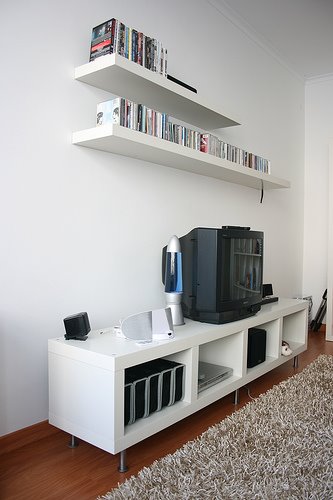
Here's what I got in my apt...Its essentially a wall to wall wooden panel and 2 ledges below it. The ledges look strong enough to hold most equipment though I'm still planning to place heavy stuff like my AVR on the bottom platform that at floor level...


Here's what I got in my apt...Its essentially a wall to wall wooden panel and 2 ledges below it. The ledges look strong enough to hold most equipment though I'm still planning to place heavy stuff like my AVR on the bottom platform that at floor level...


Kevian
New Member
Thanks a lot Gentlemen for pictures and suggestions.....I will post the pictures once I finish this project....will start soon...thanks once again..
Great pictures Venkatcr and Soul...:clapping:
Venkat
Great pictures Venkatcr and Soul...:clapping:
Venkat
Wharfedale Linton Heritage Speakers in Walnut finish at a Special Offer Price. BUY now before the price increase.
Similar threads
- Replies
- 2
- Views
- 10K
- Replies
- 29
- Views
- 24K
- Replies
- 33
- Views
- 8K