madbullram
Well-Known Member
I have been wanting to redo my bedroom setup for almost 1 yr now but never found the time. Last week I got the entire room re-wired and re-painted. All it needed now was a good AV Rack. Though I was a hard core DIYer in college it kind of died down on me now. I had been after Magma for sometime now and unfortunately it did not work out for me. Magma and Flanker are my inspiration for this entire build. It was Flanker last year who showed how simple a TNT stand is and it was Magma who showed me with little effort how much we can achieve.
So this weekend I decided, I will do a TNT Flexi stand. My wife was more than glad and was all game to help me (trust me I realised again how lucky I am bcos without her I could have never finished it!). I had done all the planning on Friday and done the necessary home work. This is how my existing setup looks like:

Step 1: I started with measuring all my equipments. I did a rough calculation and realized, I needed a 6 rack stand to fit my equipments. The rack has to be less than 3 feet in height so that it doesnt hit my TV. The bottom most will have the NAD, then my DAC, then my NAK, then DVDp +Set top box + WDTV + Harddrive, then Radio, then the TT. The order was decided based on what we use the most and what can be controlled by remote. Total height came to 31 inches including the TT and taking into account 12mm space for each rack. I made a rough sketch.
Step 2: Went to Gandhi market and searched for good threaded rods. They were there in many sizes, the best I thought was 16mm dia which was neither think nor too thick. I bought 3 rods of 1 meter each . Got the rods cut to 32 inch (1 inch extra to play around). Also purchased some WD40 to clean the rods and rust proof them
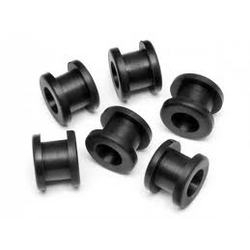
Step 3: Purchased 36 SS nuts (this will ensure no rust!), 36 SS steel washers, and 40 rubber washers. Also bought a leveling scale to ensure the rack were leveled.

Step 4: Finalizing the rack material was the toughest. I had 3 options, MDF, Glass, and Flexi. Wife wanted a see through rack as it will help the space perception since our BDRoom is just 10X11. SO MDF was ruled out. We decided on glass due to budget constraints and also this is a DIY so didnt want to spend much on the first attempt. I sampled 8mm, 10mm, and 12 mm glasses. I felt 10 mm was neither too thin nor was it too heavy as 12 mm. Placed the order for 6 nos of 2 ft X 1.5 ft glass shelves with 18mm hole in the 3 sides. The holes were supposed to be drilled 1 inch away from the edges. The edges were blunted (curved!) to avoid any mishap.


Step 5: Took the steel rods to a lathe and got the ends grinded to nice cone shape resembling a spike. The spike came to 1 inch in length. This took 45 mins in total. The lathe person is a flankers good friend hence didnt charge any. I think he would have charged 50-75rs for someone else.

Came home and we laid out everything spaciously.


We picked up 2 pairs of leather gloves to ensure there were no nicks or cuts. Me and wifey started the process of fixing it. The bottom most self was easy, fit the rubber washer, then ss washer, then the nut. It went in fine. Next is when we realized how important the NUT is!!!! The SS Nuts I bought though were of good quality were not perfect!!! This meant we couldnt just screw the nuts using hands!!! We had to literally use the spanner for the entire length. The bottom most shelf took almost 1 hr for us to complete with me and my wife taking turns for holding and rotating.


Finally, after 4 hrs of non-stop work, we did manage to put the TNT rack in place. Though exhausted, the joy of achieving something that too as a team was simply exhilarating. Not only was the rack functional but it was aesthetically so good that some of my friends have started asking me if I can make one for them. For less than 5000rs we made a TNT Flex stand that is beautiful, functional, and more than anything it created such a wonderful time for me and Vands it has given us enough confidence to try DIY route for all now! Here are the pics of our stands:


Budget:
S.No Item Comp Cost Quantity Total Cost
1 Threaded Iron rod (1 mt) - 16 mm Rs. 210 3 Rs. 630
2 SS Nuts (36 nos) Rs. 15 36 Rs. 540
3 SS Washer (36 Nos) Rs. 6 36 Rs. 198
4 Levelling Scale Rs. 80 1 Rs. 80
5 WD40 Rs. 80 1 Rs. 80
6 Cutting Cost Rs. 20 Rs. 20
7 Washer (40nos) Rs. 2 40 Rs. 80
8 Ring Spanner Rs. 110 1 Rs. 110
9 10 mm glass (2 ft X 1.5 ft) Rs. 100 18 sq ft Rs. 1,800
10 Cutting Cost Rs. 75 18 Rs. 1,350
11 Petrol Expense Rs. 55 1 Rs. 55
Total Rs. 4,943
Options:
1. If you opt for a SS rod instead of MS rod, you will spend around 1300 rs more per rod. The SS rod costs 1500 rs per meter so around Rs 4500 for 3 rods. It will cost around 3600 rs more than using MS Rods
2. If you opt for PLexi (Acrylic) 12 mm sheet, the sheet come as 6 X 4 which costs around 390 rs/ sq ft which around Rs 9360 + 12./5 tax = 10530 rs. Add it to it cutting charges of aroun 70 rs per sheet (for 3 hole ). It will cost around 9000rs more than using Glass
Tips:
1. I feel the bottom most rack should have been 12 mm instead of 10 mm to take the stress. Experts can correct me here, the rest can be 10 mm. Again it depends on your equipment weight.
2. The difference between building this rack in 1 hr and 10 hrs is how well the Nuts and Rods go well. If the Nuts and Rods fit well and you can screw the Nut through the Rod using your hand, you will be done in just 1 hr. My suggestion is, when you buy test every NUT and pick nuts that go through smoothly. This WILL SAVE HUGE AMOUNT of time
3. Ensure you check the glass after holes are made to ensure there are not cracks in the glass after making the hole. Also, ask the shop person to pack each glass separately and give.
4. When you have finished the bottom and have started building the next set of racks, ensure you place 2-3 thick towels on the glass rack. This will cushion and protect the glass if you drop a nut or spanner. I also kept a pillow just incase and trust me 4-5 times the spanner or nut fell down and bounced of the pillow.
5. Once you are done with a rack, use the levlling scale to check for levels in the middle as well in the sides
6. Ensure you give liberal coating of WD40 for the MS rods. Soak it for min 30 mins. This will lubricate and will also protect the rods from rusting.
7. Do not over tighten the nuts. This will cause stress on the glass and will break it.
8. Make the stands near by to the place where you would be keeping it. This will help you avoid lifting the stands once finished. Trust me these are freaking heavy.
9. Ring spanner helps a lot than a regular spanner, as you can freely rotate it!
Some more thoughts:
If you think the threaded rods look ugly, you can buy either SS tubes or Aluminum tubes, cut them according to each shelves height and place them covering the rod and nuts. This will give a nice look.
If you too worried about SS resonating, buy a PVC pipe, cut them, paint them in black or silver and cover them, them place the glass on top. Repeat this for each shelf
Hope this will inspire more to try this. My hearty thanks to Vands and Flanker without whom I would have never done this. Magma for being my inspiration and Venkat for helping me whenever I had some doubts.
Last but not the least BIG BIG thanks to Arnold who answered my queries patiently. His site:
The road to nirvana
TNT Site: The TNT FleXy Table
Finally, Before and After pics") :
:
BEFORE:
NOW:

p.s: Sorry for the watermarks, just wanted to ensure no one picks the pics for free!
So this weekend I decided, I will do a TNT Flexi stand. My wife was more than glad and was all game to help me (trust me I realised again how lucky I am bcos without her I could have never finished it!). I had done all the planning on Friday and done the necessary home work. This is how my existing setup looks like:

Step 1: I started with measuring all my equipments. I did a rough calculation and realized, I needed a 6 rack stand to fit my equipments. The rack has to be less than 3 feet in height so that it doesnt hit my TV. The bottom most will have the NAD, then my DAC, then my NAK, then DVDp +Set top box + WDTV + Harddrive, then Radio, then the TT. The order was decided based on what we use the most and what can be controlled by remote. Total height came to 31 inches including the TT and taking into account 12mm space for each rack. I made a rough sketch.
Step 2: Went to Gandhi market and searched for good threaded rods. They were there in many sizes, the best I thought was 16mm dia which was neither think nor too thick. I bought 3 rods of 1 meter each . Got the rods cut to 32 inch (1 inch extra to play around). Also purchased some WD40 to clean the rods and rust proof them
Step 3: Purchased 36 SS nuts (this will ensure no rust!), 36 SS steel washers, and 40 rubber washers. Also bought a leveling scale to ensure the rack were leveled.

Step 4: Finalizing the rack material was the toughest. I had 3 options, MDF, Glass, and Flexi. Wife wanted a see through rack as it will help the space perception since our BDRoom is just 10X11. SO MDF was ruled out. We decided on glass due to budget constraints and also this is a DIY so didnt want to spend much on the first attempt. I sampled 8mm, 10mm, and 12 mm glasses. I felt 10 mm was neither too thin nor was it too heavy as 12 mm. Placed the order for 6 nos of 2 ft X 1.5 ft glass shelves with 18mm hole in the 3 sides. The holes were supposed to be drilled 1 inch away from the edges. The edges were blunted (curved!) to avoid any mishap.


Step 5: Took the steel rods to a lathe and got the ends grinded to nice cone shape resembling a spike. The spike came to 1 inch in length. This took 45 mins in total. The lathe person is a flankers good friend hence didnt charge any. I think he would have charged 50-75rs for someone else.

Came home and we laid out everything spaciously.


We picked up 2 pairs of leather gloves to ensure there were no nicks or cuts. Me and wifey started the process of fixing it. The bottom most self was easy, fit the rubber washer, then ss washer, then the nut. It went in fine. Next is when we realized how important the NUT is!!!! The SS Nuts I bought though were of good quality were not perfect!!! This meant we couldnt just screw the nuts using hands!!! We had to literally use the spanner for the entire length. The bottom most shelf took almost 1 hr for us to complete with me and my wife taking turns for holding and rotating.


Finally, after 4 hrs of non-stop work, we did manage to put the TNT rack in place. Though exhausted, the joy of achieving something that too as a team was simply exhilarating. Not only was the rack functional but it was aesthetically so good that some of my friends have started asking me if I can make one for them. For less than 5000rs we made a TNT Flex stand that is beautiful, functional, and more than anything it created such a wonderful time for me and Vands it has given us enough confidence to try DIY route for all now! Here are the pics of our stands:


Budget:
S.No Item Comp Cost Quantity Total Cost
1 Threaded Iron rod (1 mt) - 16 mm Rs. 210 3 Rs. 630
2 SS Nuts (36 nos) Rs. 15 36 Rs. 540
3 SS Washer (36 Nos) Rs. 6 36 Rs. 198
4 Levelling Scale Rs. 80 1 Rs. 80
5 WD40 Rs. 80 1 Rs. 80
6 Cutting Cost Rs. 20 Rs. 20
7 Washer (40nos) Rs. 2 40 Rs. 80
8 Ring Spanner Rs. 110 1 Rs. 110
9 10 mm glass (2 ft X 1.5 ft) Rs. 100 18 sq ft Rs. 1,800
10 Cutting Cost Rs. 75 18 Rs. 1,350
11 Petrol Expense Rs. 55 1 Rs. 55
Total Rs. 4,943
Options:
1. If you opt for a SS rod instead of MS rod, you will spend around 1300 rs more per rod. The SS rod costs 1500 rs per meter so around Rs 4500 for 3 rods. It will cost around 3600 rs more than using MS Rods
2. If you opt for PLexi (Acrylic) 12 mm sheet, the sheet come as 6 X 4 which costs around 390 rs/ sq ft which around Rs 9360 + 12./5 tax = 10530 rs. Add it to it cutting charges of aroun 70 rs per sheet (for 3 hole ). It will cost around 9000rs more than using Glass
Tips:
1. I feel the bottom most rack should have been 12 mm instead of 10 mm to take the stress. Experts can correct me here, the rest can be 10 mm. Again it depends on your equipment weight.
2. The difference between building this rack in 1 hr and 10 hrs is how well the Nuts and Rods go well. If the Nuts and Rods fit well and you can screw the Nut through the Rod using your hand, you will be done in just 1 hr. My suggestion is, when you buy test every NUT and pick nuts that go through smoothly. This WILL SAVE HUGE AMOUNT of time
3. Ensure you check the glass after holes are made to ensure there are not cracks in the glass after making the hole. Also, ask the shop person to pack each glass separately and give.
4. When you have finished the bottom and have started building the next set of racks, ensure you place 2-3 thick towels on the glass rack. This will cushion and protect the glass if you drop a nut or spanner. I also kept a pillow just incase and trust me 4-5 times the spanner or nut fell down and bounced of the pillow.
5. Once you are done with a rack, use the levlling scale to check for levels in the middle as well in the sides
6. Ensure you give liberal coating of WD40 for the MS rods. Soak it for min 30 mins. This will lubricate and will also protect the rods from rusting.
7. Do not over tighten the nuts. This will cause stress on the glass and will break it.
8. Make the stands near by to the place where you would be keeping it. This will help you avoid lifting the stands once finished. Trust me these are freaking heavy.
9. Ring spanner helps a lot than a regular spanner, as you can freely rotate it!
Some more thoughts:
If you think the threaded rods look ugly, you can buy either SS tubes or Aluminum tubes, cut them according to each shelves height and place them covering the rod and nuts. This will give a nice look.
If you too worried about SS resonating, buy a PVC pipe, cut them, paint them in black or silver and cover them, them place the glass on top. Repeat this for each shelf
Hope this will inspire more to try this. My hearty thanks to Vands and Flanker without whom I would have never done this. Magma for being my inspiration and Venkat for helping me whenever I had some doubts.
Last but not the least BIG BIG thanks to Arnold who answered my queries patiently. His site:
The road to nirvana
TNT Site: The TNT FleXy Table
Finally, Before and After pics
:BEFORE:
NOW:

p.s: Sorry for the watermarks, just wanted to ensure no one picks the pics for free!
Last edited: