sarathssca
Member
Hello,
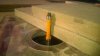
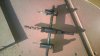
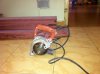
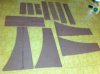
I have started the build of frugal horn mk3 for my ma alpair 7p (paper version). Brought 8*4 sheet of 18mm exterior grade MDF sheet. I have no prior experience with any wood work and this is first time doing such work. my doubts/questions may be very baisc. Got a circular saw for rent for a day and started the basic cuts following the plan from the frugal horn plan pdf page 17 Sheet C-2. But only managed to cut as shown in the attached photos.
Got some idea and info from the threads of Bibin, Balu, Manniraj, but cuts I made were no where as nice as in those theads. cuts were not very uniform and smooth (curve cuts and height/length of the long pieces). Could you please help in clarifying below :
1. now already the pieces are cut, how to make them uniform and smooth so that they couldd fit properly ? do i need to use a sand paper or any other tool ? ( in the photo its looking better than the actual pieces i cut)
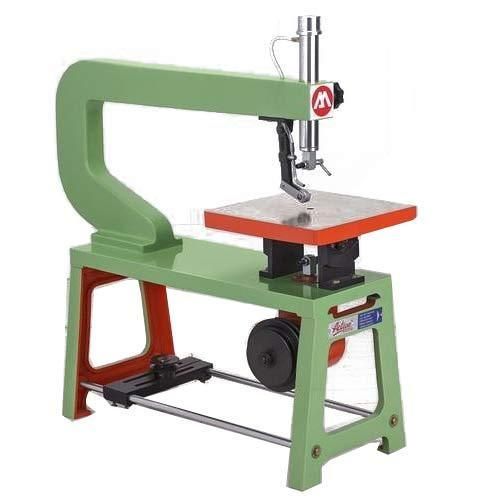
2. what tool to use to make the circular hole for the driver and binding post. Also for the flush mount do we need to cut the mdf or add a separate 3-4 mm additional sheet on the front.
3. how to fix the pieces? seems they are fixed by screws in other threads.. what is the size and type of the screws to use? what tool to use to fix them? do i need to drill the holes and then put the screws in them?
4. will the box be completely closed or the one side will be removable with screws? if its removable how will it be air tight?
thanks and regards
S Sarath
I have started the build of frugal horn mk3 for my ma alpair 7p (paper version). Brought 8*4 sheet of 18mm exterior grade MDF sheet. I have no prior experience with any wood work and this is first time doing such work. my doubts/questions may be very baisc. Got a circular saw for rent for a day and started the basic cuts following the plan from the frugal horn plan pdf page 17 Sheet C-2. But only managed to cut as shown in the attached photos.
Got some idea and info from the threads of Bibin, Balu, Manniraj, but cuts I made were no where as nice as in those theads. cuts were not very uniform and smooth (curve cuts and height/length of the long pieces). Could you please help in clarifying below :
1. now already the pieces are cut, how to make them uniform and smooth so that they couldd fit properly ? do i need to use a sand paper or any other tool ? ( in the photo its looking better than the actual pieces i cut)
2. what tool to use to make the circular hole for the driver and binding post. Also for the flush mount do we need to cut the mdf or add a separate 3-4 mm additional sheet on the front.
3. how to fix the pieces? seems they are fixed by screws in other threads.. what is the size and type of the screws to use? what tool to use to fix them? do i need to drill the holes and then put the screws in them?
4. will the box be completely closed or the one side will be removable with screws? if its removable how will it be air tight?
thanks and regards
S Sarath
")